Introduction
Internal prereq.
-
-
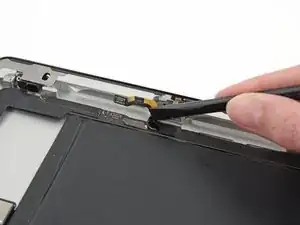
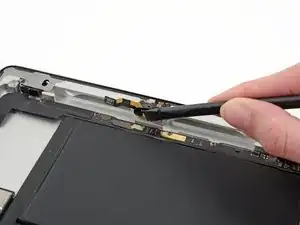
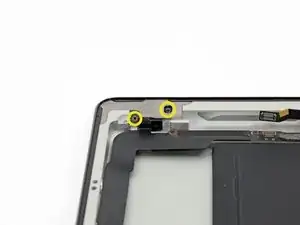
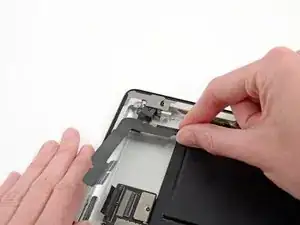
Carefully move, but do not remove the front-facing camera ribbon cable aside with the flat edge of a spudger.
-
-
-
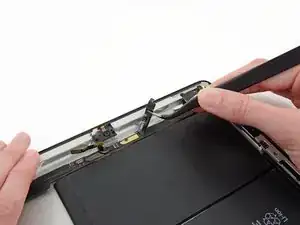
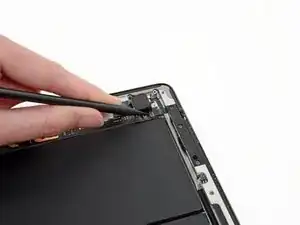
Using the tip of the spudger, flip up the retaining flap on the microphone cable ZIF connector.
-
-
-
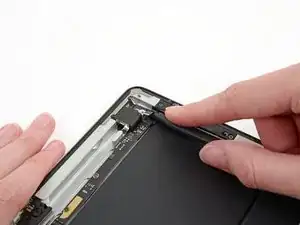
Insert the tip of the spudger underneath the microphone ribbon cable and carefully push it out from its socket on the ZIF connector.
-
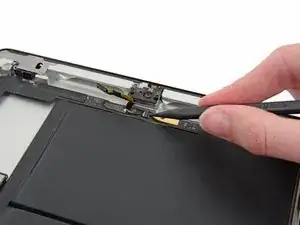
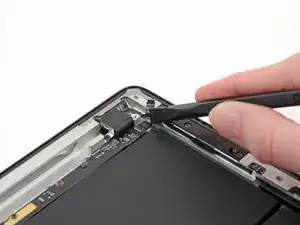
Use the flat edge of a spudger to move the microphone ribbon cable aside.
-
-
-
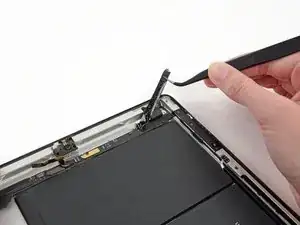
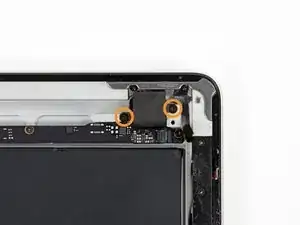
Flip up the retaining flap securing the volume/power button ribbon cable connector to the headphone jack assembly board.
-
-
-
Push the volume button ribbon cable from its ZIF connector.
-
Gently bend the volume button ribbon cable upwards to move it aside.
-
-
-
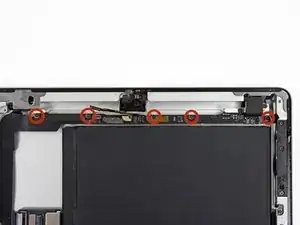
Remove the following screws from the headphone jack assembly:
-
Five 2.6 mm Phillips #0
-
Two 2.2 mm Wide Head Phillips #00
-
Two 2.6 mm Phillips #00
-
-
-
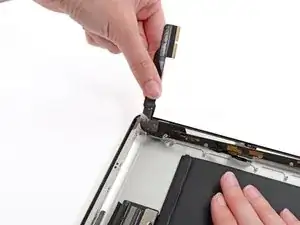
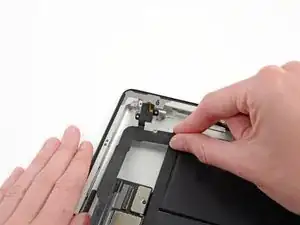
Holding onto the ribbon cable of the headphone jack assembly, carefully pull the assembly upwards towards the top of the device.
-
-
-
Grasping the headphone jack assembly with one hand, pull the assembly from the iPad, minding any cables that may get caught.
-

To reassemble your device, follow these instructions in reverse order.

OR, if you’re having a problem with the front camera OR the ambient light sensor (which is the small module above the camera lens), go ahead and remove the front camera and swap in a new one, complete with sensor module. It is theoretically possible to remove and swap just the ambient light sensor module, but this author found it too difficult to be worth it, if it’s possible at all.
[The ambient light sensor makes automatic adjustment of screen brightness possible, if you switch it on with the toggle under “screen and brightness” in settings. When working, the screen gets dimmer in dim settings and brighter in bright settings. It might sound unimportant, but if you’ve tried to take pictures in bright sunlight with a dim screen…you’ll appreciate it’s usefulness.]
Bonnie Baxter -