Introduction

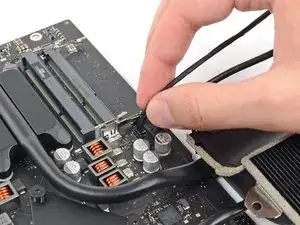
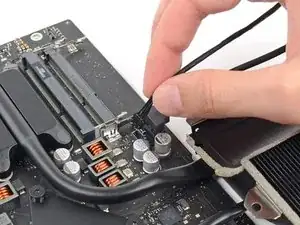
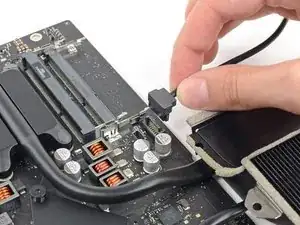
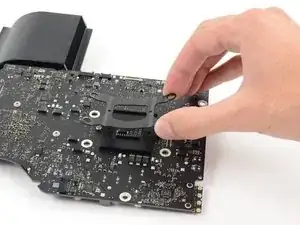
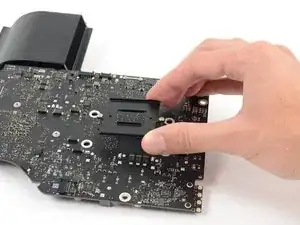
Prereq to remove the heat sink.

  1. cOcrX1b4L2pPITUw
    cOcrX1b4L2pPITUw
    XnjcFyxbSH5rxVTP
    SJINkCvkSRlQpjfE
    • Disconnect and remove the SATA data and power cables from the logic board.

  2. ivtpcLUtNcAHJntU
    • Remove the four 12 mm T10 shoulder screws from the spring plate behind the CPU.

  3. tm2Iv6pY4KPhQZnN
    • Remove the spring plate from behind the CPU heat sink.

  4. fGLuTmurVUTJWhOd
    • Lift and remove the backing plate from behind the CPU heat sink.

    • The backing plate has two posts that fit into alignment holes in the logic board and heat sink.

  5. 66NAkYSMcHJwna44
    66NAkYSMcHJwna44
    ifCkOsjsh4PvYQUQ
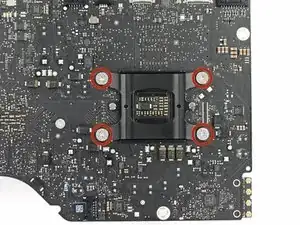
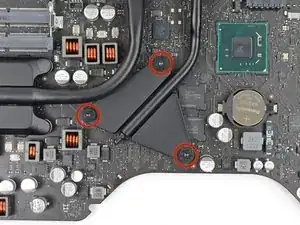
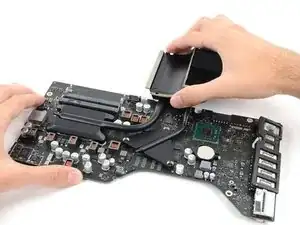
    • Remove the three 12 mm T8 Torx screws securing the GPU heat sink to the logic board.

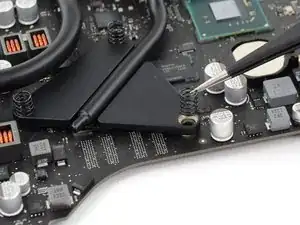
    • Remove the three springs left behind.

    • These springs might come up with the screws; be careful not to lose track of them.

  6. WGeMEogUysSIPPXQ
    WGeMEogUysSIPPXQ
    oXwsLDRwBJHDkME3
    • Lift and remove the heat sink up off the logic board.

    • The CPU will most likely detach with the heat sink, so be careful about where you lay it down.

Conclusion

To reassemble your device, follow these instructions in reverse order.

Sam Goldheart

Member since: 19/10/12

465329 Reputation

0 comments