Introduction

Use this guide to install a hard drive in your iMac Intel 20" EMC 2133 or 2210.

  1. LjDLTLrgcTN6NZH2
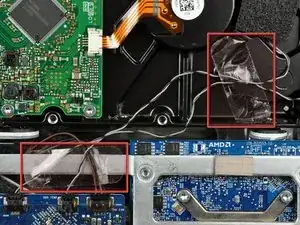
    • If necessary, remove the pieces of tape securing the hard drive/optical drive thermal sensor cables to your iMac.

    Pull the temperature sensor cable for the optical drive well out of the way so you don't trap it when inserting the new hard drive.

    kevinp -

  2. 5tyrG1RUmZlBOdry
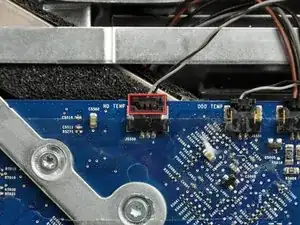
    • Disconnect the hard drive thermal sensor by pulling its connector toward the top of your iMac.

    • When removing this connector, it is helpful use your thumbnails to push the ears on either side of the connector toward the top of your iMac.

    I didn't do this on my 2133; just pushed wires out of the way.

    robgendreau -

    Rather than disconnect this cable, you might as well jump ahead to steps 19-21 and remove the sensor from the drive.

    kevinp -

  3. XARgcgviC4XvCMAa
    XARgcgviC4XvCMAa
    gbSjwbdKZQRXIZCI
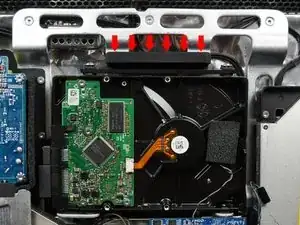
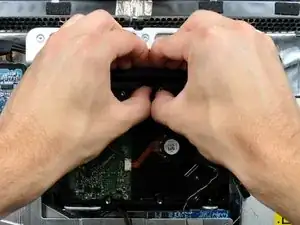
    • Pressing the top of the hard drive bracket down to release it from the rear case requires a substantial amount of force. We recommend laying your iMac stand-side down on a table to avoid knocking it over.

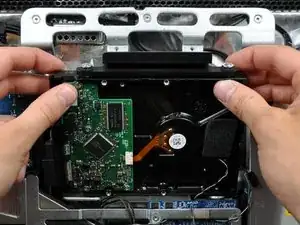
    • Press the hard drive bracket down toward the bottom edge of your iMac to free it from the rear case, then rotate the top of the drive toward yourself.

    At first it looked like it needed extra force, rather stand the computer in its stand press the bracket firmly it will come out.

    Great set of instructions altogether!

    Jim Laredo -

    I just braced the foot/stand against my thigh and found there wasn't much force needed. Had to do it twice as I missed the foam pad on the drive I was replacing.

    The whole process was simpler than I expected.

    I seem to have missed something somewhere as I now have a lot more fan activity than before. A missed sensor connection maybe. Not looking forward to tracking it down.

    paul beard -

    I worked with the top of the screen facing me. It was very easy to brace my fingers and press with my thumbs to release the drive. I recommend doing it that way if you can.

    marcintosh -

    I just used pliers….. Easy!

    Dennis Postma -

  4. VMitQPmVMd4qFbyA
    VMitQPmVMd4qFbyA
    42RQbCnZhAmVhvFi
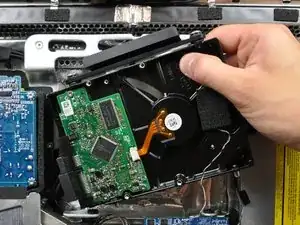
    • Rotate the hard drive toward yourself, then lift it up off its mounting pins.

    • The hard drive is still connected via the SATA cables.

    • When reinstalling your hard drive, be careful not to push the rubber grommets through the openings in the chassis with the lower hard drive pins as retrieving them may require logic board removal.

    During reassembly make sure not to trap the cable for the temperature sensor on the superdrive -- it goes on top of the new hard drive.

    kevinp -

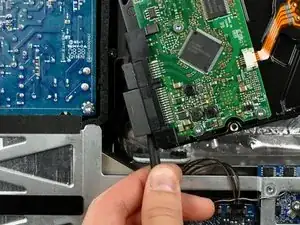
  5. J2JseEWMkmZ2IWZR
    • Insert the flat end of a spudger between the SATA power cable connector and the edge of the hard drive.

    • Twist the spudger to separate the connector from the hard drive.

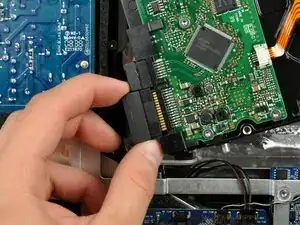
  6. cmr5VJFpvLHAoe2W
    • Pull the SATA power connector away from the hard drive.

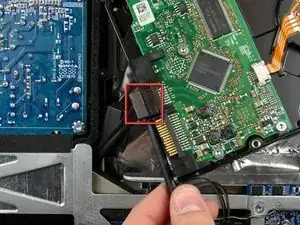
  7. HrqNAt5KIAqbaXQb
    • Disconnect the SATA data cable by pulling its connector away from the hard drive.

Conclusion

To reassemble your device, follow these instructions in reverse order.

Walter Galan

694047 Reputation

One comment

Walter, I was working on a mid-2007 IMac (2133) and found your instructions helpful but not always complete or right. I have added some comments in some of the steps to clarify.
Pablo Guerrero -