Introduction

The iMac G3 Uses a 3.5" IDE Hard Drive. It supports data partitions no larger then 128GB and boot partitions no larger then 8GB (The 8GB limit only applies to iMac G3 tray loaders).

  1. gGVjVbZFLV61fCAO
    • The iMac G3. This was a great computer for the time, and had plenty of features.

  2. DUFXQG1sqjDL1mWo
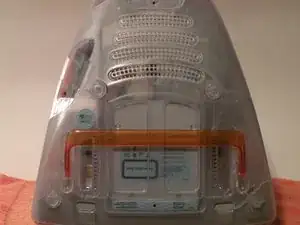
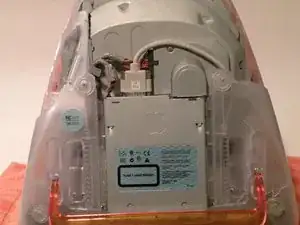
    • Start by flipping the iMac upside-down. It may help to lay it on a towel, so you don't damage the screen, or scratch the face.

  3. QVaxOhZWv5goXGwC
    QVaxOhZWv5goXGwC
    LfEwfwjNndwimJBG
    EmBNBpWyQ1x6GbTP
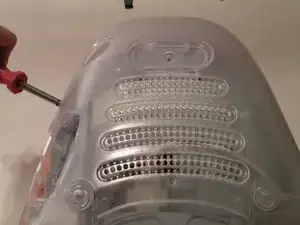
    • Remove this Phillips screw.

    • Using a flathead screwdriver, work your way around the bottom cover, until it comes off.

    • Then, lift the bottom cover up and out, and set it aside.

  4. 5i3eX6Lh2jWsxneJ
    5i3eX6Lh2jWsxneJ
    jcAfjZ5ssqMpyubi
    AnoPhThAGRGPV3SD
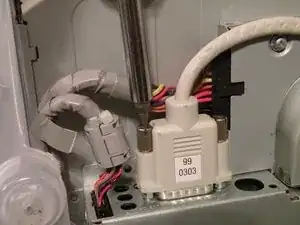
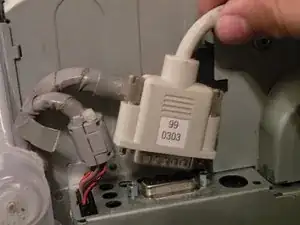
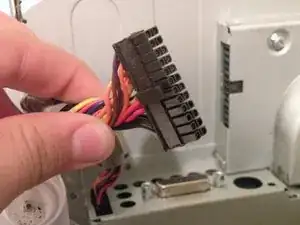
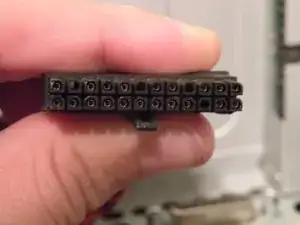
    • Now, remove the DB-15 Video connector from the logic board.

    • It may be helpful to use a Phillips screwdriver to remove the thumbscrews.

  5. bMq6q56SDvtD4aCc
    bMq6q56SDvtD4aCc
    KcjQhLK1A2yG3HjO
    wCF6aWJR3H521OdI
    • Remove the power cable from the logic board assembly.

  6. 3PrKVx1LscHck1Js
    3PrKVx1LscHck1Js
    bO21VFiAPCciFH5b
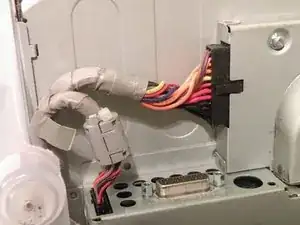
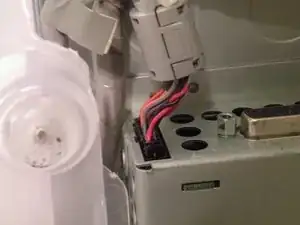
    • Remove the front panel connector. (You may also need to remove an additional screw that connects the front panel connector to the logic board assembly).

  7. pyVPpD1AlWbWDWgj
    pyVPpD1AlWbWDWgj
    NmIRkBxPcZflcX1y
    MIDMd6SEwScUfiRf
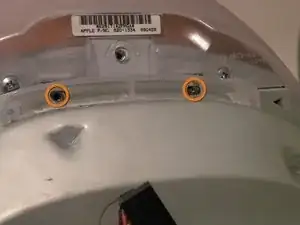
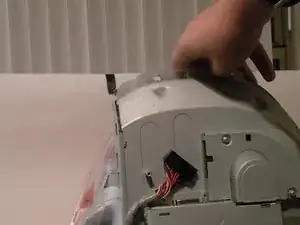
    • Now, remove these Phillips screws.

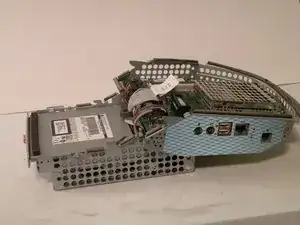
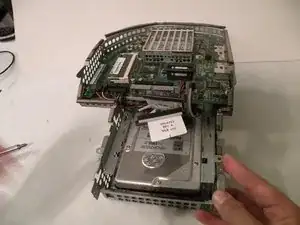
    • Now, grab the logic board assembly by the piece of plastic, and lift it out.

  8. jaqBFKiv51dRVdiU
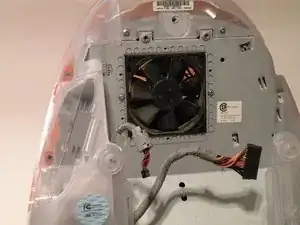
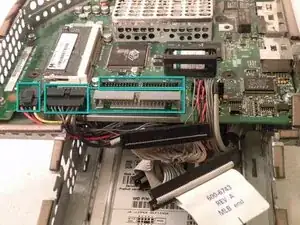
    • The logic board assembly. This is the heart of the computer, it contains the motherboard, CPU, RAM, V-RAM, PRAM battery, the hard drive, and the optical drive.

  9. cpKELJyh6SFDSbNA
    • Now to remove the optical drive!

  10. gubmBdp1PvJHvkfF
    • The optical drive is located near the front of the assembly.

    Devo sostituire il lettore che modelli potrei cercare in alternativa

    iaco715i -

  11. mBHkyMGCoSUrmQvJ
    mBHkyMGCoSUrmQvJ
    6tiRqYK4HPmBjqm2
    2n6dePOjWeLix5DM
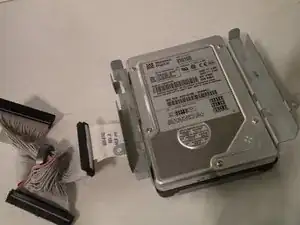
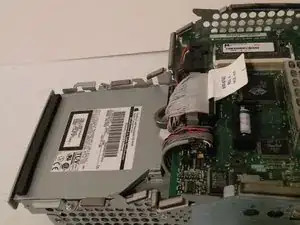
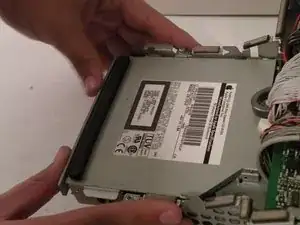
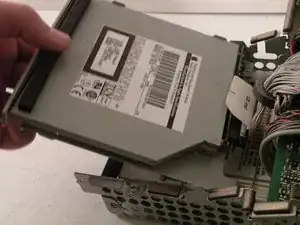
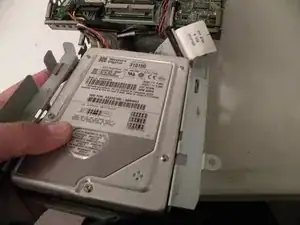
    • To remove the drive, push it in, lift up, and then pull forward.

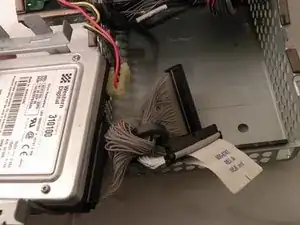
    • As you pull the drive forward, disconnect the ribbon cable and set it aside.

  12. E2OUMbWDIi1VUW5A
    E2OUMbWDIi1VUW5A
    EugM54MIWEdCNBXp
    VIAPpDvSXoZNSgFf
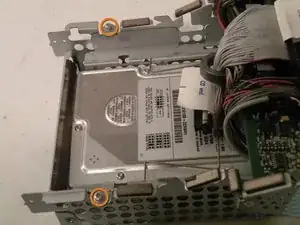
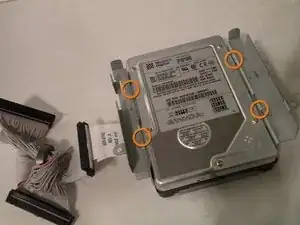
    • Remove the two phillips #00 screws.

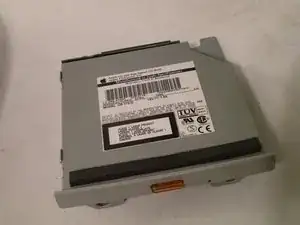
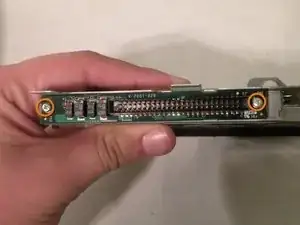
    • Then remove the board. This will reveal that it is a standard PATA drive.

    • Congrats, the drive is free! You can use any PATA-tray loading drive in the iMac G3 which means you can install a CDRW to burn CDs in OS9 or X(if using OSX,install that DVD writer) but, of course only original drives will match the great look of the iMac).

  13. 5NaYw3qdWtpMCrVv
    • Hard Drive Removal:

  14. cbZuWc1WHjnMIbCx
    cbZuWc1WHjnMIbCx
    SJhuBTpKZe1Ba5xS
    • Start by removing these Phillips screws:

    • Now, remove all of these cables:

    At this step, the right screw refused to budge. I managed to strip the you-know-what out of it trying to extract it. Every tool I tried, it only got worse. I put it aside for the night and resigned myself to buying some stubborn/rusted-screw-extracting tool the next day. One of the lessons here is rest and walk away if you get frustrated because after a moment of clarity I had a crazy idea. What if I left the screw there and tried to remove the 4 HDD screws THROUGH the holes in the drive cage?! IT WORKED!

    I carefully got to all the screws, simply lifted the HDD out of the still-attached bracket, unplugged the connectors and replaced it with a spanking new 120 GB IDE drive by sticking the screwdriver head into the small holes a la the kid’s game Operation! There is NO WAY I could have done this if 1) I didn’t have a magnetic-head screwdriver (thanks iFixit!) and 2) if there wasn’t an opening at the head of the drive cage on both sides for when the screws fell loose.

    Hope this helps someone. Aloha!

    Joshua Easter -

  15. aB3oCstq3rneUQ1E
    aB3oCstq3rneUQ1E
    26cXh3eiA1s1tFkv
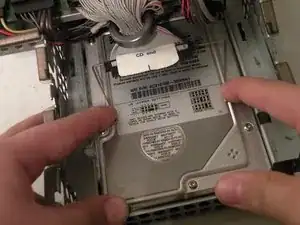
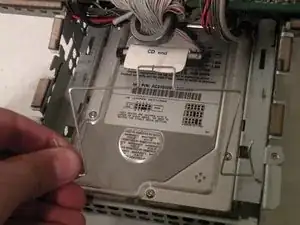
    • Now, remove the optical drive retention spring.

    • Push in on both sides, and pull towards you releasing the retention spring.

    • It may help to do it one side at a time.

    Note the orientation of the retention spring. The end towards the back should be pointing upwards.

    Axel Wikström -

  16. fJLRRWTsBhLoLiIN
    fJLRRWTsBhLoLiIN
    fx1cPONDu1XmkxeB
    ItOLTSboMobWOKNN
    • Now lift the drive up, and pull it out.

    • Make sure that no cables are snagged before completed pulling out the drive!

    If you have trouble getting the drive out, note that there are two small hooks on the underside of the drive cage keeping it in place. Get the hooks out of the holes and the drive will be freed. It can be a bit fiddly.

    Axel Wikström -

  17. juTZIFg5LVolsmXP
    • When installing a new drive, make sure that the drive jumper block is set to "Single drive". In most drives, this means removing the jumper, or positioning the jumper horizontally instead of vertically, so you don't lose it.

    • To remove the drive from the metal caddy, remove these four screws from the side of the drive.

Conclusion

To reassemble your device, follow these instructions in reverse order.

Chris Green

Member since: 11/10/09

36876 Reputation

8 comments

great description, great photos

antiquarian1 -

Many thanks. Worked perfectly.

Bob Schowalter -

is the hard disk on a mac interchangeable to iMac 4984 from iMac M5521? Power supply failed on M5521. thx

alexa pritchard -

Çok güzel. Makul bir para ödemesi yapabilirim.

Erdog ̆an Tas ̧cı -

Thank you so much! My grandmother finally decided to throw hers away but she wanted the hard drive and I got it for her with your help!!!

Heather Hall -

Oh thats so sad. She threw away a piece of apple history :(

Crosby Grim -

Any idea if I would be able to put a modern 1tb HDD into my iMac G3?

Crosby Grim -

Unfortunately not. The largest drive these machines support is 128GB total but you must partition the drive so that the OS / boot partition is 8GB or smaller. If you want the machine to be faster and more reliable, you can install a 120-128GB solid state drive with an IDE-to-SATA adapter.

Chris Green -