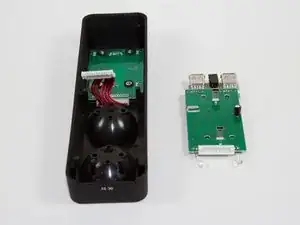
Introduction

This is where all of the power comes into the device. Learn how to replace it. Be careful while soldering!

  1. fWXOkYmkGGgbe6jE
    fWXOkYmkGGgbe6jE
    5YYOfLwMIIuK3EtV
    • Remove the rubber foot pads on the bottom of the device using a plastic opening tool.

  2. xYZwFrCVpBBmHfS6
    xYZwFrCVpBBmHfS6
    jdMYOrHSGHjvXGyG
    • Remove the six 2 mm PH0 screws on the bottom of the device.

    • Four of those screws are located under the foot pads.

  3. CW5EChNAKIKbwTxh
    • Gently remove the bottom of the device.

  4. S3okWpXCPoVDXtOr
    S3okWpXCPoVDXtOr
    6fQYQwJyMWyJGIbn
    • Remove the four 1.8 mm J1 screws.

    • Remove the two 2mm PH0 screws.

  5. 6VXuMDTcSWennQvk
    • Gently pick up the mother board

    • Pick the mother board straight up or you may risk damaging the mini-USB charging ports.

  6. HTFG12rGmqtPXACJ
    HTFG12rGmqtPXACJ
    ZrDKWbfvJAEKSkUT
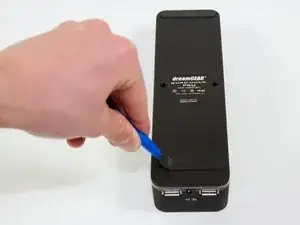
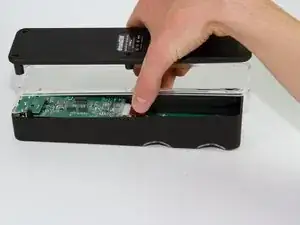
    • Use a plastic opening tool or similar tool to gently pry the power ribbon cord out of its port.

  7. pE2CuRw5GY3Ru3BB
    pE2CuRw5GY3Ru3BB
    eSwDnAlGeZofElTv
    HOQqqFpPpwGR23lY
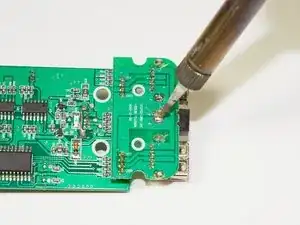
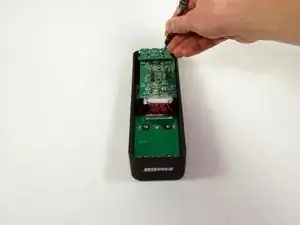
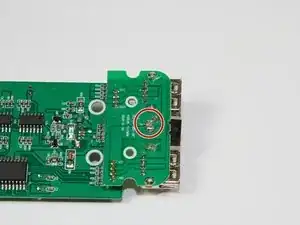
    • Locate the three solder connections for the electrical port.

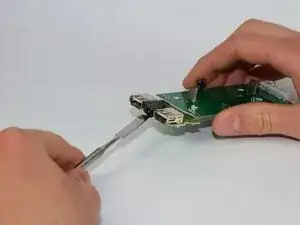
    • Desolder the connection points following the instructions included with your soldering kit as you remove the port.

    • FIRE HAZARD! BURN DANGER! Follow all the safety precautions included with your soldering kit.

    • It is helpful to use a nylon or metal spudger or tweezers for the removal of this component, pieces of which are very hot.

    • You can follow iFixit's guide to soldering here.

Conclusion

To reassemble your device, follow these instructions in reverse order.

Jacob

Member since: 11/03/15

757 Reputation

0 comments