Introduction

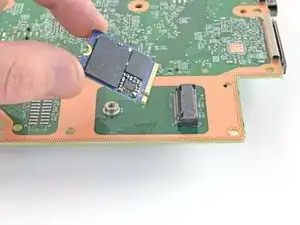
Follow this guide to remove and replace the SSD card on a Xbox Series S.

There are some photo discontinuities with the exterior Bluetooth, Wifi, and power boards. These discontinuities do not affect the repair procedure.

  1. ksCkcPpj1f2rbPSZ
    ksCkcPpj1f2rbPSZ
    MgCgSIErTTMZv5jk
    NdWUAfnNgVUUa1AP
    • Before you start this guide, turn off the Xbox and unplug any cables from it.

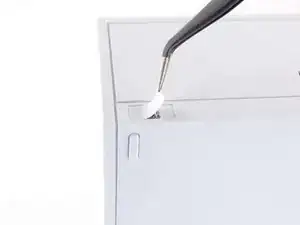
    • Use tweezers to peel off the two white screw covers located on the bottom corners of the back panel.

    Where can I get a shell replacement?

    King DK -

  2. Y5tXDBFpuucoHo2y
    • Use a T8 Torx driver to remove the two 10 mm-long screws securing the back panel to the bottom panel.

    • Throughout this repair, keep track of each screw and make sure it goes back exactly where it came from.

  3. mHROMZpcqKDeQXyf
    mHROMZpcqKDeQXyf
    GpmhWc3GtpTrGES3
    OTdQPA45aCH6byxX
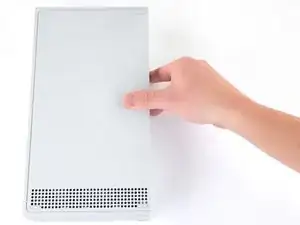
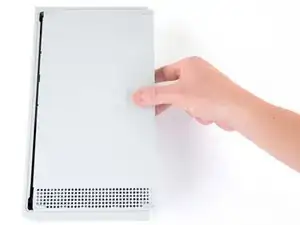
    • Slide the bottom panel horizontally toward the back of the console until it comes to a stop.

    • This slides the clips out of the slots on the plastic case.

    • Lift straight up and remove the bottom panel from the plastic case.

  4. B1OvlYqHkmYPl2rp
    • Use a T10 Torx driver to remove the seven 51 mm-long screws securing the chassis to the plastic case.

  5. wyLautfBRPLPIG3t
    wyLautfBRPLPIG3t
    n3WKRnayG2HH5kTp
    GRSmSAuvLi1fnliK
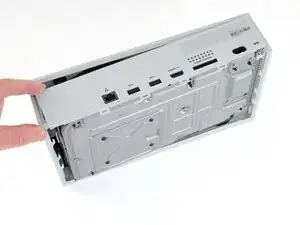
    • With the bottom of the Xbox facing you, pull the two bottom-rear corners of the plastic case away from each other.

    • As you pull the corners apart, slide the back panel towards the bottom of the device. This releases the back panel from the plastic case.

    • The back panel should now settle on top of the clips on the back of the plastic case.

    • The back panel is permanently attached to the aluminum chassis.

    • Do not attempt to fully remove the chassis from the plastic case with this technique. You may risk breaking your case.

  6. jPYaPOUIRBZQK32V
    jPYaPOUIRBZQK32V
    vu61erVTSNk4QNpX
    jgxbcKbDKA4JvY3o
    • Pull the bottom-left corner away from the chassis while swinging the chassis away from the plastic case.

    • You may need to lift the chassis to free it from the clips on the bottom-front of the plastic case during this process.

    • Remove the plastic case from the chassis.

  7. 2bCRN3HVAhNxdNYs
    • Use a T8 Torx driver to remove the 9.5 mm-long screw securing the power button board to the chassis.

  8. NbAvjG4qsRUuxvTP
    NbAvjG4qsRUuxvTP
    WWpdvikbhMmpNeIF
    inhKjcIUCexlMBC2
    • Use a spudger to pry and loosen the power button board.

    • Do not pry from the bottom of the power button board as it may bend the connector.

    • Pull the power button board straight out to disconnect it from the chassis.

  9. 65EyRHmggQLF15FE
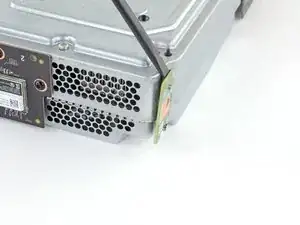
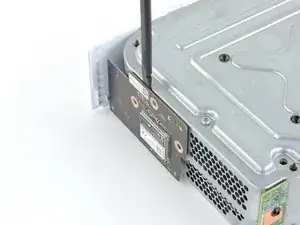
    • Use a T8 Torx driver to remove the three 9.5 mm-long screws securing the Wi-Fi board to the short edge of the chassis.

  10. ix6gZKaS3d2QJwPr
    ix6gZKaS3d2QJwPr
    BlVpMP2rj1NWyNMi
    xBgWMyTOTibYcKFw
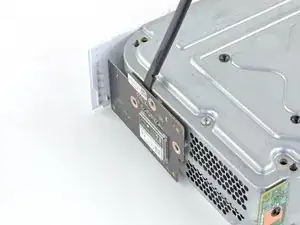
    • Use a spudger to pry and loosen the Wi-Fi board.

    • Do not pry from the bottom or sides of the Wi-Fi board as it may bend the connector.

    • Pull the Wi-Fi board straight out to disconnect it from the chassis.

  11. rEUZOvhd2gSBQYAV
    • Use a T8 Torx driver to remove the three 9.5 mm-long screws securing the Bluetooth board to the long edge of the chassis.

  12. eOD3FJCVSAZy1Nvx
    eOD3FJCVSAZy1Nvx
    SrOFWZQLcgjn41GT
    fEchsWgPZqCruvT4
    • Use a spudger to pry and loosen the Bluetooth board.

    • Do not pry from the bottom or sides of the Bluetooth board as it may bend the connector.

    • Pull the Bluetooth board straight out to disconnect it from the chassis.

  13. tR2xOFmdD6OrQSMj
    • Use a T10 Torx driver to remove the seven 11.3 mm-long screws securing the power supply to the chassis.

  14. EN5y2pLLbQftv1tS
    EN5y2pLLbQftv1tS
    LxBIhEaF3LNoJnkU
    • Flip the device over.

    • Lift the upper chassis straight up to remove it.

  15. KypeGVlKMy1uNYAZ
    KypeGVlKMy1uNYAZ
    SgLyYgUohWOPAKME
    e2W4JCiXcRCTnuQv
    • Lift the power supply straight up to disconnect it from the motherboard.

    • Remove the power supply.

    Can you please tell whether it is indispensable to use the power supply with exactly the same Revision, S/N and P/N or is the same model number, like 1920, 1921 enough to make it work? Thanks for showing the teardown.

    Ali Taimoor -

  16. PDYoG1QZhuKMDCRk
    • Use a T10 Torx driver to remove the two 11.3 mm-long screws securing the fan to the chassis.

  17. khPF2XCVjOJGYL5K
    khPF2XCVjOJGYL5K
    NaLb1oT6GiIBQodG
    • Flip the device over.

    • Take care when flipping the chassis over because the fan is now loose.

    • Use your fingers to pull and disconnect the fan connector from its motherboard socket.

    • Take care not to pull on the wires when disconnecting the fan to prevent breaking the connector.

    • This connector may be difficult to remove. A good method to remove it is to shimmy the connector up and out of its socket with a spudger.

    • You may be able to remove this connector without removing the power supply with a pair of needle-nose pliers.

    If you are careful you can also remove the connector by lightly prying from the sides of the connector in equal proportions (left then right then left etc.) using a 2.5 flathead.

    Zachary Stensrud -

    my fan was solder to my board but it broke off i have no idea ho to put it back my power button is missing the power button on the board i need help

    Edwinn du Plessis -

  18. qW6W3IbcCdAYDJTy
    qW6W3IbcCdAYDJTy
    xe3lgbFUOLx1O1pu
    • Lift the fan straight up to remove it from the motherboard.

  19. rXqXldhFrTixFIo1
    • Use a T8 Torx driver to remove the four 9.4 mm-long screws securing the motherboard to the chassis.

  20. hiNH5awnZHbMdfUk
    hiNH5awnZHbMdfUk
    QQlEZtWSIOYIJGi1
    HfUeWYBM1nZicavZ
    • Flip the device over.

    • Insert a spudger into the locking clip located on the front-left corner of the chassis.

    • This will open up the clip to make it easier to remove.

    • Lift straight up to remove the clip.

  21. tQVm5igDd1xsurHx
    tQVm5igDd1xsurHx
    msT5w3D2rMVQb4Wi
    XfMPgFOvgdEnoNOy
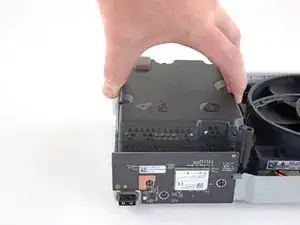
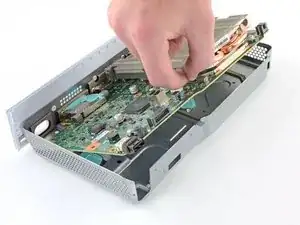
    • Grasp the heat sink with your fingers and lift up the front of the motherboard up above the edge of the chassis.

    • Pull the motherboard towards the front of the chassis to remove it.

  22. pxvKmloNYOLkTiMR
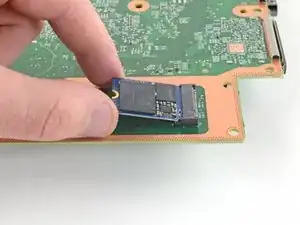
    • Use a T8 Torx driver to remove the 5.1 mm-long screw securing the SSD card to the motherboard.

  23. bbaV5DKR22ZtCJYg
    bbaV5DKR22ZtCJYg
    IEjkRDXQiqsUJHQA
    BQp6FcRn43tQEis3
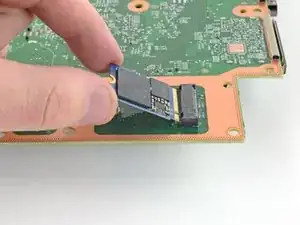
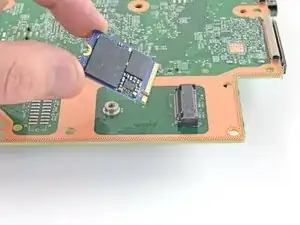
    • Pull the SSD card straight out and remove it from the motherboard.

Conclusion

To reassemble your device, follow these instructions in reverse order.

Take your e-waste to an R2 or e-Stewards certified recycler.

Repair didn’t go as planned? Try some basic troubleshooting, or ask our Answers community for help.

Robert Boyd

Member since: 01/02/21

26261 Reputation

9 comments

hello,i wanna ask on the new ssd how we install the firmware?

kostas660x@hotmail.com -

Well it certainly looks like a 2230 M-Key M.2 NVMe SSD. Will it work in a PC? Will non-OEM SSDs work in the Xbox? $100 for 512GB is highway robbery.

James Spinella -

That's why I'm trying to retrofit my 1tb from old xbox one s into my Series S

Southern Viking007 -

Can I take my 1tb hard drive from one s all digital and use it for my Series S?

Southern Viking007 -

The ssd must have the format 2230 M.2 NVMe for it to be valid.
JUAN LUIS GARCIA BRAVO -

where i find the remplace to the ssd card?

Ben -

Hi, I have an XBsS that is not working because the ssd drive caught power surge and I'm unable to clone it, is there any way to install a new drive? Thanks in advance.

osastudios2 -

I know this thread is old, but is there a way I can get the clone files without having an original SSD? Mine's completely fried so I can't get anything off of it

Julian B -