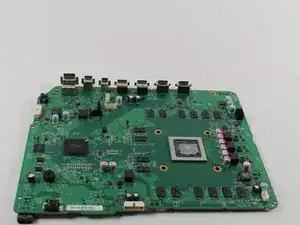
Introduction
This guide is important because it is necessary to access certain components on the board that may need replacing.
Tools
Parts
-
-
Begin by working at the case on the rear where the warranty sticker is located. Insert the plastic opening tool into the gap between the bottom of the case and the grated top side. Then find the clips in between that hold the case in place. Use the opening tool to pop the clips out. The best method is to pry the black case away from the bottom.
-
Use the opening tool to pop the clips out. The best method is to pry the black case away from the bottom.
-
-
-
Use a T10 Torx screwdriver to remove the six green 50 mm long screws from the metal case labeled F1 through F6.
-
-
-
Gently separate the interior case from the white exterior case using the appropriate method.
-
Pry the white plastic sides outwards at the rear to separate from the plastic I/O shield
-
-
-
To replace the hard drive, flip over the console and remove the two 10 mm T-10 Torx screws, C3 and C5, from the backside of the Xbox One S.
-
-
-
Pull the disc drive slightly off the motherboard and disconnect the plastic connectors from the motherboard.
-
-
-
To replace the motherboard you must remove the three silver 10 mm T-10 Torx screws labelled "C1," "C2," and "C6."
-
Remove the four black 8 mm T-8 Torx screws lablelled "A1," "A2," "A3," and "A4."
-
-
-
Locate the rectangular silver clamp on the opposite corner of the power block.
-
Remove the black bracket near the fan.
-
-
-
Grab the clamp with the tweezers. Pull the clamp upward, away from the silver casing. Jiggle it back and forth like a tooth if necessary.
-
-
-
Remove the three black 8 mm T-9 Torx screws labeled "D1," "D2," and "D3" to remove the Mediatek board.
-
-
-
Now that the clamp is removed, gently lift the motherboard from its edges out from the metal casing. The motherboard should come out with ease.
-
To reassemble your device, follow these instructions in reverse order.
10 comments
This guide is really missing alot between steps 13 and 14. There are two black panels that have to be removed(they’re in the teardown guide). One is on the front with with screws E1 ,E2, E3, E4. And theres another panel on the side with screws D1, D2, D3. Finally there are two more screws on the bottom that hold down the motherboard B1, and B2. Theres Also a black from in between the Fan and case that slides off too.
Yep, I was using this guide and realized that it is missing a few vital steps. Thank you Nathan.
If you have a multimeter could you please test the test points around the board and give me a list of a voltages?
fantastic! only issues that are missing, are mentioned in the comments above. I´d like to include that most of the exterior hardcase clips are made to be HELD in place. Which is why it´s a nuisanse to remove. So, newcomers be careful with it. otherwise you´ll easily break it.


