Introduction

Make your Xbox 360 S look shiny and new by replacing the outer panels.

  1. cXP361EtBaAjGJZB
    cXP361EtBaAjGJZB
    ksjfRhRUilKgu1kc
    sXUNWd5icHUfKXks
    • Orient the Xbox 360 S so that the bottom of the console is facing toward you.

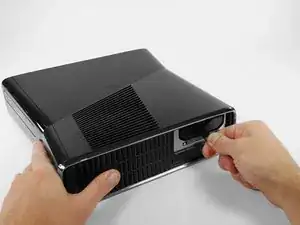
    • Push the latch holding down the hard drive cover to the left.

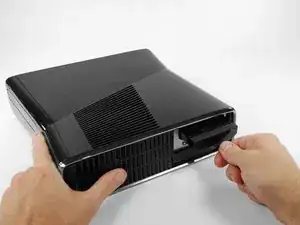
    • Pull the hard drive cover away from the console.

  2. dRnspOOs2hdPYjJL
    dRnspOOs2hdPYjJL
    yixceNkF4cdwcFYI
    veFpNDlsHOIvkOZM
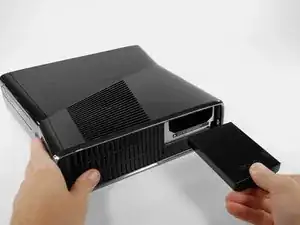
    • Firmly grasp the fabric tab labeled with the size of the hard drive (e.g. "250 GB") attached to the hard drive.

    • Pull the hard drive straight out of the console.

    • The fabric tab is attached to a catch further inside the hard drive housing. It will take some force to pull the hard drive out.

    If i buy a new xbox 360 and replace the hardrive inside with my own, will i have my account and saves? or will i have to recover my account and start over?

    yamboboy -

    You will still have your saves and account if you replace your hard drive in the new xbox

    Robert Miller -

    hola tengo un disco de laptop y quiero ponerle 100 juegos como puedo hacer la xbox me reconose el disco y todo lo configuro pero cuando conecto a mi pc para pasar los juejosel emulador no me deja

    Cesar Tourreilles -

    My fabric was accidentally ripped off years ago. What do I do?

    org 2026 -

    Stick another bit on there

    Josh Cool -

  3. JdeURU5d2WNK2NIW
    • In the following steps, you will remove the bottom vent.

    • It is attached to the bottom panel by the seven clips shown.

  4. DkxXqSfqI1ERCOZc
    DkxXqSfqI1ERCOZc
    gD5ReDMv1MWgACNr
    • Orient the Xbox 360 S so that the hard drive port is facing up and the faceplate is facing to the left.

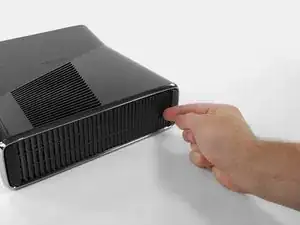
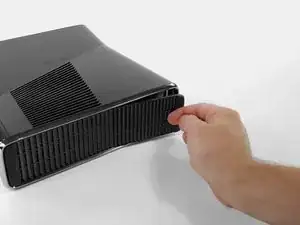
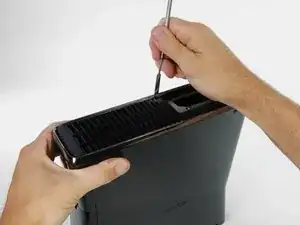
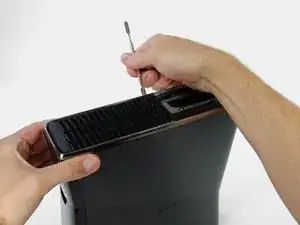
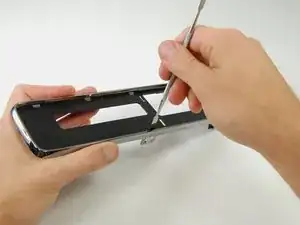
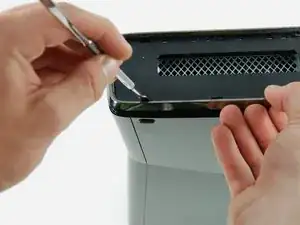
    • Insert a metal spudger between the black bottom vent and the silver rim of the bottom bezel, in the rear right corner of the vent.

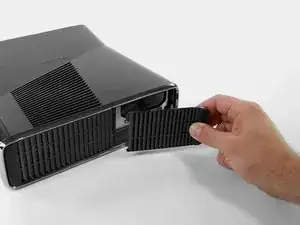
    • Rotate the spudger away from the console, prying the vent up from the bottom bezel.

    • Be sure to rotate the spudger far enough so that the clips on the vent are lifted past the silver rim of the bottom bezel.

  5. YiNRR43xJaGjaMKC
    YiNRR43xJaGjaMKC
    uBPCHkeRyTOBVjp3
    6byKJwvsYIPolHlX
    • In the same manner as described above, pry the two remaining clips on the bottom right edge.

    • All of the clips along both the right and front edge should now be free. If other clips have come undone as well, that is fine.

  6. IahXZbmBH1IeCXJE
    IahXZbmBH1IeCXJE
    lvmhHM1AxcLEEuQW
    • Remove the bottom vent by lifting it away from the bottom bezel.

  7. KCDQaD6xFdnDjSou
    KCDQaD6xFdnDjSou
    MxgTGMMNrYJYxoCU
    • In the following steps, you will remove the bottom bezel, which is attached to the rest of the console by the six clips shown.

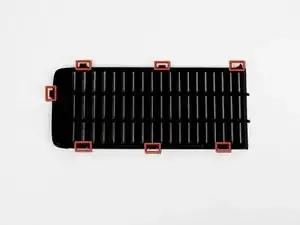
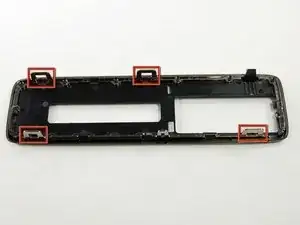
    • The clips shown in red can be detached by inserting a metal spudger underneath the bottom edge of the clip. Once underneath the bottom edge, simply prying away from the console will free the clip.

  8. Z1y23DAjLEl4UKDo
    Z1y23DAjLEl4UKDo
    bAYCknYslmUGlfRo
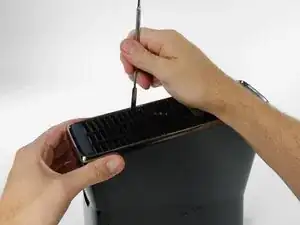
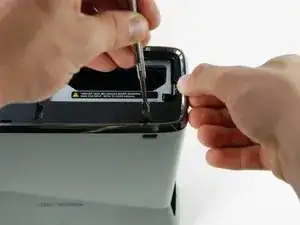
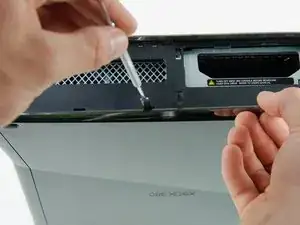
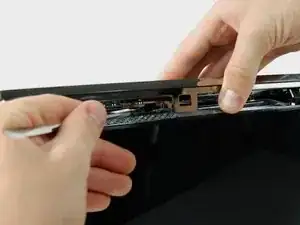
    • Insert a metal spudger through the slit near the rear left corner of the bottom bezel.

    • Rotate the spudger away from the device while lifting the rear bezel up with the other hand.

    • You may hear a "pop" signifying the clip has cleared its catch.

    These are pretty awkward to remove, but once you understand how they work its easy enough. The goal here is to slot the spudger THROUGH the gap of the silver tabs (visible in previous steps image, circled) and then pry. Put pressure against the wall of the Xbox case and push downwards, once you feel the spudger slot in, then apply force away from the Xbox and pull up a little with your free hand.

    Spaced Invader -

  9. oCYbsitAfTRRourw
    oCYbsitAfTRRourw
    YpSSYNkOyMbjtXB5
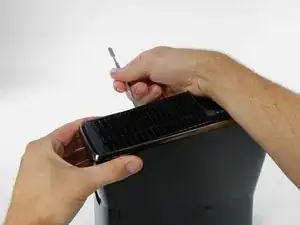
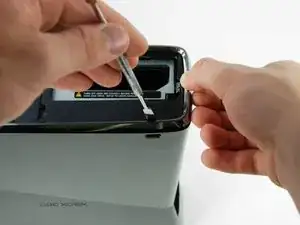
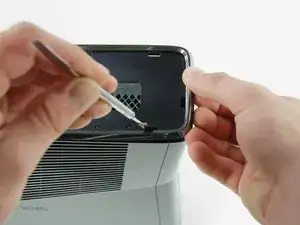
    • Insert a metal spudger through the left middle slit of the bottom bezel, and between the bottom edge of the clip and the left case.

    • Simultaneously pull the bottom bezel up and rotate the spudger away from the console to free the clip.

    • In a similar fashion, free the clip at the front of the bottom bezel's left edge.

    • The entire left side of the bottom bezel should now be free.

  10. aQyChrSntWEdEbwS
    aQyChrSntWEdEbwS
    lkvca1xDnnKV1rP2
    • Turn the console around so that the faceplate is facing to the right and the right case is facing toward you.

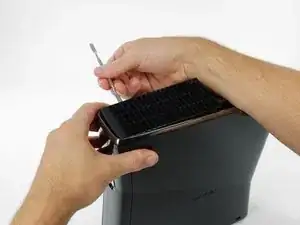
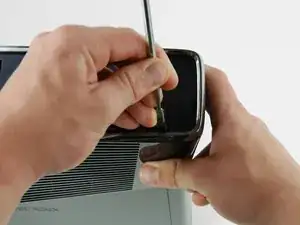
    • Insert the spudger into the rear-most slit on the right edge of the bottom bezel, and wedge it behind the clip by pushing the spudger down while pushing the tip of the spudger against the right case.

    • Simultaneously release the clip and pull the bottom bezel up.

    • This clip is especially hard to remove. Some force will be required to insert the spudger correctly.

  11. RfPl2wCnjJEJNYGq
    • This clip does not have a slit in the bezel to guide you. You can locate the clip by looking under the bezel near the hard drive slot.

    • Insert a spudger between the silver rim and bottom bezel directly above the clip shown.

    • Release the clip while pulling up on the bottom bezel.

  12. A4SnSxnfFIWSaSKW
    A4SnSxnfFIWSaSKW
    uVViKRQGsuU2EkQk
    • This clip is smaller than the others and should not be removed from above like the others.

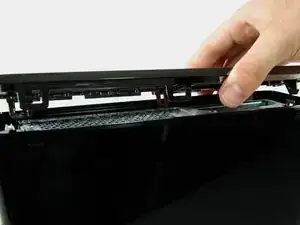
    • Lift the left edge of the bottom bezel up enough to gain clearance.

    • Insert a metal spudger behind the left edge of the last clip, and push the clip away from the right case.

Conclusion

To reassemble your device, follow these instructions in reverse order.

Matthew Newsom

Member since: 06/01/10

39452 Reputation

0 comments