Introduction

Use this guide to remove or replace the throttle assembly on a Wacker BS50-4AS REV 101 (2019) Vibrator/Rammer.

  1. MLifHqlYxerSwXNl
    MLifHqlYxerSwXNl
    ipgNkCbKH1uGuLIO
    • Ensure the device is powered down and cool to the touch before starting your repair.

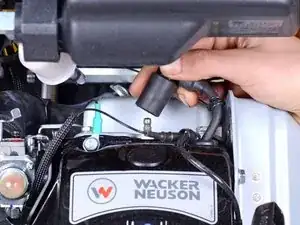
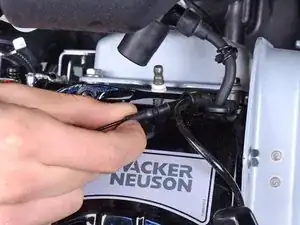
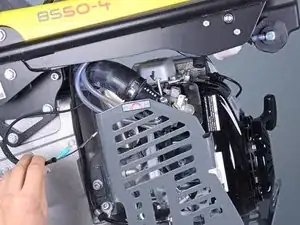
    • Firmly grip the base of the spark plug wire's connector and pull it away from the spark plug to disconnect it.

  2. N4wsqqkO4mFVfour
    N4wsqqkO4mFVfour
    BNIHCMlXTd16Xfxo
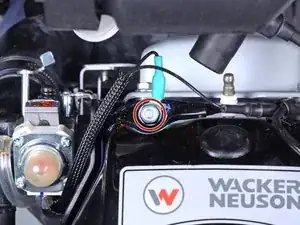
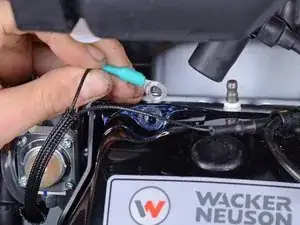
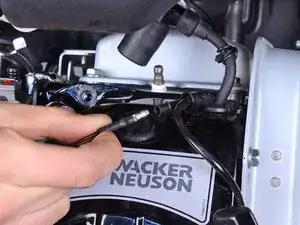
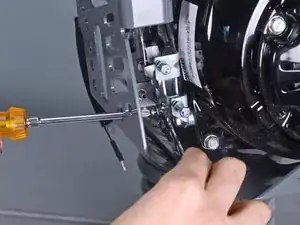
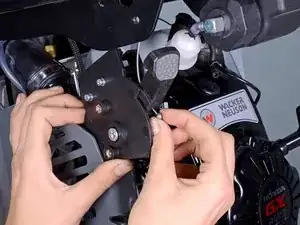
    • Use a 10 mm socket to remove the bolt securing the throttle assembly's ground wire.

    • Remove the ground wire.

  3. 6HxRJrRNTMUqqCJC
    6HxRJrRNTMUqqCJC
    tMhonmhSbZi1oD1C
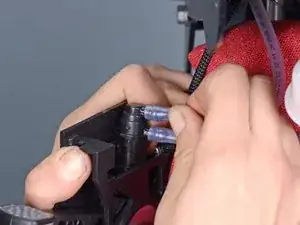
    • Grip the throttle cable's black wire bullet connecter and pull to disconnect it from the engine.

  4. L2BJLmnCfIPpj2Nn
    L2BJLmnCfIPpj2Nn
    DvrkVQnNWdUnTodB
    OlCb1Yfuf3cemTvA
    • Grab both ends of the throttle wires and feed them out, past the metal engine guard.

  5. xCyQxD6uWCgOGDRH
    • Use a pair of flush cutters to cut the cable tie securing the throttle wires together.

    • During reassembly, replace this cable tie.

  6. isKeQDHHG5sVaxNt
    isKeQDHHG5sVaxNt
    2GI1TBxKgAqU36ON
    • Move the throttle lever all the way into the SLOW position, towards the front of the device, to loosen tension on the throttle cable.

  7. yBBXqajCnAMO2PSL
    yBBXqajCnAMO2PSL
    MBAwIw5ayLQfDdLA
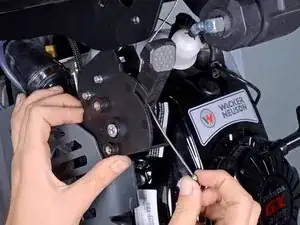
    • Use a Phillips driver to remove the screw securing the throttle cable to the actuator arm on the motor.

    • You may need to use a 10 mm wrench to hold the nut in place as you remove the screw.

  8. F22HxPg2akCxqTHl
    • Use an 8 mm socket to remove the two bolts securing the throttle assembly to the frame.

  9. 2IVEPwhcFTDGaS2s
    2IVEPwhcFTDGaS2s
    yGkTd3OWTjARCHKr
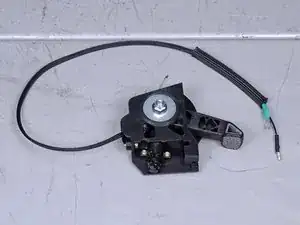
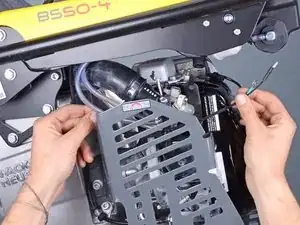
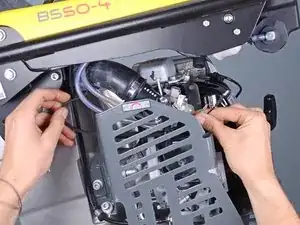
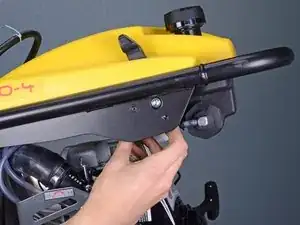
    • Grip the throttle assembly from underneath and lower it down through its cutout in the frame.

    • Don't attempt to fully remove the throttle assembly yet. Let the assembly hang in place.

  10. BSmCqwYeCnYpLTCY
    BSmCqwYeCnYpLTCY
    n3EgXLQujP6dXJxv
    XLdIJjWscRRnIUOd
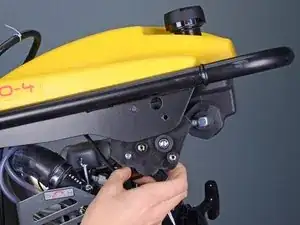
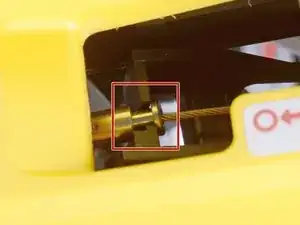
    • Holding the throttle assembly in place, pull the throttle cable through the hole on the throttle lever.

    • Remove the throttle cable.

    • During reassembly, be careful not to fray the throttle cable tip, or you won't be able to install the cable.

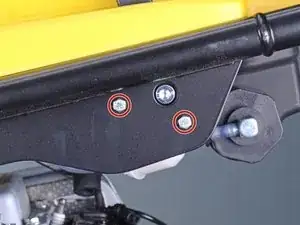
    • During reassembly, ensure the throttle cable guide shoulder is fully recessed into its section on the throttle assembly.

  11. lNAcEQDYVv6qqNOV
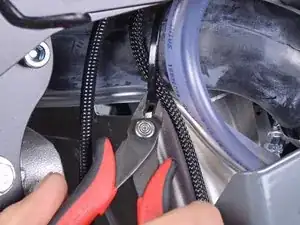
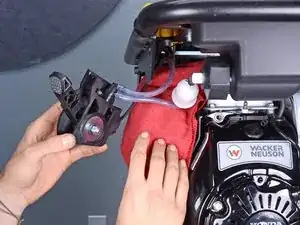
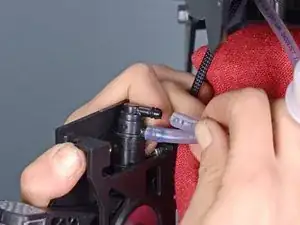
    • Place a rag or shop towel underneath the petcock fuel lines to prevent drips and spills from getting on the device.

  12. WAobqxxM2cLqZAhi
    WAobqxxM2cLqZAhi
    BUfpaJKOxQbjWecp
    nmsulJowJLhGs6hQ
    • Grip one of the clear fuel tubes near where it connects to the petcock and squeeze it completely closed.

    • Pull the tube directly away from the petcock nipple to remove it.

    • This may require some force due to suction within the tubes.

    • Use a pick tool to lift one end of the tube up to break suction if needed.

    • Residual fuel in the fuel lines may leak out after the tube is removed.

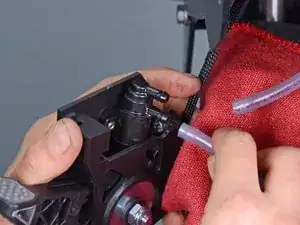
    • Disconnect the second fuel tube from the petcock.

  13. 4caY4GsDyhKBXLIh
    4caY4GsDyhKBXLIh
    GSIWKv3PcB5TsRZE
    PFgwchpTFS2RNHXo
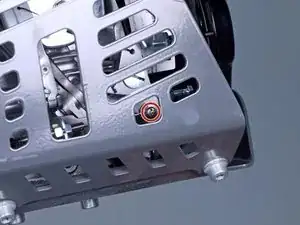
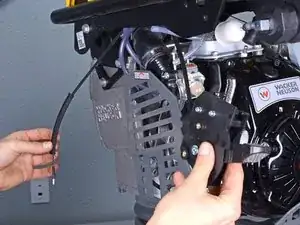
    • Thread the throttle wires out from underneath the metal engine guard.

    • Remove the throttle assembly.

    • Only the throttle assembly remains.

Conclusion

To reassemble your device, follow these instructions in reverse order.

Carsten Frauenheim

Member since: 10/03/20

110978 Reputation

0 comments