Introduction
Tools
Parts
-
-
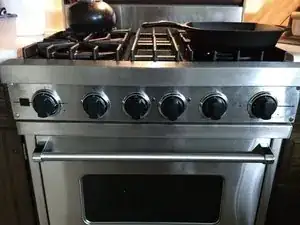
The problems I had included: Oven light not turning off, wrong temperature during bake, no self-clean function, oven shuts off after pre heat. If you have some or all of these issues, your thermostat might need replacing. It is certainly worth the effort to keep this nice oven working.
-
-
-
The model number and serial number are located on a sticker next to the left rear burner. The first 6 numbers of the serial number correspond to the month, day, year i.e. 02 31 05.
-
If your oven is before 02 02 05, the thermostat part # is PJ030003.
-
If your oven is after 02 02 05 the thermostat part # is PJ030031 which you can order from a parts dealer such as searspartsdirect.com
-
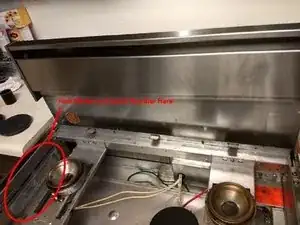
No tools needed here, just remove the burner grates to the left side and the cooking surface pulls up and toward you.
-
-
-
After researching online, I found a supplier that had the part for a decent price. I went with searspartsdirect but you can shop around.
-
Highly recommend ordering a NEW thermostat which you will see later. There are components that wear out which directly causes the problem in the first place.
-
-
-
Pull the oven away from the wall about a foot and unplug the electrical and shut off the gas.
-
You can see the new thermostat on the left and old one on the right for comparison.
-
The Red covered line is a vapor filled tube, do NOT cut this line or break it since the liquid inside will react with water (your hands and eyes) make sure to wear gloves and eye protection during removal and installation.
-
To reassemble your device, follow these instructions in reverse order.
5 comments
I’m in the UK, my Model No. is EVGSC305-4BSS. I think the E may be for export , or Europe? It has a gas oven and temp control is now a problem! Any idea if PJ030003 is correct for this, date of manufacture appears to be (based on the above guidance) 04 09 99.
Can anyone complete the instructions?
Remove screws that hold thermostat in place.
Find the sensor on the inside of the oven on the upper back wall of the oven - it is pencil shaped. Remove it from the two clios and thread it up through the hole in the top left rear of the oven. Leave the wire attached . Connect the wires from the new thermostat to the wires from the old one. Thread the new sensor down the hole at the left rear of the top and snap it into the clips. Now attach the new thermostat with the two screws. Test oven and then replace top and grates. If there is still a problem replace the two igniters. I replaced both the thermostat and the igniters at the same time cuz I was not sure what was causing the problem. Turned out to be the thermostat but now its all new and range works great.
Sorry, I neglected to add that you need to remove the front faceplate by pulling off each knob. Then the two screws behind each knob followed by the screws in each corner of the face plate. Let the faceplate fall away without disconnecting any of the wires. Now you can see the thermostat and proceed as above.


