Introduction

To complete this guide you will have to separate the parts of the handset in order to access the keypad. The steps of this guide are moderate in difficulty. After completing this guide, users will no longer have a sticky keypad or worn out buttons.

  1. iSLlfF6DsaOXGeHJ
    • Set the phone with dial keys facing downward.

  2. 2BhTjKkXfI2nXYW5
    2BhTjKkXfI2nXYW5
    RGPmRANjpli6VFTc
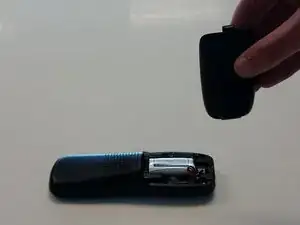
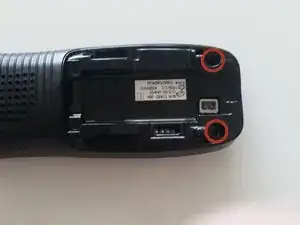
    • Slide the battery cover toward the bottom of the phone.

    • Lift and remove the back cover from the phone.

  3. xIXfBUEAaqQwFWCW
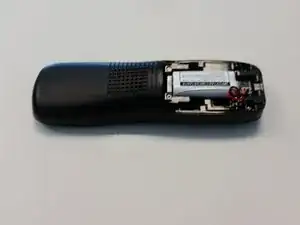
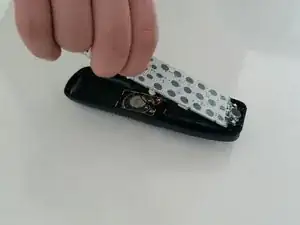
    • Remove the battery from its compartment.

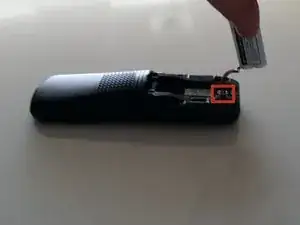
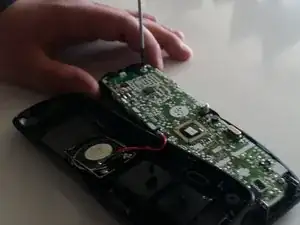
    • Pinch the end of cord where the battery is attached to the phone and pull up gently.

  4. uSuZiSyIYSWrmqnX
    uSuZiSyIYSWrmqnX
    4HyPTlp4WvY6KSmn
    • Remove the two 9mm Phillips #1 screws in the battery compartment.

  5. WEFSJvCnMWtJpfe2
    WEFSJvCnMWtJpfe2
    oTlda24BNtJhyYTP
    Mlx2MvNRxvDVrThW
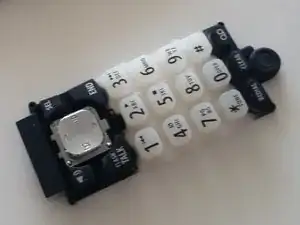
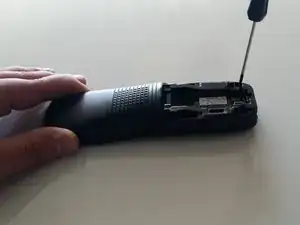
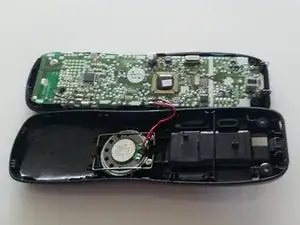
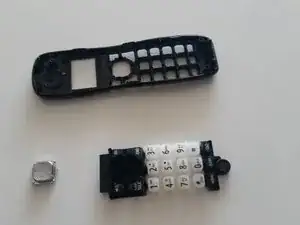
    • Use the plastic opening tool to carefully separate the two halves of the case.

    • Slowly work around the entire case to fully separate the halves before pulling them apart.

    • Wires inside the case hold the two halves together, tearing these wires will lead to a need for additional repair.

  6. JTNQF3lgL3TJhoGa
    JTNQF3lgL3TJhoGa
    YAqopRjY6sDqfdQf
    • Carefully remove the 9mm Phillips #1 screw from the top corner of the circuit board.

  7. Z1CaNLHUoyjLaUK3
    Z1CaNLHUoyjLaUK3
    jkddo2sYSluLCTCH
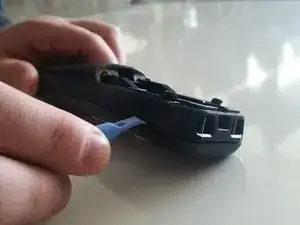
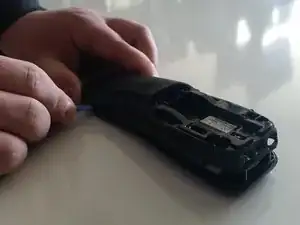
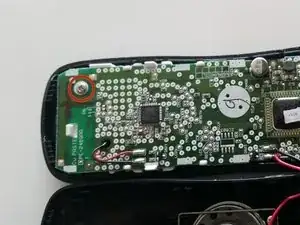
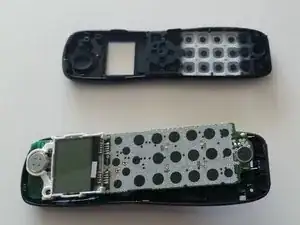
    • Carefully grasp either side of the circuit board and lift it straight out of the front half of the case.

    • Set the board in the lower half of the case.

  8. CiFVc4hZD5P1aeSV
    • Remove the rubber keypad from the front half of the handset case.

    • The keypad comes in two separate pieces.

Conclusion

To reassemble your device, follow these instructions in reverse order.

Arbitrary Name

Member since: 28/01/15

1083 Reputation

0 comments