Introduction

Trackpad prerequisite without the reassembly instructions.

  1. xJPH6raejS4AGHFs
    xJPH6raejS4AGHFs
    3wSVHWf5IpZw5jwB
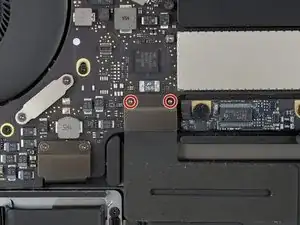
    • Use a T3 Torx driver to remove the two 1.8 mm screws securing the trackpad cable connector bracket.

  2. fBocHATfFgSGmY3N
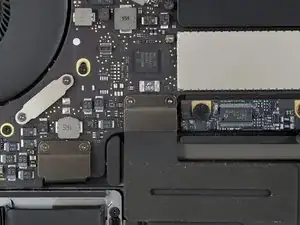
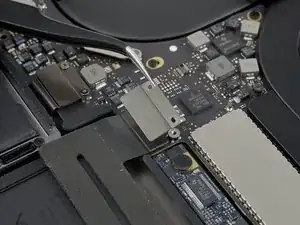
    • Remove the trackpad cable connector bracket with a pair of tweezers.

  3. lG1TH2NbxOXtNXJQ
    lG1TH2NbxOXtNXJQ
    Aj2NjKUWteqjdJKU
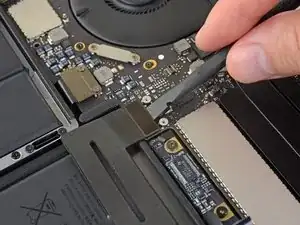
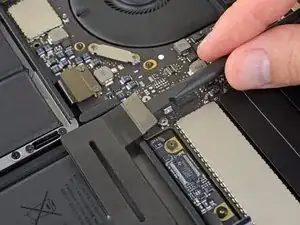
    • Use a spudger to disconnect the trackpad ribbon cable by gently prying its connector straight up from the logic board.

  4. o1OmvUYWsUdaOwaD
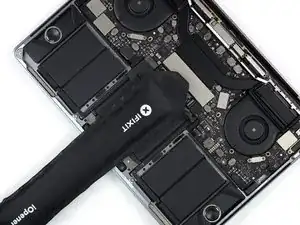
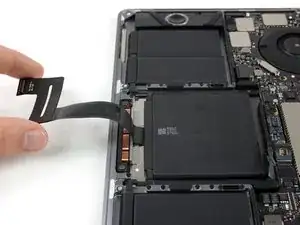
    • Prepare an iOpener and lay it on top of the trackpad ribbon cable for about a minute, in order to soften the adhesive securing the trackpad ribbon cable to the top of the battery.

    • If you don't have an iOpener, use a hair dryer to warm up the cable instead. The cable should be warm, but not too hot to touch. Be careful not to overheat the battery.

    I was able to extremely gentle peel (just applying a little bit of continuous tension and waiting for the adhesive to release) the cable off without heating. It came off relatively easy, probably due to age or heavy usage in the past.

    Justin Ossevoort -

  5. NPf6eZplKQeJFvBq
    NPf6eZplKQeJFvBq
    qgLCqH3TxjwSVpZa
    g1qEEEviQXkSrVwq
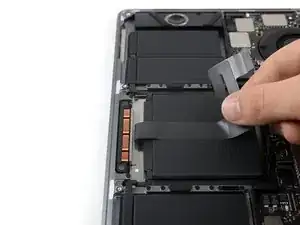
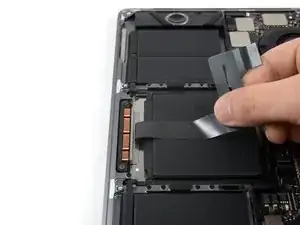
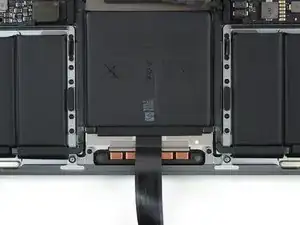
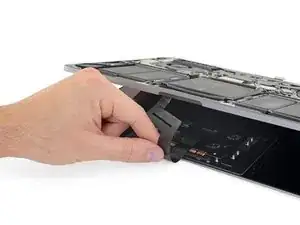
    • Carefully peel the trackpad ribbon cable up off the battery, and push it out of the way.

    • Do not fold or tear the cable.

  6. jKEZqfy1YjXSlftq
    jKEZqfy1YjXSlftq
    fPHwQjZC1fRCYd14
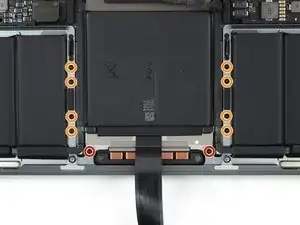
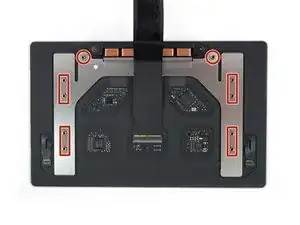
    • Use a T5 Torx driver to remove the ten screws securing the trackpad assembly:

    • Two 4.3 mm screws

    • Eight 5.8 mm screws

  7. nqULadYTgfGCUj6X
    nqULadYTgfGCUj6X
    41QN6aQUhIRcjGBl
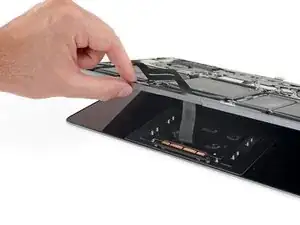
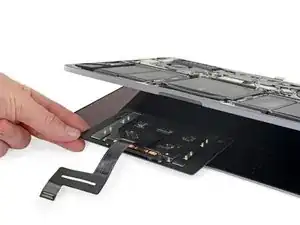
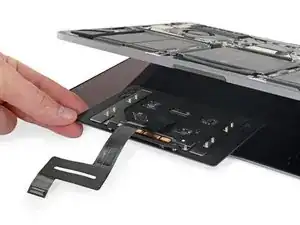
    • Swing the display open slightly to access the trackpad.

    • Carefully thread the trackpad ribbon cable out through the hole in the MacBook Pro's frame.

    It'd be super nice to remind about the washers at this point - I've done 3 or 4 of these laptops the past few years and I forget every time about this step & lost many washers.

    JoeP -

  8. eqpFWnaqpAePZKVO
    eqpFWnaqpAePZKVO
    mBM12cVmhimFArDc
    4MH5VNGMEJ6auxnQ
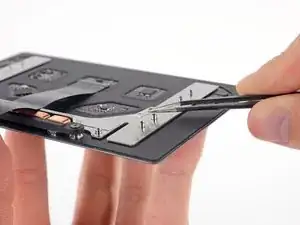
    • Remove the trackpad assembly.

    • Be sure not to lose the six small washers (two circular and four rectangular) resting on the underside of the trackpad.

Conclusion

To reassemble your device, follow these instructions in reverse order.
Tobias Isakeit

Member since: 31/03/14

116775 Reputation

0 comments