Introduction

Trackpad prerequisite without reassembly bullet.

  1. quWHlwu1iNuZKqpE
    quWHlwu1iNuZKqpE
    JOvnH5IWGfqgxwfi
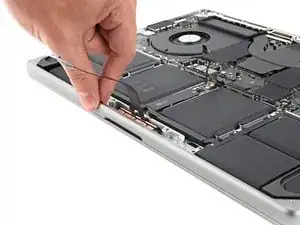
    • Use a T5 Torx driver to remove the ten 5.7 mm 5IP Torx Plus screws securing the trackpad assembly:

    • Adding a little blue threadlocker to the screw threads during reassembly can help prevent the screws from working themselves loose over time.

    • Install the screws loosely at first, and then check the trackpad alignment before tightening them down.

  2. 2fAlyWwWARDSyGdI
    2fAlyWwWARDSyGdI
    R2ReZsRkNgmHUVMu
    TSe6CWwHatyO4hV3
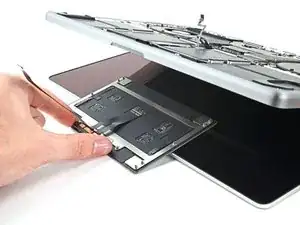
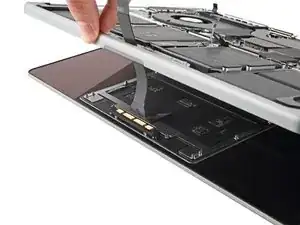
    • Swing the screen open slightly, but keep the MacBook upside-down. The trackpad should separate and lay flat on the display.

    • As you remove the trackpad, be very careful not to lose the six small metal washers resting on the screw posts. (They will fly off and get lost with very little provocation.)

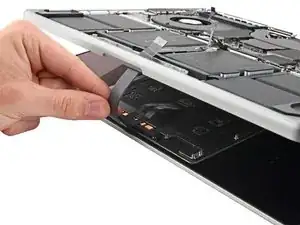
    • Carefully feed the trackpad's ribbon cable through its slot in the frame.

  3. djYKbqh2ddAhARri
    • Remove the trackpad.

    • During reassembly, make sure that each of the nine washers are present before you install the trackpad.

Conclusion

To reassemble your device, follow these instructions in reverse order.

Compare your new replacement part to the original part—you may need to transfer remaining components or remove adhesive backings from the new part before you install it.

Repair didn’t go as planned? Try some basic troubleshooting, or ask our MacBook Pro 14" 2021 Answers community for help.

Alex Diaz-Kokaisl

Member since: 16/01/22

117875 Reputation

0 comments