Introduction

The motherboard contains the principal components of the device. Make sure the device is not connected to any source of power before removing any parts. Clips and connections may break easily so be gentle when removing parts.

  1. hPtmChoDUGycnAhq
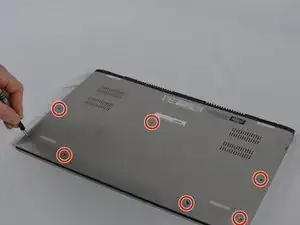
    • Turn the laptop off, unplug the AC adapter, and any other auxiliary components.

    • Turn over the laptop and proceed to take out the seven 5mm silver JIS #1 head screws. If some of the screws are difficult to take out use the tweezers to help.

  2. pw6NHvWLQLfDikyC
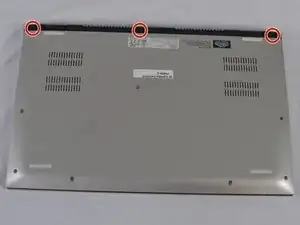
    • Use the screwdriver to take out the three 5mm black JIS #1 head screws that are located on the hinge.

  3. WRr45qBTeW2IUw6G
    WRr45qBTeW2IUw6G
    lGG5ioxJIQwMsESO
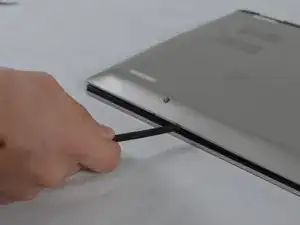
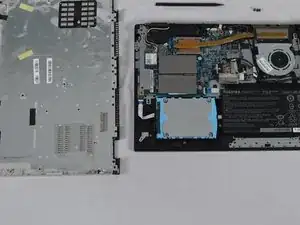
    • Use the spudger to pry under the back cover until it pops off.

  4. VBHDfZZDtawSxaXC
    VBHDfZZDtawSxaXC
    1MHkRWgjaVcmGuOc
    lV1Qb1Dib2epdbkZ
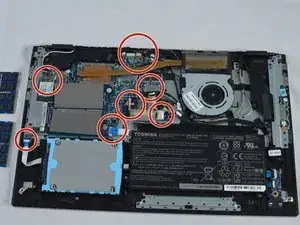
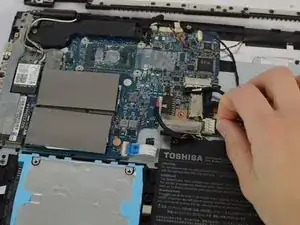
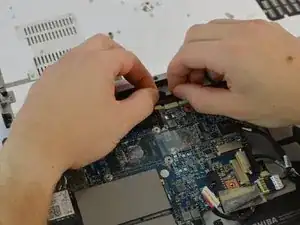
    • Remove all power connections to the motherboard. Including the black and white power connections to the wifi module.

  5. tgxrwJekdPPlLAxw
    tgxrwJekdPPlLAxw
    nQ33mbgVSLpr5P3q
    lu4UaP1LfffPKHWq
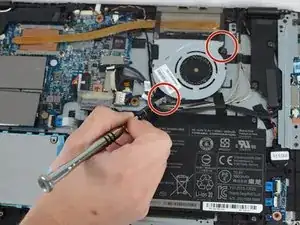
    • Unscrew the two 7 mm JIS head screws in the fan .

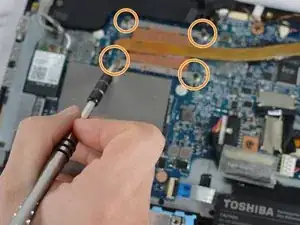
    • Then unscrew the four 2 mm JIS head screws connecting the heat sink to the mother board.

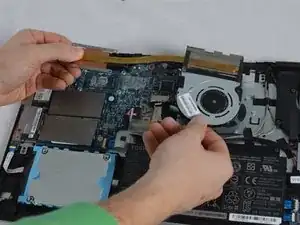
    • Then take out the heat sink and fan.

  6. t2xwBlMA1aSWvTXN
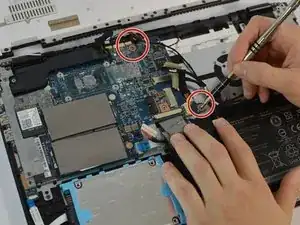
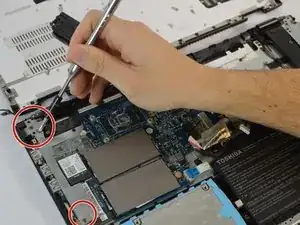
    • Remove both 3mm JIS head screws connecting the motherboard to the device.

  7. hcOA1u4UH4Ltf1hK
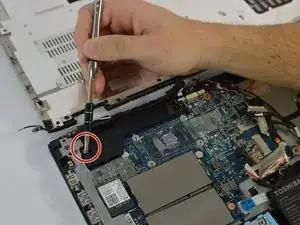
    • Remove 5mm silver Phillips head screw connecting black cover to the motherboard

  8. luQblke3EDwK1Flc
    luQblke3EDwK1Flc
    2Oe63irDQNEoZyJF
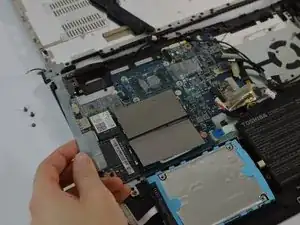
    • Remove all three 5 mm silver JIS head screws connecting the silver cover to the motherboard.

  9. A3XxwAbWKWVUwGFH
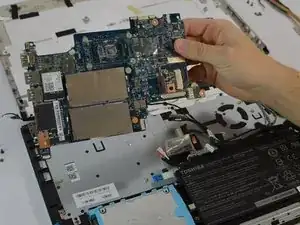
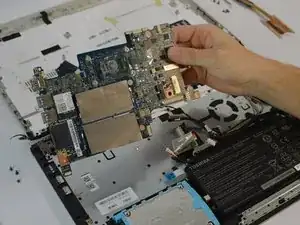
    • You can now gently remove the motherboard from the device.

Conclusion

To reassemble your device, follow these instructions in reverse order.
Brittany Edwards

Member since: 25/09/17

104 Reputation

0 comments