Introduction

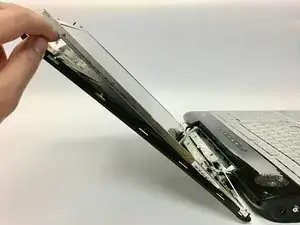
This guide will show how to remove the screen on the Toshiba Satellite.

  1. VVTCIExvbPbbOL16
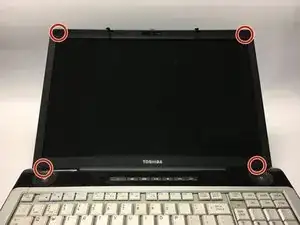
    • With the screen on a flat surface, remove the screws in each corner of the screen. There will be 4 in total.

    • Note: The screws for the screen may be hidden under rubber pad at the top of the screen so they will have to be removed.

    maybe instead of "with the screen on a flat surface" say "tilt screen backwards as far as it can go" or something to that effect. also indicate screw length

    Andy Feng -

  2. mI1LCPSPqdVFhTvI
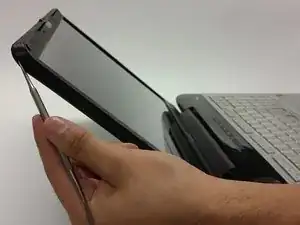
    • Using a metal spudger wedge open the front and back cover of the screen.

    • Take care to not damage the camera in the process.

    we used "plastic opening tool" instead of metal spudger and it worked better and didn't scratch the computer. also maybe add more detail, such as slide along the seam around the entirety of the cover. we also needed to use opening tool to loosen near hinge. it would not have come off had we not tried to work around plastic on hinge.

    Andy Feng -

  3. Bt6hMMIlPF6R33Bj
    Bt6hMMIlPF6R33Bj
    yLbZ4SdBvj3Mv4sV
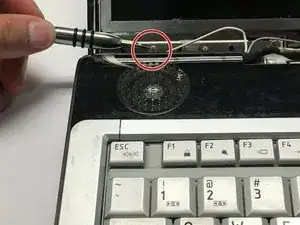
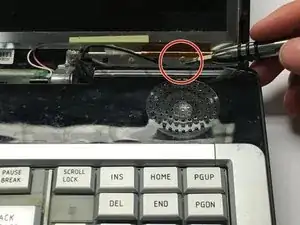
    • After the front cover is removed remove the two screws at the very bottom of the screen.

    • This will give you access to the screws running along the side of the screen.

    indicate length of screws and that they are the two outer screws.

    Andy Feng -

  4. HTSUJmQOwNwbaVNT
    • Remove the four screws on the each side of the screen. There will be eight in total.

    • We recommend starting from the bottom and working upward.

    need to use markup for screws and indicate length. also maybe be more specific that you need to switch to other side of screen.

    Andy Feng -

  5. JKFCqovo4jitJPeZ
    • Lay the screen flat on the keyboard so they the back panel can be accessed.

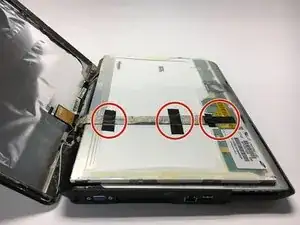
    • Remove all the tape on the video cable that connects the screen to the computer.

  6. sTQBULSLw2EbNQ6g
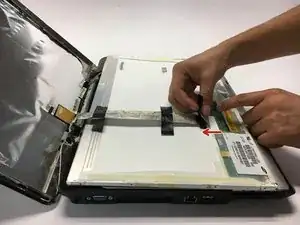
    • Remove the video cable from the screen.

    • After the video cable is removed the screen is free and can be removed from the computer.

    indicate that the video cable will be a pull and will not slide off super easily

    Andy Feng -

    the screen is still connected by the pink and white wires that go into the hinge. probably need to add steps until complete removal

    Andy Feng -

Conclusion

To reassemble your device, follow these instructions in reverse order.
Caroline Camp

Member since: 30/01/17

1 Reputation

0 comments