Introduction

This guide shows how to remove and replace the flex coupler assembly on the Toro Log Splitter 22618HD 2019 / LS-922.

  1. Oayc2Rs5nayc1XDV
    Oayc2Rs5nayc1XDV
    g4nXlg5vKANWyicy
    • Before you begin, ensure that the engine is powered down and cool to the touch.

    • Grab the plastic housing at the end of the spark plug wire and pull firmly to disconnect it.

  2. vDPEfXkdhOkpgmJO
    vDPEfXkdhOkpgmJO
    RhSoM6jUyXRv2LPE
    • Flip the red engine ON/OFF switch to the OFF position.

  3. ZUbbVJ15Sl4HybJp
    ZUbbVJ15Sl4HybJp
    wMEtAY1n2cQoqf5Y
    • Flip the fuel valve lever to the OFF position.

  4. gFSFFbtBV4eF2btr
    • Residual hydraulic fluid will be trapped in the hoses connected to the pump, and may drip during the following procedure.

    • Place a bucket underneath the device, below the pump to catch any hydraulic fluid drips.

    • Have rags handy to stop drips and clean up affected areas.

  5. Ms2l4uf2kb1yMbmE
    Ms2l4uf2kb1yMbmE
    VpyNxOfSqrishAmi
    • The hydraulic fluid tank is near the back of the device, so raising the front will help keep less fluid from spilling.

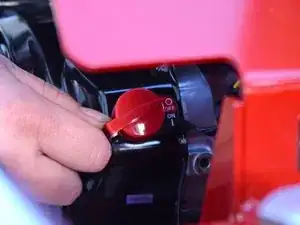
    • Turn the trailer jack handle clockwise to raise the front of the device as far up as it will go.

  6. yCyrbRPr2qNEhITx
    • Use a large flathead screwdriver to loosen the hose clamp.

    • During reassembly, replace this hose clamp.

  7. BANAnmTFIRUBU3JP
    BANAnmTFIRUBU3JP
    JjtXq5ASJLb5IrO5
    4BZVKAqVKAcNFrbm
    • The input hose is directly connected to the hydraulic fluid tank. Keep the hose elevated, otherwise the tank will lose hydraulic fluid.

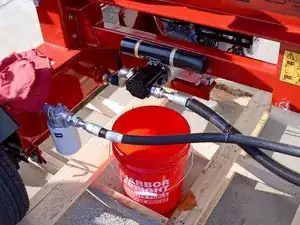
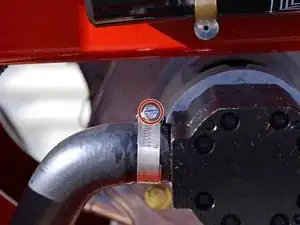
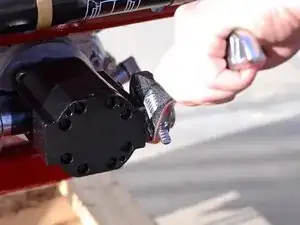
    • Slide the hose clamp away from the pump and onto the hose.

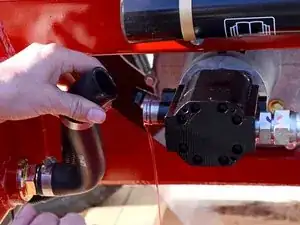
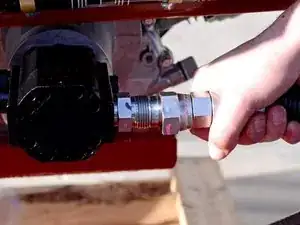
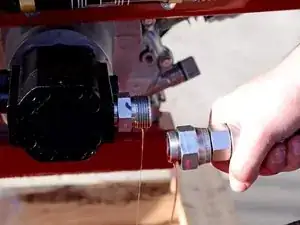
    • Twist and pull the hose away from the pump to remove it.

    • Hydraulic fluid may spill out of the pump.

    • Ensure the hose is kept elevated to avoid spills.

  8. qtfiwBoAcAetSTbP
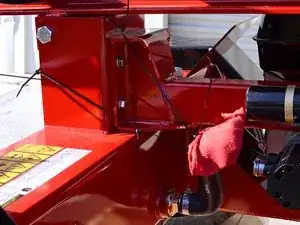
    • Use zip ties, a bungie cord, rope, or something similar to tie the hose into an elevated position to avoid spills.

    • Plug the open end of the hose with a clean shop towel.

  9. ZJeTbvnT3MXKCPuv
    ZJeTbvnT3MXKCPuv
    oyDEq2ZxfOAnNkDy
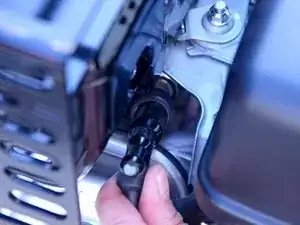
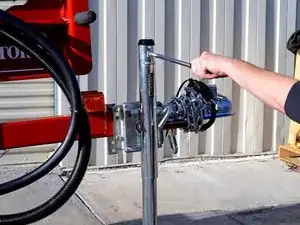
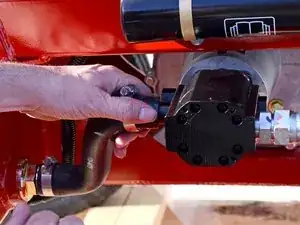
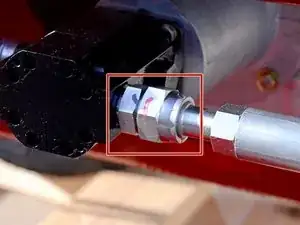
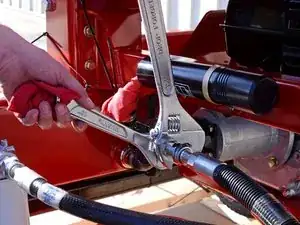
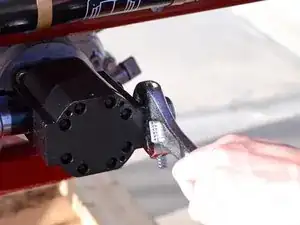
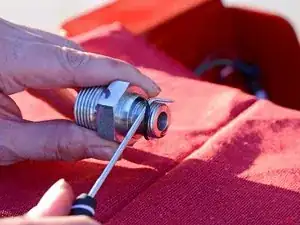
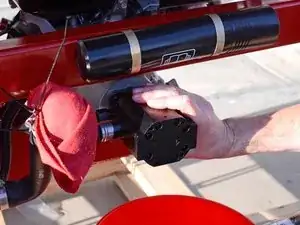
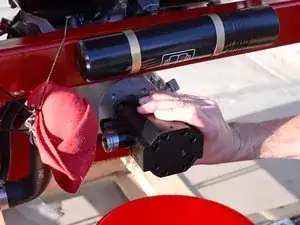
    • Use two adjustable wrenches to loosen the nut holding the input hose to the fitting on the right side of the pump.

    • Using one adjustable wrench to hold the nut closest to the pump steady, use the second adjustable wrench to loosen the nut on the hose.

  10. pF36gLNFnja6MMDO
    pF36gLNFnja6MMDO
    KDwnB3lASUCMQSqC
    • Remove the input hose from the right side fitting.

  11. mL3sVE6QFPNAwuQC
    mL3sVE6QFPNAwuQC
    lpnvrdufOfEC2n66
    UXmGDFvjen5Og3VG
    • Use an adjustable wrench to remove the fitting on the right side of the pump.

  12. TA2amrdX6rcsfMBr
    TA2amrdX6rcsfMBr
    HfpuIJcKudhm2DHJ
    tqrDRVraBEcuKUyf
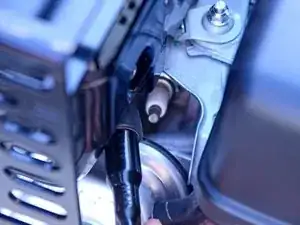
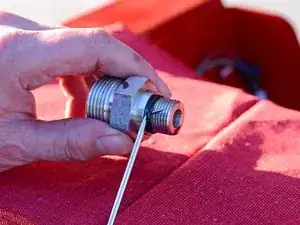
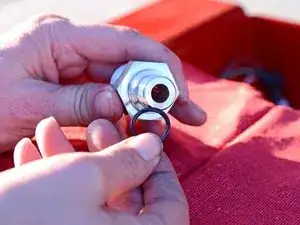
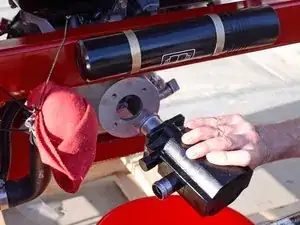
    • Use a pick tool to remove the O-ring from the input hose pump fitting, on the side that connects to the pump.

    • This O-ring is part number 237-79.

    • The O-ring between the L-fitting and the hose is part number 237-58. Only replace this O-ring if it is visibly damaged.

  13. wQLbAEtFj1WvYQcS
    wQLbAEtFj1WvYQcS
    TiTS2ALZNPiInSgG
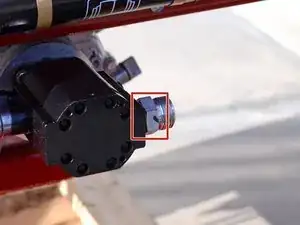
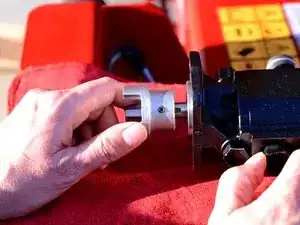
    • Use a 1/2 inch wrench to remove the four bolts securing the pump to the flex coupler housing.

  14. PPXZfk2oBI12PGuB
    PPXZfk2oBI12PGuB
    lgUvZkRaRdwXaStO
    bYHRhfGGaX6B1CJL
    • Remove the pump.

  15. GdqxxpZKiiEDTJfd
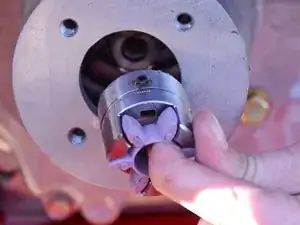
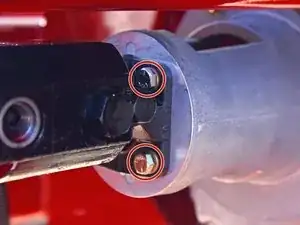
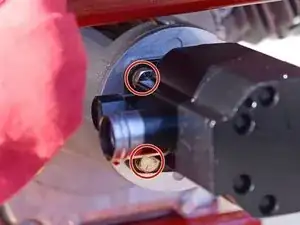
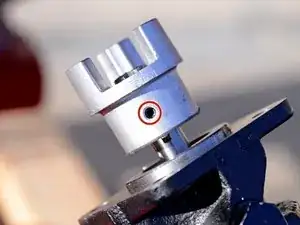
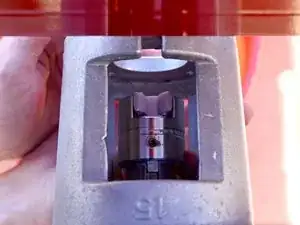
    • Use a 2.5 mm hex key to loosen the pump-side flex coupler's set screw until the flex coupler moves freely on the shaft.

  16. mcStVVXuJwFZn5HT
    mcStVVXuJwFZn5HT
    L3CmKRF2pwtpJXtJ
    FqUJ3yknEB1ODEBO
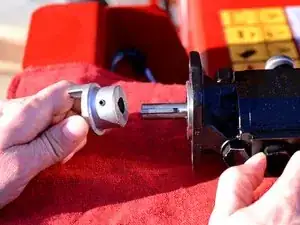
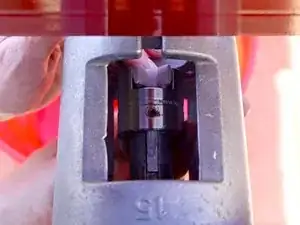
    • Pull the pump-side flex coupler away from the pump input shaft to remove it.

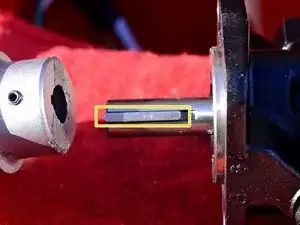
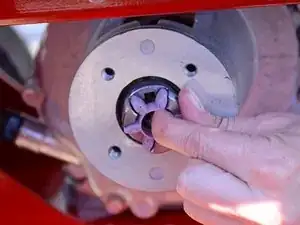
    • Keep track of the pump shaft key. Transfer it to the replacement pump only if the new part does not come with a new key.

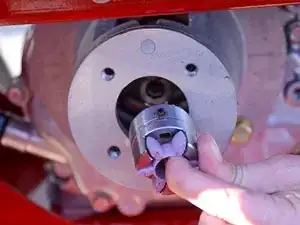
    • Only the pump remains.

    fluid is dripping from the bottom 2 bolts. I took the pump head off hoping to find an o-ring. what could cause the fluid to drip

    RANDY -

  17. RBUT4tQMPnVPvLEa
    • Use a 2.5 mm hex key to remove the motor-side flex coupler's set screw.

  18. KPbRv1SjmnrDwYZZ
    KPbRv1SjmnrDwYZZ
    mFHg3aawGQNtg1ee
    • Reaching underneath the device, through the flex coupler housing access cutout, slide the motor-side flex coupler off of the shaft.

  19. 2Cd3kdMRtEcSUpJC
    2Cd3kdMRtEcSUpJC
    FRlcNVjUHWADLnT4
    • Remove the motor-side flex coupler.

Conclusion

To reassemble your device, follow these instructions in reverse order.

Carsten Frauenheim

Member since: 10/03/20

110978 Reputation

0 comments