Introduction

Use this guide to replace the volume potentiometer of your OP-Z.
In case the defect was caused by a drop then the volume knob was probably damaged too. This guide will also show how to replace the knob which can be purchased separately.

  1. 3P3PtudTARX4VYYo
    3P3PtudTARX4VYYo
    wV3ZGSxOE1EQcKRX
    kabawgJinAQaRfXx
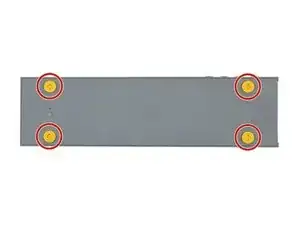
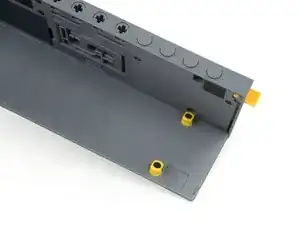
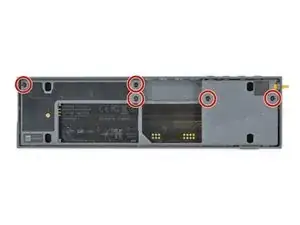
    • Unlock the four rubber feet by turning them 90° counterclockwise using your thumb or finger tip.

    • There is a tiny mark on every foot facing the bottom edge of the OP-Z. After turning them they should face towards the short edge where the on/off switch is.

  2. pueLJe1vTPDuZsOa
    pueLJe1vTPDuZsOa
    QbptcMmcnDwpxrCE
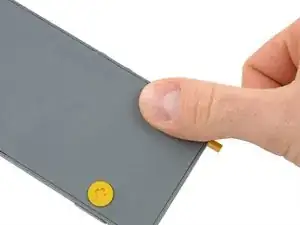
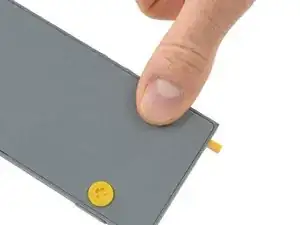
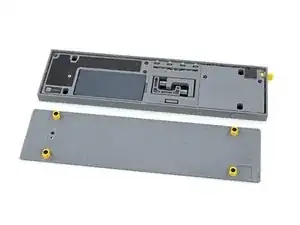
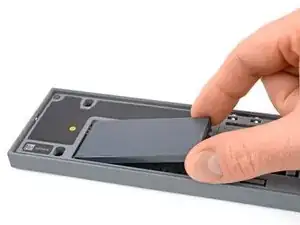
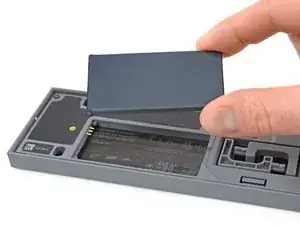
    • When turning the OP-Z over again the bottom plate should come off by itself (thanks gravity).

    • If the bottom plate won’t come off you might want to make sure every foot is rotated correctly and gently tug on one of them.

  3. QCjZngZMmxyi3pxU
    • Remove the bottom plate including the rubber feet.

  4. p3FkSHtKFCvwrqeh
    p3FkSHtKFCvwrqeh
    viRjEDse1dT2OS4X
    • Use your fingernail or a spudger to lift the battery on the right side where the notch is.

  5. y6hJwRZefWmmEoyh
    y6hJwRZefWmmEoyh
    vAo4CAkJUTfGyAjL
    • Remove the battery.

    • When installing the new battery make sure you put it in contact side first.

  6. XgfsXNdbNChaCItV
    XgfsXNdbNChaCItV
    iZLHrpyCV3hLsPxA
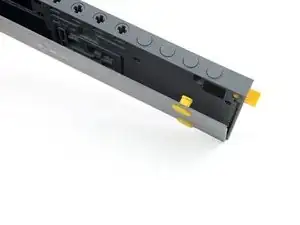
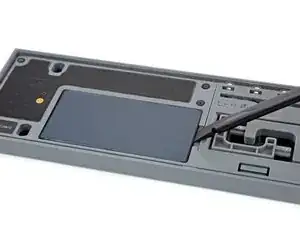
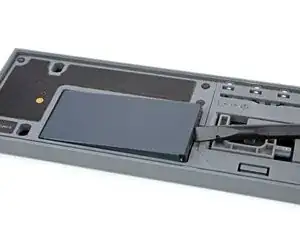
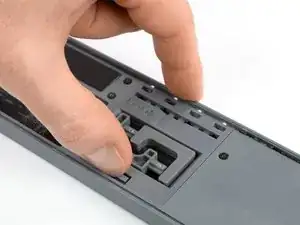
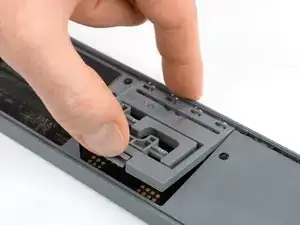
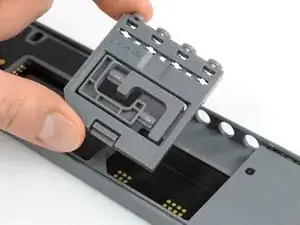
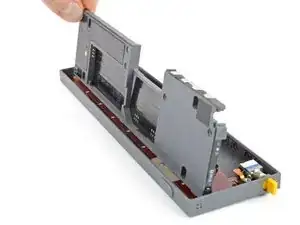
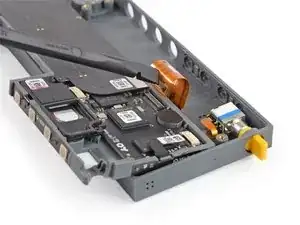
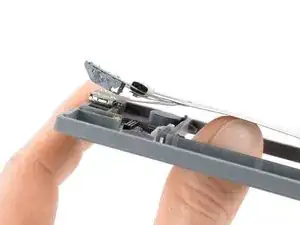
    • Use your finger or a spudger to push up on the small tab on the bottom of the module.

    • Lift the module up and out of its recess bottom first.

  7. 24rAVGncEwtxrq2c
    • Remove the module.

    • When inserting another module make sure you put it in outputs first. Then push down the bottom part for the tab to engage.

  8. jITUlDVHew4Tk6jG
    • Remove the five Torx T4 screws.

  9. jEjjakdWPfPVCLfV
    jEjjakdWPfPVCLfV
    356PLic2YIghgbwH
    • Place a spudger in the cutout of the extension module to lift the midframe.

    • Be careful not to damage the highway flex cable underneath.

    • Don’t remove the midframe yet. It is still connected to the rest of the OP-Z.

  10. K36FYIB6YETIaIqa
    K36FYIB6YETIaIqa
    WofBDtn2woT3g4DZ
    kBLJXjtNWgi5bRUa
    • Flip the midframe over to gain access to the flex cable connector underneath.

  11. O1DGquvrAsqNIBJF
    O1DGquvrAsqNIBJF
    OLba64cQMSshZHEI
    • Use the flat end of a spudger to disconnect the flex cable from the front panel assembly.

  12. xJ3LNW1TIPFTCDy2
    xJ3LNW1TIPFTCDy2
    eKRuknk3Uw2MxgDT
    • Use a spudger to disconnect the highway flex cable from the DSP board.

  13. KZlCLY6GvwNYCe5q
    KZlCLY6GvwNYCe5q
    aeK24AwWPRlnUWQK
    • Use the spudger to disconnect the flex cable from the encoder board.

  14. IDT5avMF2jbgqHaH
    IDT5avMF2jbgqHaH
    Ka5aVK5EDYrxDiyA
    vCCEH1qIPOBVjMtE
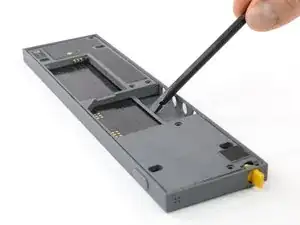
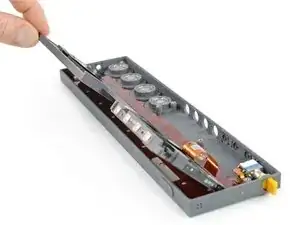
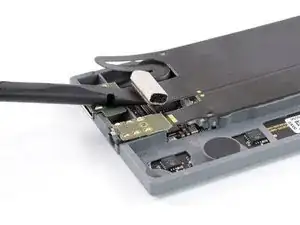
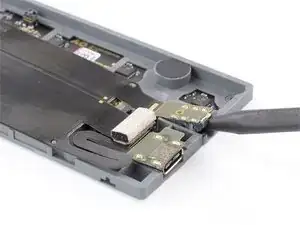
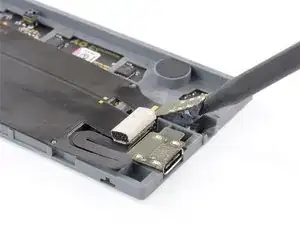
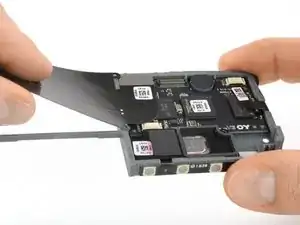
    • Slowly pry the USB-C connector out of its recess. Use the flat end of a spudger on the small nib on the USB-C board.

    • The connector is slightly glued down.

  15. RdFLuIhaIld4yymQ
    RdFLuIhaIld4yymQ
    1ghWOIaH5yKWYLFq
    WgetNabA2E1SR5WZ
    • Insert the pointy end of the spudger into the line-out jack and lever it up carefully.

    • The jack connector might sit tight and is slightly glued down.

  16. Ptx3YyBnpdb5GGqr
    Ptx3YyBnpdb5GGqr
    EEJeHUZr3AoPWuM4
    LKA4U1RvR3LIEQ6U
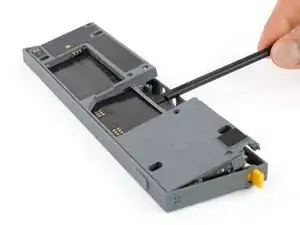
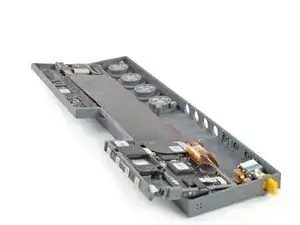
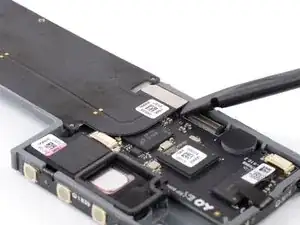
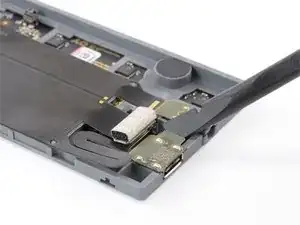
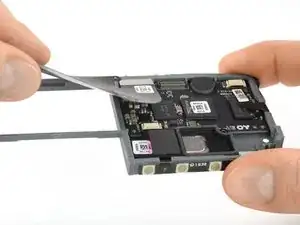
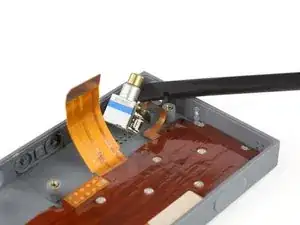
    • The highway flex cable is slightly adhered to the midframe. To remove it, gently push it out from underneath.

    • A small transparent part may pop out. This is the light guide for the bluetooth indicator. Just hinge it back onto the midframe as seen here.

  17. mbEyBeo5ELJppJGD
    mbEyBeo5ELJppJGD
    RumqEHBUtuVV5IK4
    HWRh2A2O5HRLhVUr
    • Peel the highway flex cable off the midframe and remove it.

  18. rgxqHuLpAayB1oaw
    rgxqHuLpAayB1oaw
    qrM2UxPyMZEBLKhd
    • Use one arm of a tweezer to lift the small black flap of the ZIF connector.

  19. TucqIiC4RSJOsQ1y
    TucqIiC4RSJOsQ1y
    QgMxdgQnwqZ4c3Q1
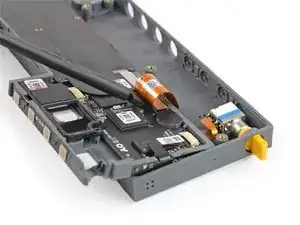
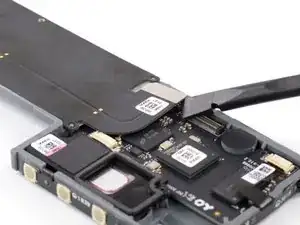
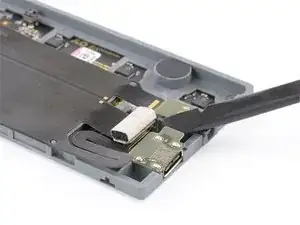
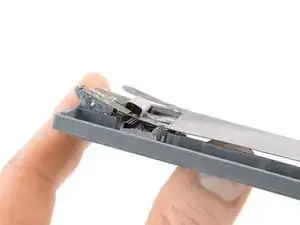
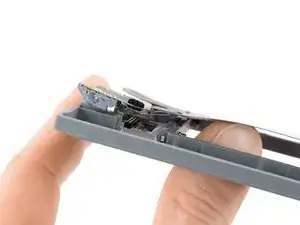
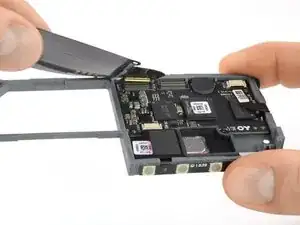
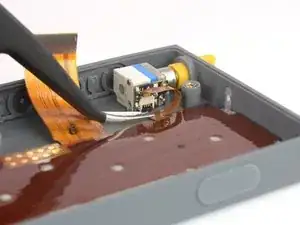
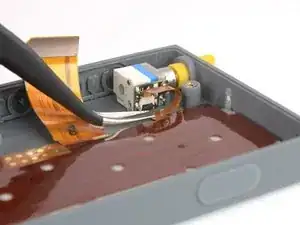
    • Use a pair of flat nose tweezers to pull the small flex cable up and out out the ZIF connector.

    • When reassembling make sure to insert the flex cable all the way.

  20. KXmlBVGX6CsTFyHc
    KXmlBVGX6CsTFyHc
    qJ4TpUKp4R6f6m5D
    • Grab the volume knob with your fingers or a pair of pliers and pull it off its axle.

  21. tJZkBbrVnelc5ORU
    tJZkBbrVnelc5ORU
    4oHOWTfRCsbHZZc5
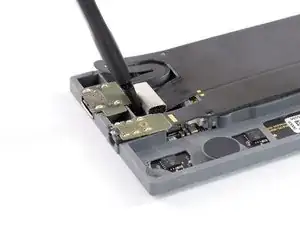
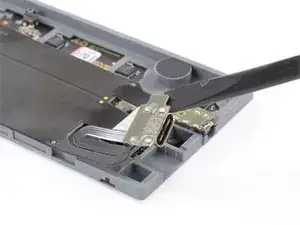
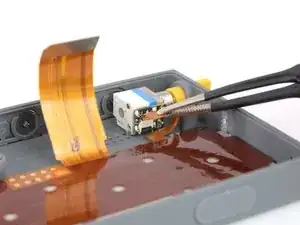
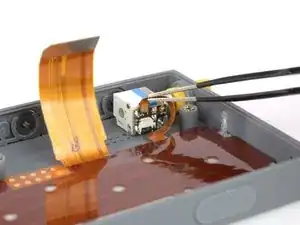
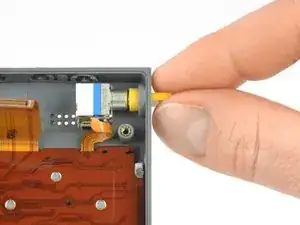
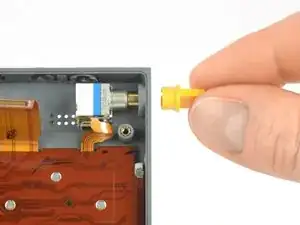
    • Use a spudger to lever up the axle of the volume potentiometer. This way it will clear the frame’s cutout.

    • The volume pot is slightly glued down.

  22. QYHHClxm1El6Qa36
    • Remove the volume potentiometer.

Conclusion

To reassemble your device, follow these instructions in reverse order.

Tobias Isakeit

Member since: 31/03/14

116775 Reputation

0 comments