Introduction

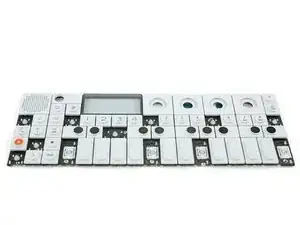
No keyboard no sound. It's easy as that. But don't be afraid, replacing it is also very easy.

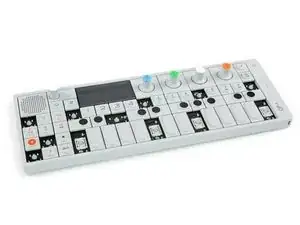
This guide shows you how to replace the keyboard of your OP-1.

  1. vxoTLiJxFDPOji5X
    vxoTLiJxFDPOji5X
    ajlj12AYLBNXKv6o
    MSgrKiNeLFhWdEpd
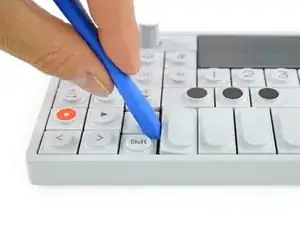
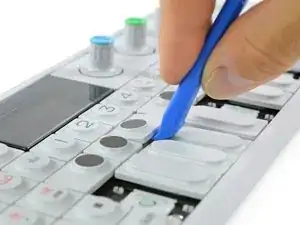
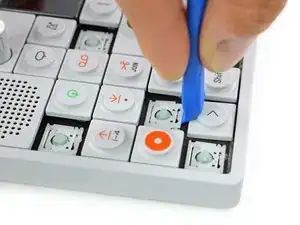
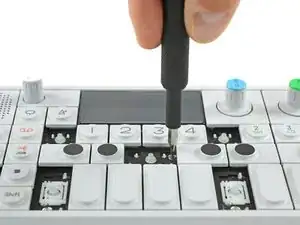
    • To get to the screws beneath the keyboard you need to take some keys off. You can use either an opening tool or an opening pick. The first picture shows how it should look like with all the necessary keys off (12 in total).

    • The four longer keys from the fingerboard are to be handled from the left side to get them off.

    • The eight smaller keys need to be levered from the bottom up.

  2. NKEIk4cFqiaAPIDr
    NKEIk4cFqiaAPIDr
    faMO21YfJAINC3yK
    • The scissor mechanism of the eight small keys are obstructing the underlying screws.

    • By using again an opening tool or opening pick these can be snapped off easily.

    • When reassembling be sure to place them in with the correct side facing upwards.

  3. SLEyuvdxWjnDuCUg
    SLEyuvdxWjnDuCUg
    RCYV1CYSlXFdOVKE
    MpduwLQ5mTtWh4lM
    • Loosen those 12 screws with a Phillips #00 screwdriver.

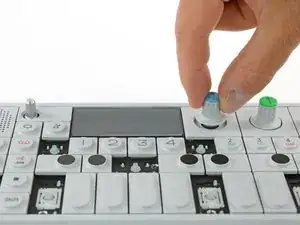
    • Then just pull off the four rotary knobs and the volume knob.

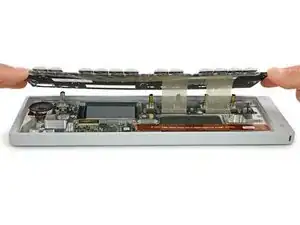
    • Now it is possible to slightly lift the keyboard and set it back.

  4. sq6pFjQdQhfSeR12
    sq6pFjQdQhfSeR12
    kEQZ31Y6ENYobgjN
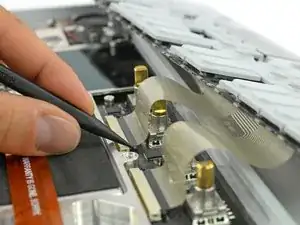
    • Unlock the flex cables by pushing the two black nibs on both sides of each connector.

    • Now you can pull the flex cables out and remove the keyboard completely.

    • When installing the new keyboard, make sure to remove the protective film underneath the screen.

    • The OP-1 has a mode to test specific functions. You can enter it by holding the "COM" button while powering on, then choose the function test (2). You don't have to complete every test and can power off after the keyboard test.

    Don't forget to add the metal parts of the new plastic keys and press the keys down until you hear a click.

    Raimund S -

    I found bring the OP-1 higher up off my work surface made installing the ribbons much easier, oh and keep the keyboard assembly parallel to the OP-1 to ensure the ribbons seat evenly.

    Stephen Holder -

    Also you have to bend the tips of the ribbons a little bit

    Al B -

    There ribbons are incredibly frustrating -- I cannot, for the life of me, lock them in place. Even after bending them, the direction of the bend itself creates tension that pulls them out of the zero insertion force connector. The black nibs do not seem to provide enough locking force. Frustratingly enough, this happens slowly over time, so usually 24 hours after I have fully reassembled the keyboard, it starts malfunctioning again. I would really appreciate some help here.

    Sébastien Barré -

Conclusion

To reassemble your device, follow these instructions in reverse order.

Tobias Isakeit

Member since: 31/03/14

116775 Reputation

18 comments

Nice guide Tobias!

Worked like a charm. My OP-1 feels brand new.

Thanks iFixit X TeenageEngineering for providing these replacement parts!

Keep it up <3

Flavius Ivancu -

Awesome guide! Thank you!!!

Jason Wasiak -

After reassembling everything I have one key ( the upper A) which retriggers the sound randomly if I press the key.

I hope that the reason is not that I put the flex cable back too loose … and i have to open it again. Anyone had this before?

Raimund S -

This happened to me constantly, only by taking the key off I noticed the tiniest amount of moisture, a mere misting, nesting in the board. it had been re-triggering randomly… Not ideal whilst constantly gigging. Seems to be triggering normally now after drying it in front of a heater. The only thing I think could of caused this is a dry ice machine I played beside a few weeks ago.
Qaiyyum Tajudin -

Perfect. Thanks :)

kristianottosen -

Did this along with with replacing the connector board and it all seems as good as new. Recommended getting the Opening Tool, Spudger and for the connector board job the Jimmy. Well done TE for providing this to option for repairs.

Toby Curnow -

Usually when a key retriggers or triggers multiple times on one press, it's because the plastic that holds the metal on the inside of the key has broken. It still sits in place, but the key would need to be replaced.

Mike -

keyboard replaced I have a new OP1 ;)

thx TE, hope you will bring connector board please !!!

Cédric Buron -

Thank you very much for the tutorial. Made me believe that I could do it. My OP1 feels brand new again.

aaa -

Is this going to be available any time soon?

Marco Luceri -

Solid guide. Solid fix. Nice to have my synth back in order :)

Scott McGimpsey -

I have a a broken scissor mechanism on 1 single key of my OP-1, but it seems like my only option to replace that tiny broken part is to buy a whole new keyboard. Wondering if someone on this thread might confirm that (or offer and alternative). Thanks!

Ben White -

Take a look at these comments, maybe this will help.

Tobias Isakeit -

Is this ever coming back? I spilled coffee on my OP-1 last year and some of the keys no longer work. I would really like to be able to fix this

:-(

Michael Forrest -

Hi Michael, we’re constantly looking to get parts back into stock. Sometimes we are limited by our suppliers. But you can use the "notify me" function so you’ll know when it is available again.

Tobias Isakeit -

Just purchased a new keyboard but have found it to be double triggering. Not sure how to return item as no return form was supplied in package.

BBaker -

Is this ever coming back?

Taka -

After installing the new keyboard a sliver of the screen edge under the outer screen is visible. Do you think the replacement is manufactured incorrectly? Or is this an error with aligning the keyboard when reinserting it?

Elliot Ashton-Stretch -