Introduction

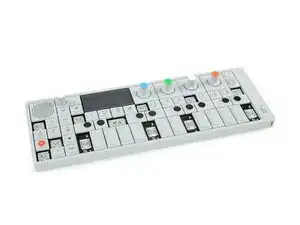
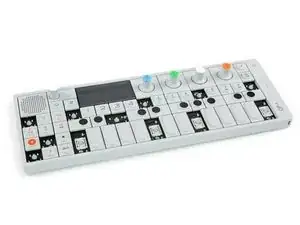
The display not only gives you useful information, it is also fun to watch the small animations while making sounds. If the display should fail this guide will show you how to replace it.

  1. vxoTLiJxFDPOji5X
    vxoTLiJxFDPOji5X
    ajlj12AYLBNXKv6o
    MSgrKiNeLFhWdEpd
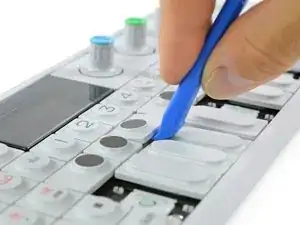
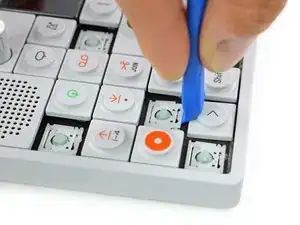
    • To get to the screws beneath the keyboard you need to take some keys off. You can use either an opening tool or an opening pick. The first picture shows how it should look like with all the necessary keys off (12 in total).

    • The four longer keys from the fingerboard are to be handled from the left side to get them off.

    • The eight smaller keys need to be levered from the bottom up.

  2. NKEIk4cFqiaAPIDr
    NKEIk4cFqiaAPIDr
    faMO21YfJAINC3yK
    • The scissor mechanism of the eight small keys are obstructing the underlying screws.

    • By using again an opening tool or opening pick these can be snapped off easily.

    • When reassembling be sure to place them in with the correct side facing upwards.

  3. SLEyuvdxWjnDuCUg
    SLEyuvdxWjnDuCUg
    RCYV1CYSlXFdOVKE
    MpduwLQ5mTtWh4lM
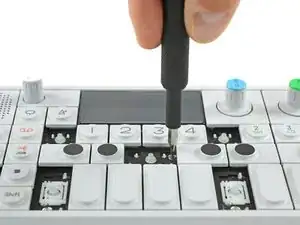
    • Loosen those 12 screws with a Phillips #00 screwdriver.

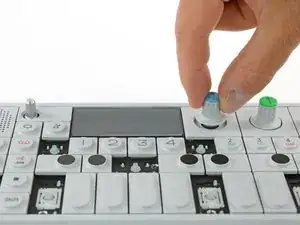
    • Then just pull off the four rotary knobs and the volume knob.

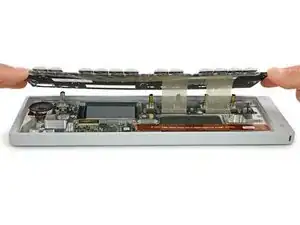
    • Now it is possible to slightly lift the keyboard and set it back.

    Your missing the ribbon decoupling step, unless you skipped it because it’s such a tight squeeze to get back in.

    William “Zoe” FitzGerald -

    The concept of removing the square panels that the knobs sit on was skipped.

    Station 2Station -

  4. qJg5uZO2UgNXEdkK
    qJg5uZO2UgNXEdkK
    UWtXrjdNVgKYTF2I
    bsTStZcjsFVSPaQa
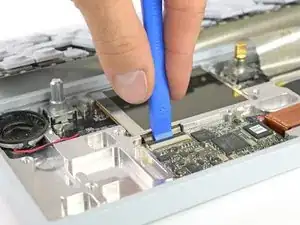
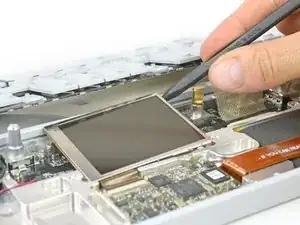
    • Open the display cable connector by using a plastic opening tool to flip the latch upwards.

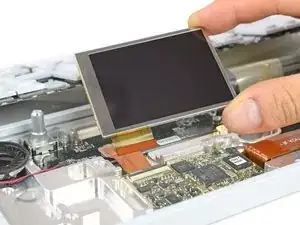
    • The display is held in place with a mild adhesive. A spudger helps you to get it free.

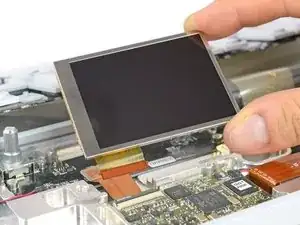
    • Now you can unplug the cable and take out the whole display.

    • After reassembly you want to perform the three function tests (0, 1 and 2) from the OP-1 special start screen. You can enter this menu by holding the COM key when powering up.

Conclusion

To reassemble your device, follow these instructions in reverse order.

Tobias Isakeit

Member since: 31/03/14

116775 Reputation

13 comments

It is really helping.

do you know where to get the screen?

thank you.

chefshin -

I see that the part # is AMS260CM61 ver 2 by Samsung. However, I have not been able to source it online.

Mike -

Hey guys,

Can someone from IFIXIT please let us know where we can buy the screen please.

my screen is cracked and i desperately need to replace it.

Thanks!

Jack -

Hi Jack, unfortunately we do not know where to get a replacement screen for the OP-1. You might want to get in contact with the guys from Teenage Engineering directly. Sorry

Tobias Isakeit -

Jack, look for “part number 74-x000045”, there are few of them out there. Cheers.

Peter O -
What about the new rev 2.0 op-1

Can you source those screens ?

Newer push in connection.

Or anyone got the specs or compatible part number ?

Yes, also messaged t.e

Gadget -

It appears there are three versions of the screen as of 2021-03-10; I cannot currently confirm if ver. 2 or ver. 3 are accurate, but will update in about a month when I receive a ver. 2 if they are not accurate:

ver. 1 : 74-x000045, can be currently found on eBay ; this version is the one is shown in the example

ver. 2 : AMDM001, will need to purchase from LCD-focused or bulk electronics sites such as enlcd; this one has a connector piece on the ribbon to snap onto the circuit board, and is smaller than 74-x000045; it is NOT interchangeable with ver. 1

ver. 3 : AMEJ006D, even worse scarcity than ver. 2, only found one listing on eBay, none from LCD-focused or bulk electronics sites; looks similar to ver. 2; it is also NOT interchangeable with ver. 1. However, it looks similar to ver. 2, so it MIGHT be interchangeable with ver. 2 — I haven’t been able to test.

Anonymous -

Update: the AMDM001 arrived from lcdperfect, and I can confirm it works correctly with version 2 of the OP-1 (the version with the smaller screen and higher circuit board that the screen connects to).

Anonymous -

This is some valuable information here. Thanks for sharing

Tobias Isakeit -

I just did this and it worked! Thank you for this tutorial.

The original problem for me was a progressive glitching. The screen was kind of readable for a few months but eventually went completely dark aside from a random pixel or two.

I ordered my replacement screen from from this seller on AliExpress. The first screen didn't work but thankfully they had free returns and all that was lost was a few months of slow shipping time. ;)

Of note: Your replacement screen might be flipped upside down. Don't worry. Restart your OP-1 while holding down the COM button and it will prompt you to flip the screen by hitting Shift-4.

One thing I noticed that might help people squeeze some new life out of an old screen: When I was replacing the screen I decided to carefully peel the sticker connector off the back of the old screen. I reconnected it one last time and... it started working again. Albeit with some slight ghosting. If your screen seems otherwise dead, maybe give that a try as a last resort.

Elling Lien -

How to order display please i need to fix it

pon mani -

Hello, I dont see where to buy the display? It is available for buying?

TOMI LEBRERO -

Hello, It´s possible buying a screen of OP 1? Thanks

TOMI LEBRERO -