Introduction
Use this guide to safely remove and replace a worn out or dead battery in a Steam Deck LCD.
For your safety, turn on your Steam Deck and allow the battery to fully discharge before starting this procedure. A charged lithium-ion polymer battery can be very dangerous if accidentally punctured. Heating a charged battery is a fire hazard. If your battery looks puffy or swollen, take extra precautions.
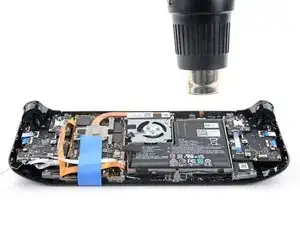
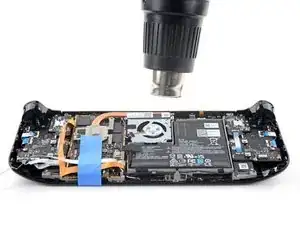
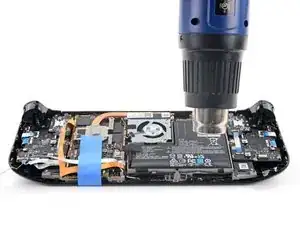
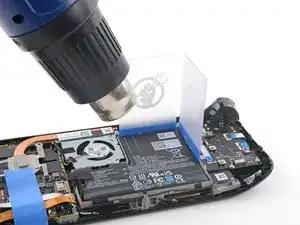
Note: The Steam Deck's battery is strongly adhered, requiring repeated heating and prying cycles. The heat produced by an iOpener may not be sufficient to loosen the adhesive, so a heat gun (or, alternatively, a hair dryer) is recommended for this procedure.
Remember: follow general electrostatic discharge (ESD) safety procedures while repairing your device.
Don't reuse the battery after it's been removed, as doing so is a potential safety hazard. Replace it with a new battery.
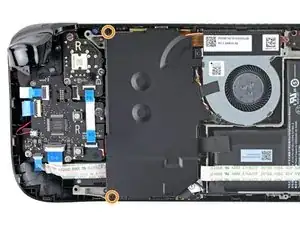
Note: Valve started shipping Steam Deck LCDs with refreshed internal designs in early 2023. Your Steam Deck may look different than the one depicted in the photos, but the procedure is very similar. Remove the back cover to check what version you have. An original Steam Deck will have a metallic motherboard shield and a fan with square sides, as seen here. A refreshed Steam Deck will have a black motherboard shield and a fan with curved sides, as seen here. Find Steam Deck OLED guides here.
-
-
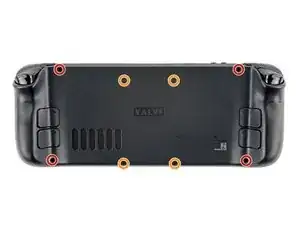
Use a Phillips driver to remove the eight screws securing the back cover:
-
Four 9.5 mm screws
-
Four 5.8 mm screws
-
-
-
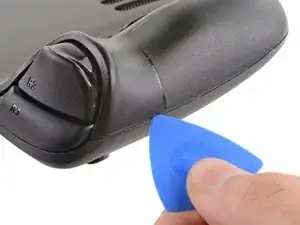
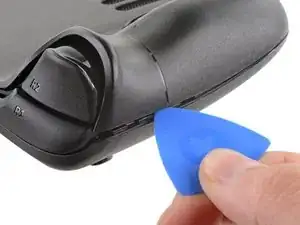
Insert an opening pick into the thin gap between the back cover and the front shell, along the edge of one of the grips.
-
Pry up on the back cover to release it from the locking clips.
-
-
-
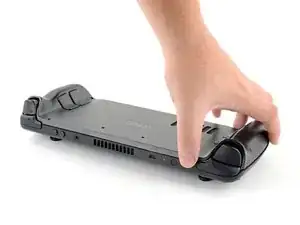
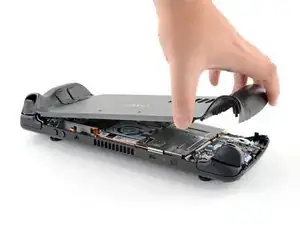
Grip the back cover at the opening you just created and pull it up and away from the device to unclip the long edges.
-
Remove the back cover.
-
-
-
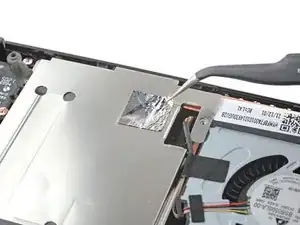
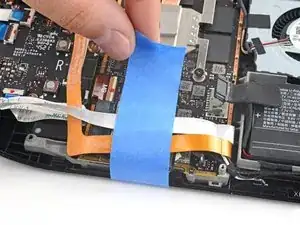
Use a pair of tweezers to remove the piece of foil tape covering the hidden screw on the board shield.
-
-
-
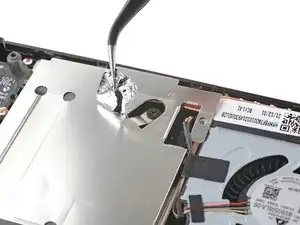
Use a Phillips driver to remove the three screws securing the board shield:
-
One 3.4 mm screw
-
Two 3.7 mm screws
-
-
-
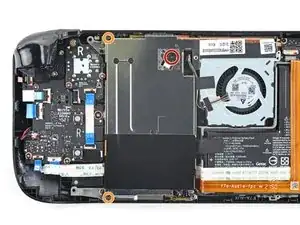
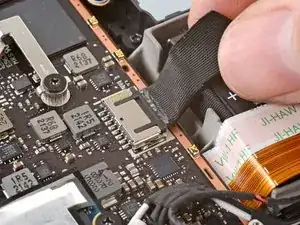
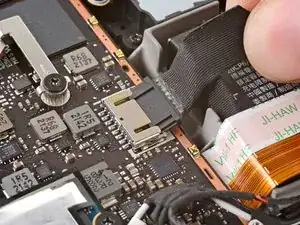
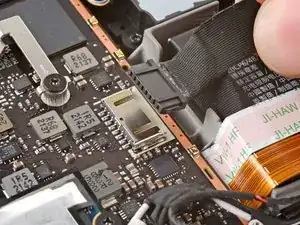
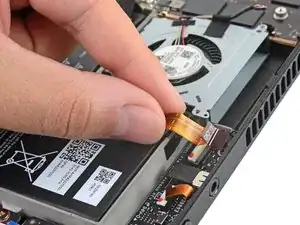
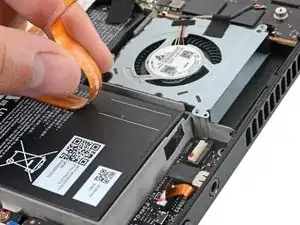
Grip the battery cable by its pull tab and pull it directly away from the motherboard to disconnect it.
-
-
-
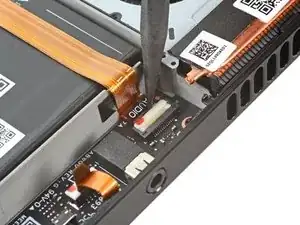
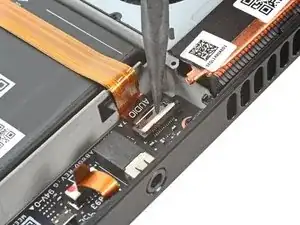
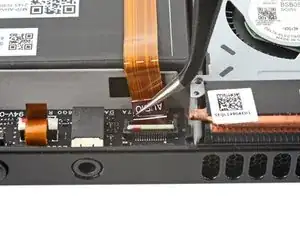
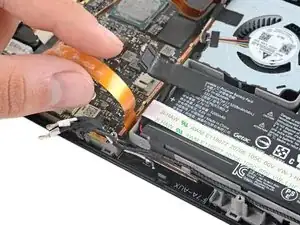
Use the pointed end of a spudger to lift up the small locking flap on the audio cable's ZIF connector.
-
-
-
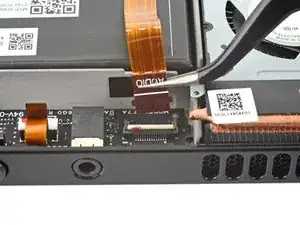
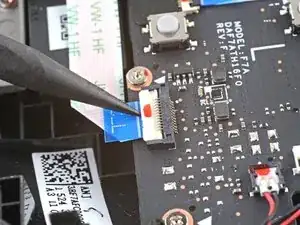
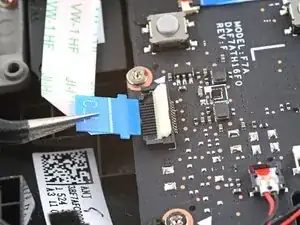
Use the pointed end of a spudger to lift up the small locking flap on the button board cable's ZIF connector.
-
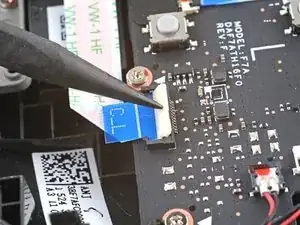
Use a pair of tweezers to slide the cable out of its connector.
-
-
-
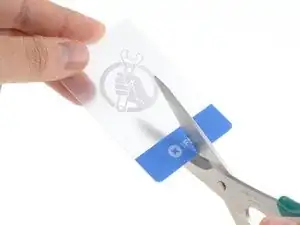
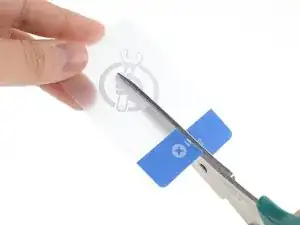
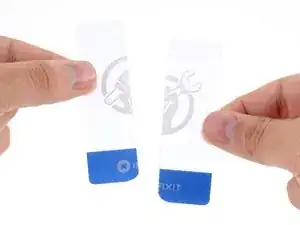
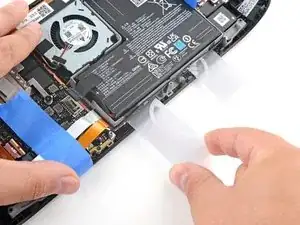
Use a pair of scissors to cut a plastic card in half, longways.
-
Round over any sharp corners, as they could scrape or puncture the battery.
-
-
-
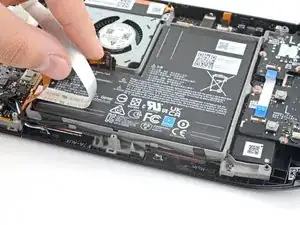
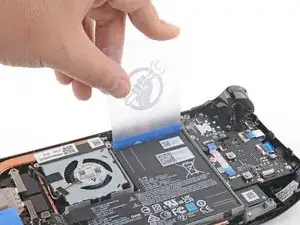
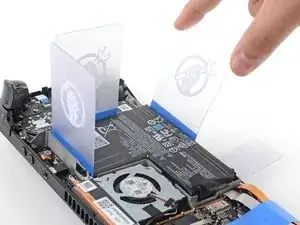
Insert an uncut plastic card between the top edge of the battery and the frame.
-
Insert a second plastic card between the right edge of the battery and the frame.
-
-
-
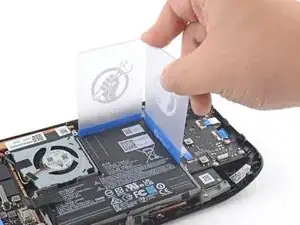
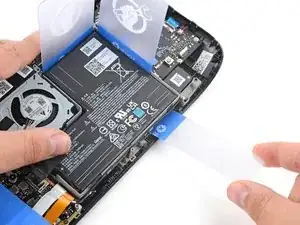
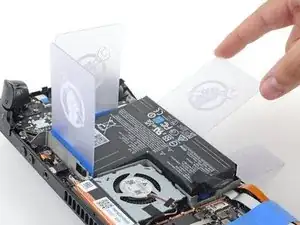
Insert one of the cut plastic cards under the battery near its bottom right edge.
-
Push the card in to slice the battery adhesive, wiggling it side-to-side as you go.
-
-
-
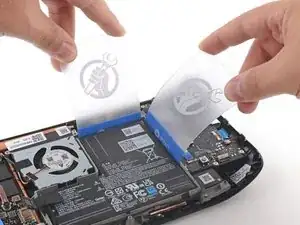
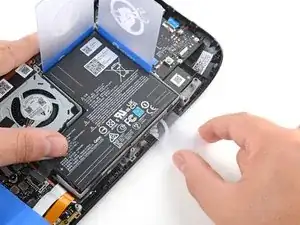
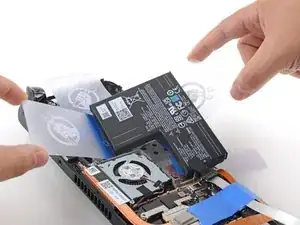
Insert the second cut plastic card under the battery near its bottom left edge.
-
Push the card in to slice the battery adhesive, wiggling it side-to-side as you go.
-
-
-
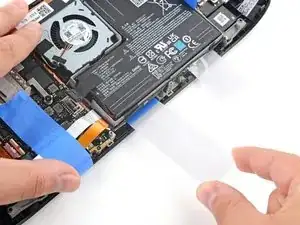
Insert a plastic card along the bottom edge of the battery to pry the battery away from the frame.
-
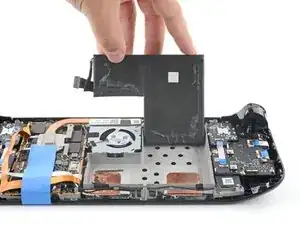
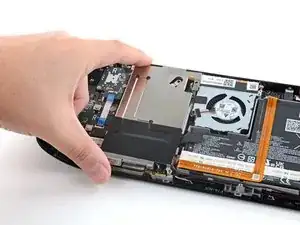
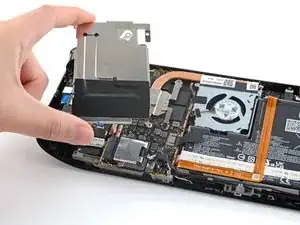
Lift the battery up, away from the Steam Deck to fully separate it from all adhesive.
-
If you're having trouble, repeat the heating and prying process around all edges until the battery becomes loose.
-
-
-
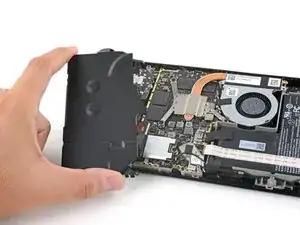
Remove the battery.
-
Dampen a lint-free cloth with some isopropyl alcohol (>90%) and use it to remove any remaining adhesive from the battery well. Don't use too much—avoid dripping any through the cutouts in the frame.
-
Peel and discard one side of protective liners on the new adhesives and apply them to the new battery, using your old battery as a reference for where they should adhere.
-
Peel and discard the remaining side of adhesive liners. Lay the battery in place and press firmly.
-


To reassemble your device, follow these instructions in reverse order.
Take your e-waste to an R2 or e-Stewards certified recycler.
Repair didn’t go as planned? Try some basic troubleshooting, or ask our Steam Deck answers community for help.

9 comments
Is it safe to apply small amounts of >90% isopropyl alcohol under the battery to loosen the adhesive bond? Or would that drip into the screen or other components and potentially cause damage?
Your mileage may vary. Isopropyl alcohol may be an effective method to loosen the adhesive, but you run the risk of excess leaking onto or into the display or other components, due to the cutouts on the battery tray. Your second sentence is spot-on, hence the recommendation to carefully use heat instead.
Why couldn’t they of used pull tabs for the adhesive so this process would not be so difficult and tedious. It would also be less risk of over heating the battery/steam deck or puncturing the battery. This is really the only design choice I can criticize of the steam deck. Pull tabs would of made this a repair the average person could achieve.
I feel like patience is everything in this scenario I mean. Just take your time and relax & it will all be ok ! When dealing with particular situations like this just take you're time simple as that I promise. Especially, since Ifixit.com has some of the best guides EVER!!
It seems crazy to me that they made this process so difficult, surely battery is one of (if not THE) most common things that you'll need to eventually replace? I suppose they must have been limited by what they could achieve?
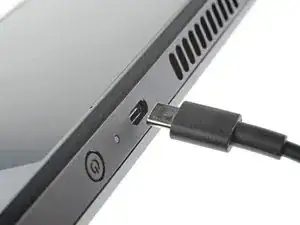
If your Steam Deck won't charge or turn on, you might need to disconnect your battery and then plug it back in.
I thought my battery had gone completely dead but when I plugged the battery back in, the Steam Deck would then accept a charge.
My Deck wouldn't accept at charge or respond at all prior to disconnecting the battery.
Make sure to try this trick before completely removing your battery.
Thanks iFixit for making these guides.
Duane Degn -