Introduction

This guide helps users to remove a fan, which leads the user of the steps to remove and replace the fan of the laptop.

  1. VIUVoWN2VNwtGQM6
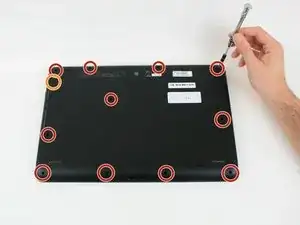
    • Unscrew the eleven 6 mm screws from the back panel on the bottom of laptop with the Phillips #0 screwdriver.

    • Unscrew the one 4 mm screw from the back panel on the bottom of laptop with the Phillips #0 screwdriver.

    • 6 mm screws marked in red, 4 mm marked in orange

  2. YWU2tnmXXTXxML5u
    YWU2tnmXXTXxML5u
    oQLpeK626raRiwgI
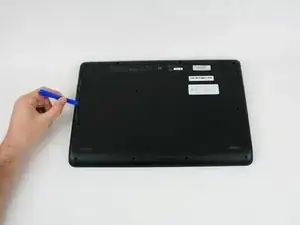
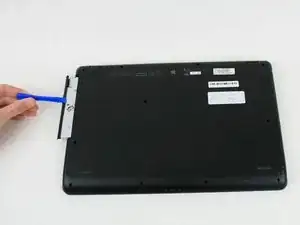
    • Using a plastic opening tool, pull the optical drive out of the computer by the seam.

    • In reassembly, slide the optical drive back in after reapplying cover.

    Debajo de la unidad óptica quedan tres tornillos que ajustan la cubierta en esa zona.

    nictalope -

  3. B5pufo3OmjGraspC
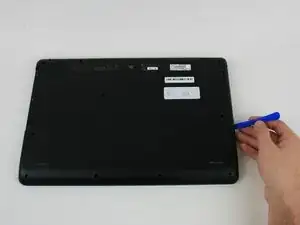
    • Run the opening tool along the bottom cover seam.

  4. UqpmYQSXGjrkYFpR
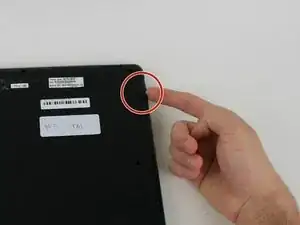
    • Lift the clip marked in red in order to release the back cover.

    • Lift the back cover.

  5. AUkSjjtCOLKwMWxQ
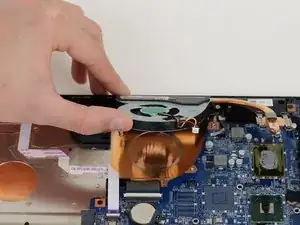
    • Unplug the clip (red black yellow wires) by pulling it in an upward direction.

  6. SJgX2RlnIeFA4KQK
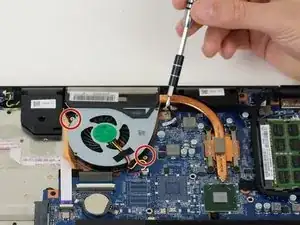
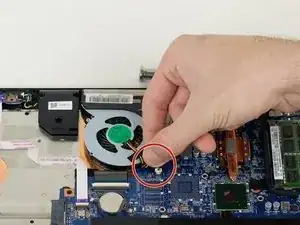
    • Remove two 4mm screws on the left side of the circular fan.

    • Both of these screws have a white washer attached.

  7. uSDUciahFXxhfuer
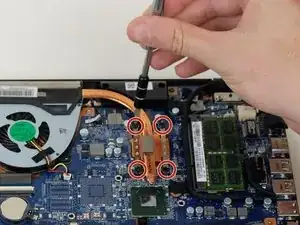
    • Unscrew the four 4mm screws from the connecting copper piece. The two screws are located on either side of the copper piece.

    • The 4 mm screws won’t come out but the fan will, the screws are just to hold the fan in place.

  8. QbbuSYCIsM3CpZUd
    QbbuSYCIsM3CpZUd
    KLHJ3OMQkEWEaELL
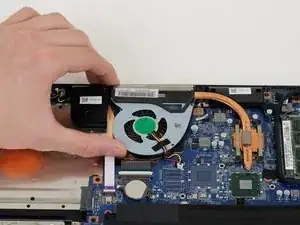
    • Gently pull off the fan from the motherboard.

Conclusion

To reassemble your device, follow these instructions in reverse order.
qiuhong Li

Member since: 04/10/18

109 Reputation

0 comments