Introduction

  1. vxCS62imcbAOF1pJ
    vxCS62imcbAOF1pJ
    2S2O4MmrIQVkb2Zq
    aTLwqxnxWNlnGhQa
    • Slide open the battery cover in the direction that the arrows on device are pointing.

    • Flip the blue battery lock to eject the battery.

    • Remove the battery from the device.

  2. GDdoZgfRwEDfL4Ev
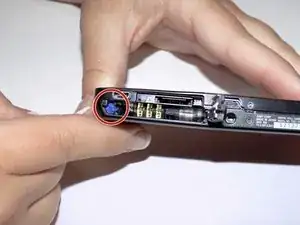
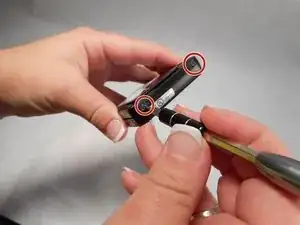
    • Using your Phillips #00 screwdriver, remove all four 0.3 cm screws that are located on both ends, as well as the bottom of your Cyber-Shot.

    • Make sure that your screws are placed on a flat, still surface so they do not roll away.

    Did not succeed in using Philips #000, #00 or #0 screwdriver - no grip at all inside the screw heads.

    Finally a small sharp edged flat srew driver made it. Using a low flat plastic bowl (best white) helps not to loose the tiny small parts.

    No Nym -

  3. oyeA4ZuU2XIXGQoB
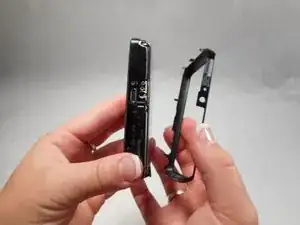
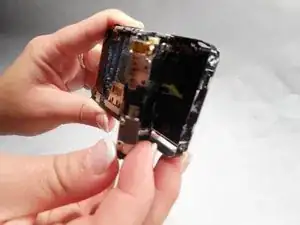
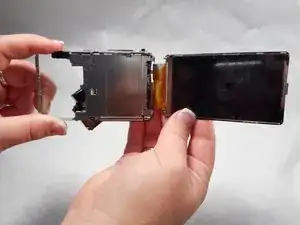
    • Gently pull away the back end of the camera where the LCD screen is located.

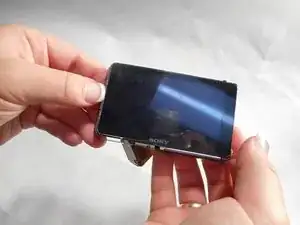
    • Remove the metal frame that is located around the LCD screen.

  4. LlrFQZb5iTdBXTUk
    • Remove the front cover.

  5. vuGMgDGV1ddpsXbS
    • Gently remove the lens from the device.

    • The lens will hang on by the orange strips, be careful not to tug on the lens.

    The lens assembly is very compact and rather "heavy" and will loosen easily. Take care it may fall out - if not fixing by fingers or via adhesive tape - when turning the camera body to access the display and then heavily will pull on the flat orange electrical connectors.

    For display exchange the optics unit mainly may stay (loosely) on its place.

    No Nym -

  6. VepJNSObmQBkhvKb
    VepJNSObmQBkhvKb
    Ol2RULNDvGTfVpsC
    • Gently slide the LCD screen using very light pressure to the right until it pops open.

    After step5 and before step6 the small plasic/metal compound inner cover of the display cables (at the right camera side when looking on the display as shown) need to be removed (may be it will fall out by its own, even if 'fixed' by four plastic noses at all 4 corners). Note or remember orientation of this part for reinsert at assembly later. Plastic is in same color as metal housing even if not to be seen after assembly.

    No Nym -

  7. 15xRPXmUHYMQKlGg
    • The LCD screen will open to the right.

    • Remove the orange tab from the device.

    Be aware that the losely attached metal strip with the colored buttons for zoom on/off and release may fall off at all these activities after the front and rear part of the body are away. May be actively taken off for placing back at reassembly.

    The two orange flat cable connector cannot be taken off before removing the black u-shaped adhesive strip that is fixing them at some other parts to keep the cables flat enough for reassembly.

    Removing this strip needs care (can break, but will be needed later) patience and a tweezer. Best hold down parts from which pulling it off with finger or little stick (Q-tip).

    For pulling out (strongly fixed) cables from connectors pull up the plastic lever on the rear side of the plate using thumbnail (lift about 0.5mm away from plate). As well make this lifting when reinserting the cables. I recommend taking off small cable first an inserting small cable last to avoid cable damage if display may move away.

    No Nym -

Conclusion

To reassemble your device, follow these instructions in reverse order.

Megan East

Member since: 13/10/15

555 Reputation

0 comments