Introduction

  1. QQjwBGADeDiqSVuN
    QQjwBGADeDiqSVuN
    Ivtj5JcRFdp3rySu
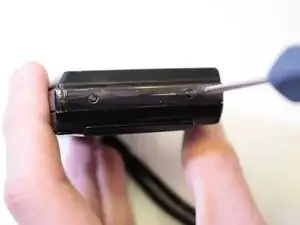
    • There are 4 screws total holding the outer shell of the camera. One on each corner. To reach the bottom two, you have to slide the camera cover up. Vise versa for the top two.

    • Make sure to remove the battery before taking the camera apart.

  2. Xsxg6Qkmbt1Fj6Tw
    Xsxg6Qkmbt1Fj6Tw
    OWJ6aSSDBEXHGPKU
    • Separate the front and back housings carefully.

    • Be careful not to pry it apart as they are connected together by the LCD ribbon cables.

    • Once you have separated the two housings unplug the LCD ribbon cables.

    • There should be three. One big one and two small ones

    • Remove the LCD screen from the housing.

    • You'll have to carefully lift the internal components of the camera in order to remove the LCD screen.

Conclusion

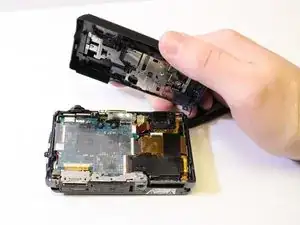
To reassemble your device, follow these instructions in reverse order.

Chelsea Vitone

Member since: 21/01/15

213 Reputation

0 comments