Introduction

  1. ZJflBPTMEqyWujYq
    ZJflBPTMEqyWujYq
    WGWlAsdl6Ix5Osy1
    VHibyyCUfTNDKhNR
    • First locate the appropriate screws for detachment.

    Hi, is this fórum working yet?

    I need tô replace my Sony P100 infernal batery.

    Leonardo -

  2. m5M5VL1iXmIbr53V
    • Remove the five screws shown using a Phillips #00 Screwdriver.

    • It is important to put the small screws in a safe location in order to reassemble the casing.

  3. TJ5tAxZiLRaxmETX
    • Using a spudger, carefully pry open the front casing.

  4. gMXKvZEWfr2mb24g
    gMXKvZEWfr2mb24g
    AH6CIFSsfKAb2QkL
    • Carefully separate the front casing from the camera body.

    • CAUTION: Be careful not to break the wire connecting the front casing and the camera.

  5. tVRQIwUNaf4HbjC5
    tVRQIwUNaf4HbjC5
    qJPvYDKJX3fowyxW
    vHqHmUBtMfgKe6tO
    • Remove the four screws from the casing.

  6. YHYSJhBlkV3xOUhL
    YHYSJhBlkV3xOUhL
    tRSvvCDAoXquGSd1
    • Carefully pull the back casing away from the camera.

  7. Jlt4VRXrvvxcuCDB
    Jlt4VRXrvvxcuCDB
    U1pmIydM1phoxq1x
    • Remove the two screws on the back side of the camera surrounding the LCD screen.

  8. EoWsmGYMiCSOYxTE
    EoWsmGYMiCSOYxTE
    AgxmApfMfAUgQGLW
    fW5DU12KoA5FXOBF
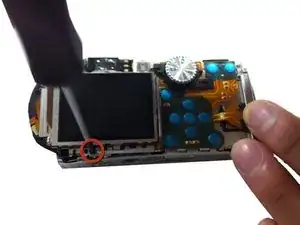
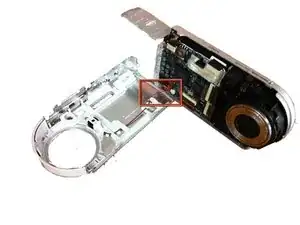
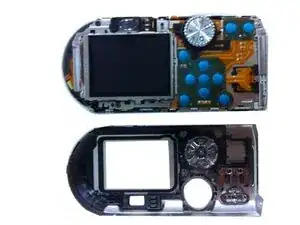
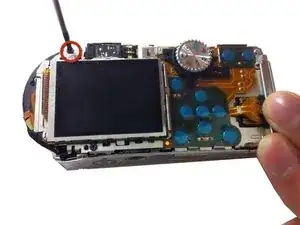
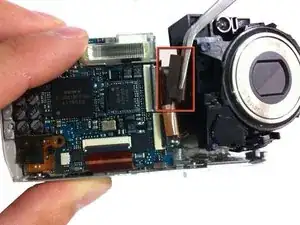
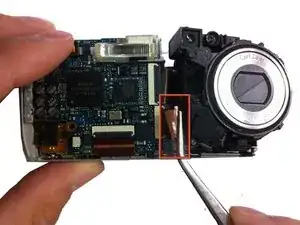
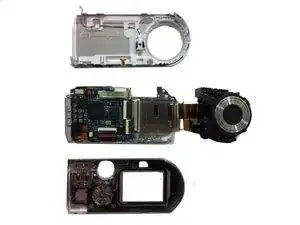
    • Remove the two ribbon traces found on the left side of the lens on the front of camera holding the lens in place.

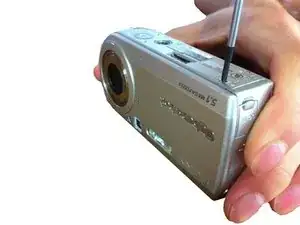
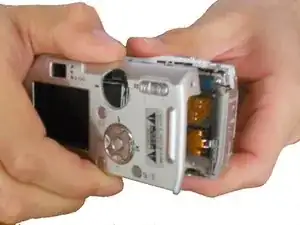
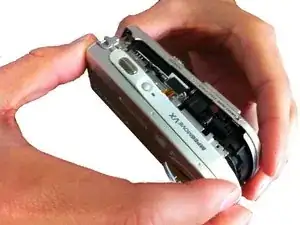
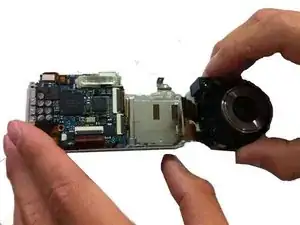
    • Carefully pull the lens away front the camera until it is released.

  9. dmxGMOuZI1TYfrHc
    • The lens is now successfully removed from the camera.

Conclusion

To reassemble your device, follow these instructions in reverse order.

Katie McCraw

Member since: 09/03/12

191 Reputation

One comment

Is there a way to disassemble the lens to correct the alignment. My daughter dropped it and I think the mechanism has been misaligned.

Macjune Tolentino -