Introduction
In the event of a damaged LCD screen, the only option may be for you to replace it. The following guide will take you step by step through the process.
Tools
-
-
Before disassembling any part of the camera, turn off the power by pressing down on the ON/OFF button. The ON/OFF button is located on top of the camera.
-
-
-
Open the compartment located at the bottom of the camera. Slide the LOCK/OPEN switch to the OPEN side. Locate the small blue tab on the side. Pull it in direction away from battery. Remove the battery and set it aside.
-
-
-
Flip LCD screen upwards.
-
Use the PH000 Phillips head screwdriver to remove the two 0.3 mm Phillips black screws located on the sides of the LCD screen. Place screws on magnetic mat or plastic bag.
-
-
-
Use the PH000 Phillips head screwdriver to remove the two additional 0.3 mm black Phillips screws located on the top edge of the LCD screen. Place screws on magnetic mat or plastic bag.
-
-
-
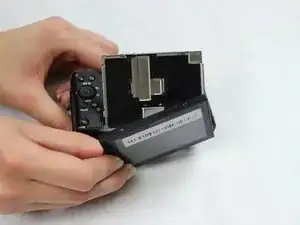
Use a nylon spudger to gently remove the damaged LCD screen off the camera.
-
Replace LCD screen with new one.
-
To reassemble your device, follow these instructions in reverse order.
6 comments
You should note that there is a small rectangular magnet (perhaps 8mm long and 2mm across) that has to be placed at the top of the LCD directly under the flash switch. Otherwise the LCD image will be upside down.
Hello could you show a picture of where exactly under the flash has to be the magnetite tangle. Thanks.
Wolfina -
Anyone know where I can find the cable from the screen to the camera?
where can i find the screen other then threw sony


