Introduction

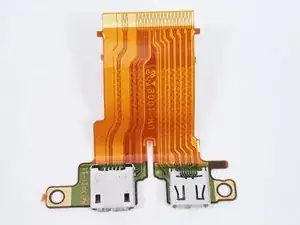
If your computer does not register that the Sony Cyber-shot DSC-HX300 is plugged in then the HDMI/USB ports may need to be replaced.

  1. rmRkqHdhkT5gsVPa
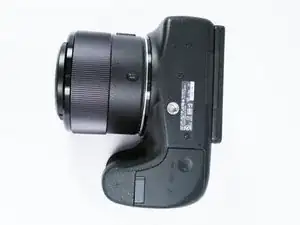
    • Make sure the camera is powered off

    • Turn the camera upside down. This is a view of the bottom of the camera.

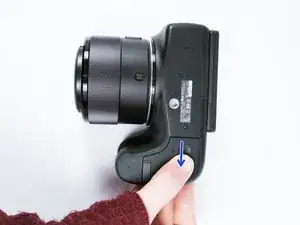
  2. GJFfowSxJqjSOXgX
    • Push battery cover away from the camera.

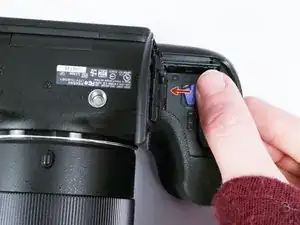
  3. j53NWvlPAILl5SIl
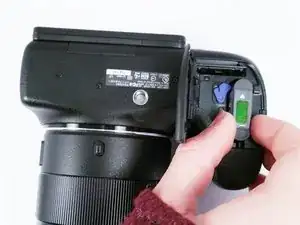
    • Push the blue tab that secures the battery. The battery will then spring out.

  4. kRj5atjCPjoiIZAq
    kRj5atjCPjoiIZAq
    vJqcNerElWWyDPAF
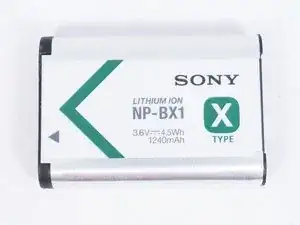
    • Remove the battery.

  5. nYxMIs5HMXNSQ4MD
    nYxMIs5HMXNSQ4MD
    mgiMiV1DJvIBgnjh
    sUUvu6PNaLEBpwqk
    • Make sure to remove the battery before disassembly to prevent electrocution.

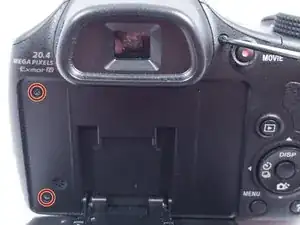
    • Remove the 3 (4 cm) Phillips head screws located on the back of the camera.

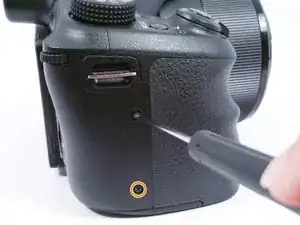
    • Remove the 2 (4 cm) Phillips head screws on the right side of the camera.

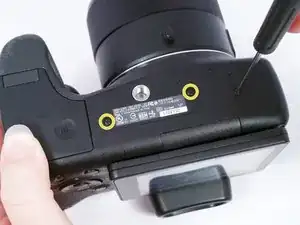
    • Turn the camera upside down to remove the remaining the 3 (4 cm) Phillips head screws holding the plastic camera housing together.

  6. XgiU5ZZasdrkhujH
    XgiU5ZZasdrkhujH
    ARubjDMkIC3rMSfM
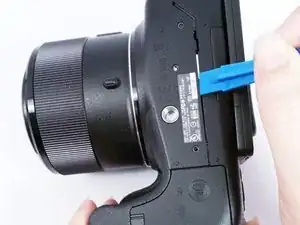
    • Using a plastic opening tool, separate the plastic camera housing.

  7. NOGQPSwJJWTJZwby
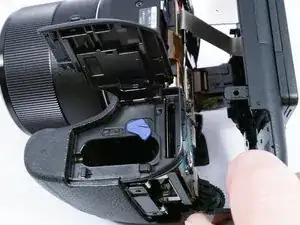
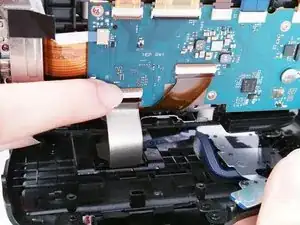
    • Disconnect the ribbon wire attaching the screen to the camera.

  8. j5ByGgpmTNPXRYmZ
    j5ByGgpmTNPXRYmZ
    vVc1QloImWJvKDZ2
    eDCbNuLIUpCmsIUK
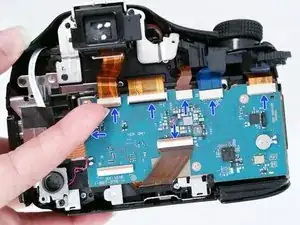
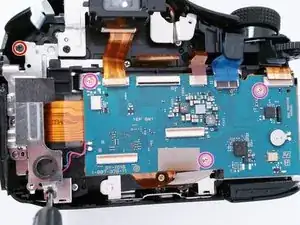
    • Carefully remove the 7 ribbon wires connected to the mother board.

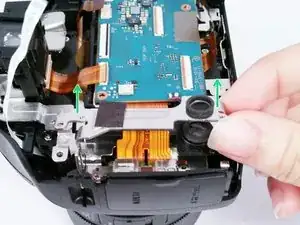
    • Remove the 2 (5 cm) Phillips head screws on the speaker mounting bracket.

    • Remove the 3 (4 cm) Phillips head screws that secure the motherboard to the camera.

    • Lift up on the speaker mounting bracket to remove it.

  9. rW53snhAbZbIS4FW
    rW53snhAbZbIS4FW
    agHwdBPdWgjtsHlv
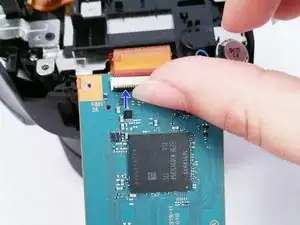
    • Carefully disconnect the ribbon wire connecting the HDMI port to the Motherboard.

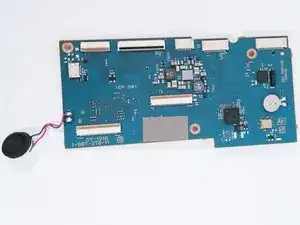
    • Once the Motherboard is removed the replacement can be installed.

    Would you know how do I remove the lens parts? My zoom is broken and I can find new parts on ebay, but I don't know how to remove and replace it. Thanks!

    flaviowolff -

  10. PCigrMGaUVbqsZHB
    • Remove the 3 (4 cm) Phillips head screws securing a mounting bracket over the HDMI/USB Port.

  11. NG2WXitNhXPDQ5EB
    • Lift up on the mounting bracket to remove the HDMI/USB Port from the camera.

  12. PNr4ootWPHkJkGxH
    • Once the HDMI/USB Port is removed the replacement can be installed.

Conclusion

To reassemble your device, follow these instructions in reverse order.
Elizabeth Surface

Member since: 27/08/15

1465 Reputation

0 comments