Introduction

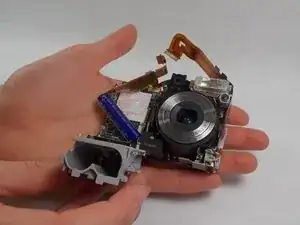
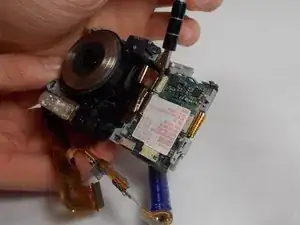
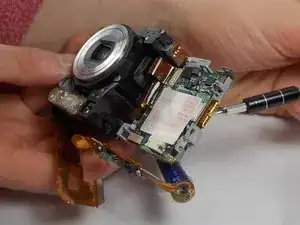
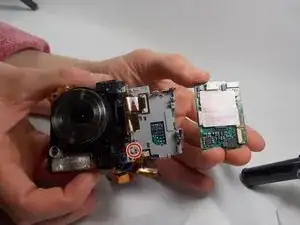
This 22 step guide to replace the Sony Cyber-Shot DSC-S90 flash is considered to be moderately difficult and take on average 30 minutes to complete. To reach the flash, a disassembly of the majority of the camera is required. This includes removing the battery terminal as well as the mother and daughter board which then gives the user the access to unclip the flash. The only tool needed is a J00 screwdriver.

  1. dLZf1uoaQpyca2xa
    dLZf1uoaQpyca2xa
    FUbhZtAb3L6lsas4
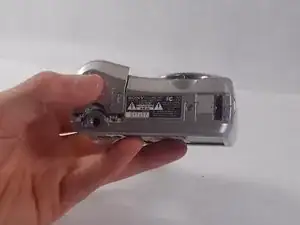
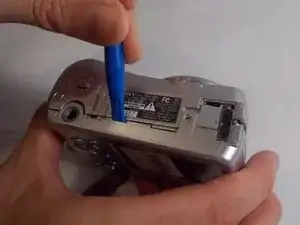
    • Hold down the "open"button (gray oval with arrow pointing upwards) on the battery port door.

    • While holding the button downwards, slide the door upwards to unlock and open the door.

  2. 4VSmARAveLBFj2w2
    • Pull open the door and allow the batteries to fall out.

  3. stNDBTL65OVtfEPt
    stNDBTL65OVtfEPt
    TNjYYHLMVjoLxe1l
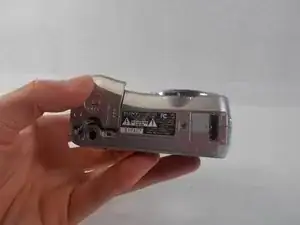
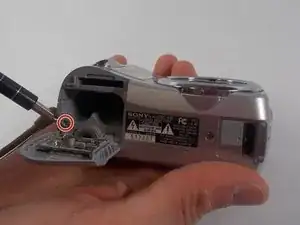
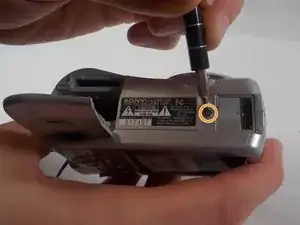
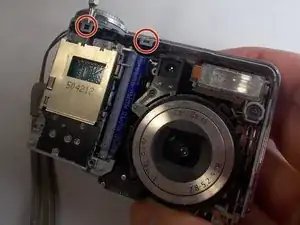
    • Remove the 2mm Phillips #00 screw under the battery port door.

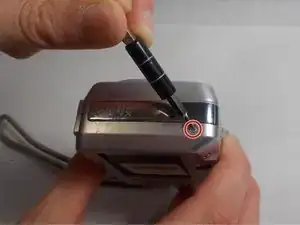
    • Remove the 2mm Phillips #00 screw towards the right of the bottom-side of the camera.

  4. L6GfVbRqUxUYqDnU
    L6GfVbRqUxUYqDnU
    XpJw5iavKBOxFRfK
    • Remove the two 2mm Phillips #00 screws (one on each side of the camera).

  5. KtPRnGk31tKmaY3f
    KtPRnGk31tKmaY3f
    iQbEGgaCWTK4ikIE
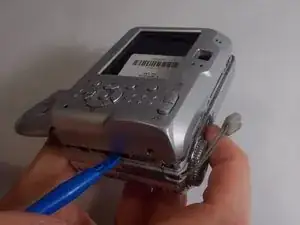
    • Use an opening tool to unlock the front case from the main body of the camera. Use the tool on the right side and bottom of the camera with the LCD screen facing you.

  6. qoFIoKjdGQrjpSRh
    • Pull apart the back case from the main body of the camera.

  7. 6ikKbfSMCUV1SmJq
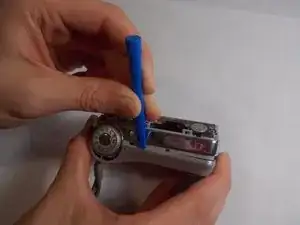
    • Use an opening tool to unlock the front case from the main body of the camera. Use the tool on the top of the camera.

  8. aeP4uUh23Ek1FCc1
    • Pull apart the front case from the main body of the camera.

  9. tivgtQvaflUrZdE3
    tivgtQvaflUrZdE3
    ZTGBFPNwGUYH5hbS
    KSKcVmb2gG2xKoSO
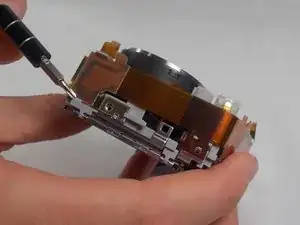
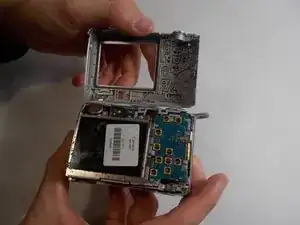
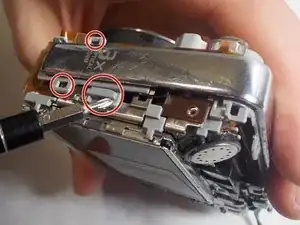
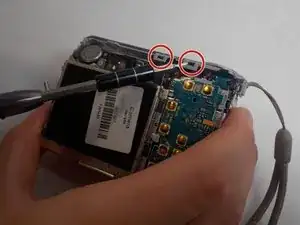
    • Release all clips and latches keeping the casing in place using a spudger, opening tool, or screwdriver.

  10. PULdehqLoRIFcpZX
    • Now the casing can be removed after all latches have been undone.

  11. NllXikaLEq1mQxnX
    NllXikaLEq1mQxnX
    LW6lFQVd4GdmODpV
    W3oW1lFfwZJk1qmO
    • Disconnect the ribbon cables on top of the battery terminal using a spudger or screwdriver.

  12. SeXPpJifZJOUxwSO
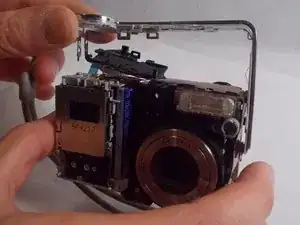
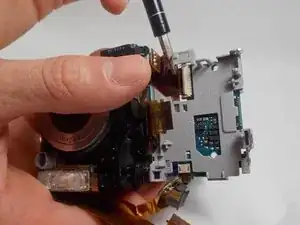
    • Disconnect the remaining ribbon cable on the side of the camera using a spudger or screwdriver.

  13. rSlhhJxqkPrfCYMD
    • Use a spudger or screwdriver to unhinge the clips. This releases the battery terminal.

  14. RtdyY4siqJUlaSF6
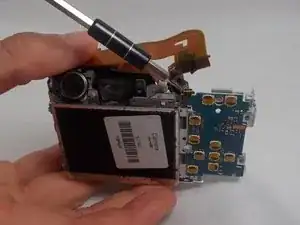
    • Once the battery terminal is unclipped, pull this ribbon cable out with a spudger or screwdriver to finish freeing the battery terminal.

  15. ljmGAm1Mf6CA1WIi
    • Now the battery terminal can be separated from the main body of the camera.

  16. UOQ3JVw3pkRtAaiH
    UOQ3JVw3pkRtAaiH
    y2VplR1BSPWFJICM
    lHMGFWoMRCgOPPZ2
    • Disconnect the three pictured ribbon cables using a spudger or screwdriver.

  17. MKK3gSNmEAZaq1xJ
    • Push the clip to the left and lift the motherboard upwards and away from the camera.

  18. jMM6bw1lTtLDA1wN
    jMM6bw1lTtLDA1wN
    E3VNkkkoMqNTQSys
    • Disconnect the two ribbon cables using a spudger or screwdriver.

  19. LXGlUDH5weIfTdFt
    • Unlatch the clip and lift the motherboard upwards and away from the camera.

  20. GYJiXavThAFisQOg
    GYJiXavThAFisQOg
    fVHMVvJ5ZndAcMJm
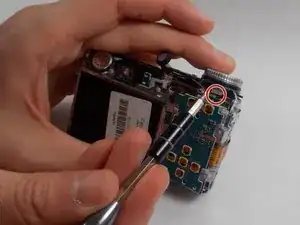
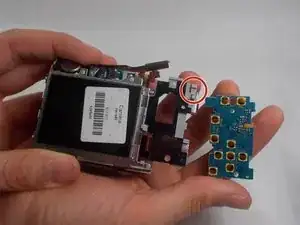
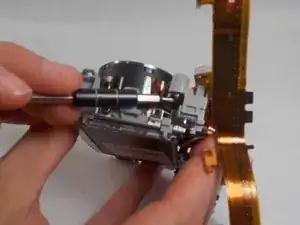
    • Release the clips on either side of the connector/ribbon cable using a spudger or screwdriver.

  21. c1FoGxd1nKKe5eWm
    c1FoGxd1nKKe5eWm
    FwAKOEq3nPImr5dP
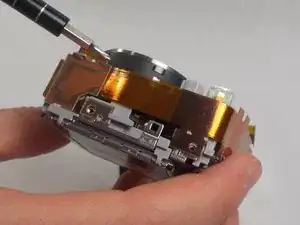
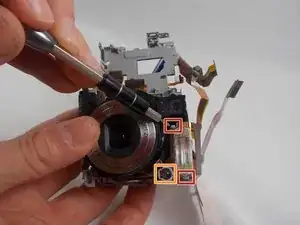
    • Release the two clips next to the flash using a spudger or screwdriver.

    • Release the clip holding the LED indicator in place using a spudger or screwdriver.

    • Push the LED indicator upwards from below using a spudger or screwdriver.

  22. NW5BRgOdRHAbnhUL
    • After all clips have been undone the flash is free to be removed/replaced.

Conclusion

To reassemble your device, follow these instructions in reverse order.

Jonathan Arns

Member since: 28/10/19

745 Reputation

0 comments