Introduction

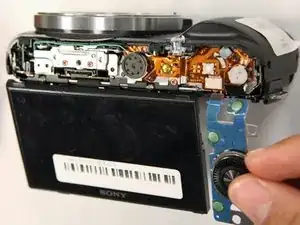
The control wheel is used to navigate through pictures, and can wear down over time, and will need replacement.

  1. OT2x5mgiBbaJLKgC
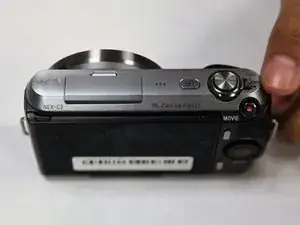
    • Turn the camera off by sliding the power switch.

  2. Yxut4VTDBlLamONy
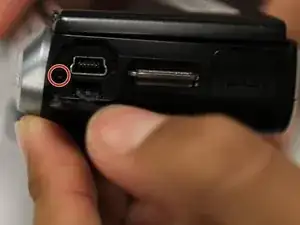
    • Use a Phillips head 000 screwdriver to remove the 4.0mm screw inside the USB port.

  3. pUYTbdNTZxDiU1DU
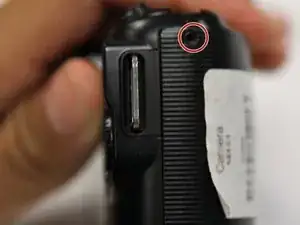
    • Use a Phillips head 000 screwdriver to remove the one 4.0mm screw on the side opposite of the USB port near the shutter button.

  4. bsnwIufU264VZN2G
    bsnwIufU264VZN2G
    OSosmAk6vjdLJQaB
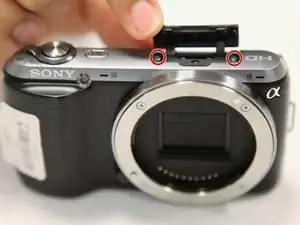
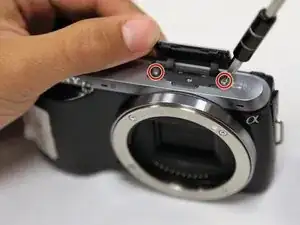
    • Open the flap at the top of the camera.

    • Use a Phillips head 000 screwdriver to remove the two 4.0mm screws inside.

  5. bG1bvlOHmNZq1kyI
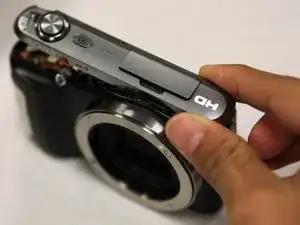
    • Gently lift off the top panel with your hands.

  6. M4gSEWZK4KBbwvIf
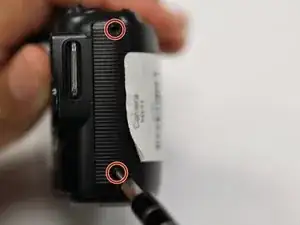
    • Use a Phillips head 000 screwdriver to remove the 4.0mm screw at the side opposite of the USB port.

  7. IvkUhtVTTRgRKSue
    IvkUhtVTTRgRKSue
    Z1cSdCYQwffxXleq
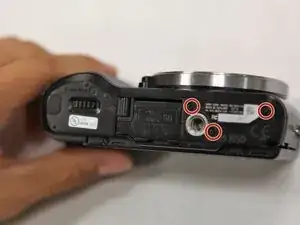
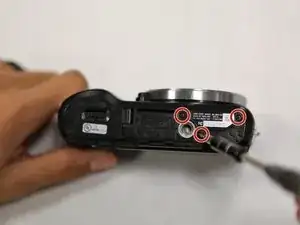
    • Use a Phillips head 000 screwdriver to remove the three 4.0mm screws on the bottom of the camera.

  8. GVOPrRSKcvCAIM3J
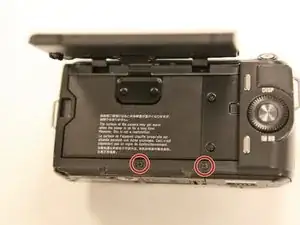
    • Tilt up the LCD screen.

    • Use a Phillips head 000 screwdriver to remove the two coarse 4.0mm screws near the bottom of the camera.

  9. SA4ADvlQiOPpLq6J
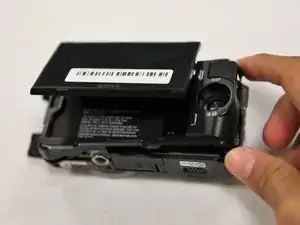
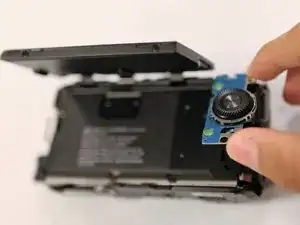
    • Gently pry off the back panel, by wiggling it around the LCD screen.

  10. BXsk5jhQJJ4nwj5q
    BXsk5jhQJJ4nwj5q
    hh6ND131AxCTGaNA
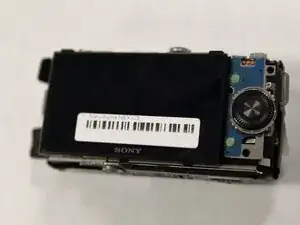
    • Tilt up the LCD screen.

    • Grab the silver plate, and gently pry it up.

  11. Ng6l5W4a1xwxlENI
    Ng6l5W4a1xwxlENI
    O5EdAXkpJJbJIJ1D
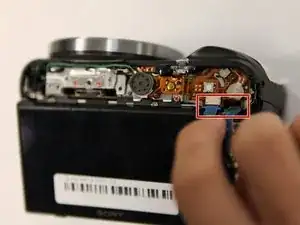
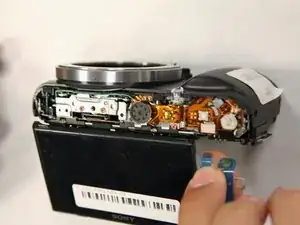
    • Gently pinch blue ribbon cable, and pull it out of the port.

Conclusion

To reassemble your device, follow these instructions in reverse order.
Jonathan Chen

Member since: 17/10/17

690 Reputation

0 comments