Introduction
LCD stands for liquid crystal display, which is a used for displays in different devices. LCD is thinner than the older technology that provides better quality of picture. This guide will successfully show you how to replace the LCD screen of your Sony a6000 camera.
Tools
To reassemble your device, follow these instructions in reverse order.
2 comments
Step 2 makes this repair impossible, the LCD screen is stuck at an angle where it's impossible to get a normal Phillips onto it without stripping the screw. Horribly inaccurate picture of how 'easy' it is to put the screwdriver there. Don't follow this guide.
Saw a bran new a6000 screen on eBay. So, I thought it would be easy to replace the scratched screen from my a6000. WOW was I wrong!
First I would say that step 2 is very hard to accomplish without stripping the screw. You need to pry the screen to get to an angle where it's doable. On my first attempt I striped the screw. I tried it on a second a6000 and successfully could remove the screw.
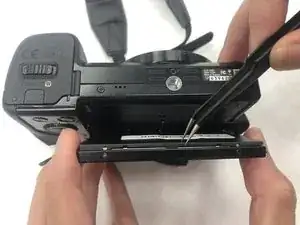
As it wasn't evident to me at first, I think it's important to specify that on step 7 you need to lift carefully the little black flap on the zero insertion force cable connector to unlock it. It's weak and I feel like it would be very prone to breaking.
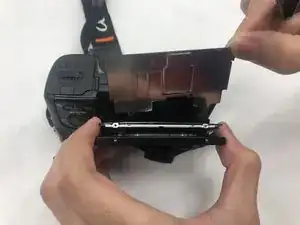
What is NOT showed on this guide is what comes AFTER step 8! The screen is actually in a plastic frame That does not ship with the replacement screen and this frame is glued! So unless you have plastic glue and are able to unglue it first, you should NOT attempt this repair.
Consequently, I reassembled everything and have resigned myself to living with the scratchs.
Drgonz0 -
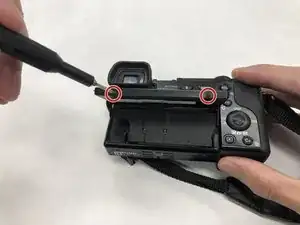
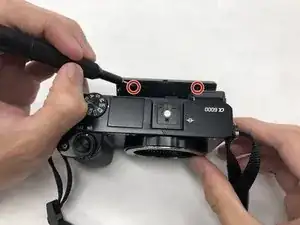
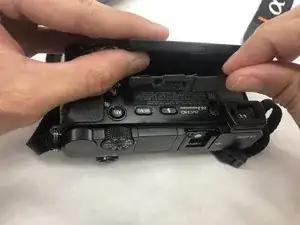
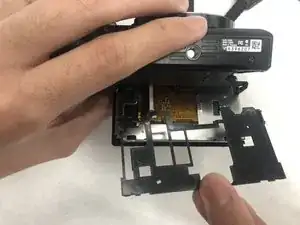
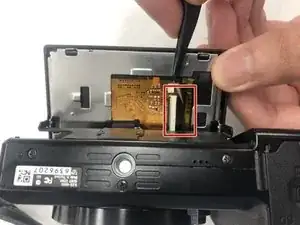
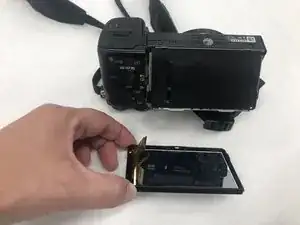
This step is impossible, the LCD screen is stuck at an angle where it's impossible to get the Phillips onto it without stripping the screw. Horribly inaccurate picture of how 'easy' it is to put the screwdriver there.
Rawr Peng -
Same as what I am thinking.
cloud.liu989 -
I'm sorry you had problems with this guide. Just curious if you or cloud.liu989 found another way to access the LCD screen? Did you have to complete a prerequisite guide first or do you have any suggestions or tips? If you have any, we would love the help and will make a note in the guide. Thanks!
Sarah Westberg -
Having just performed a screen change and also found this step confusing I find it relevant to add a bit of information regarding this step. The two screws at the back of the screen are very difficult to reach, as they are about 30mm away from the camera body. Going at it with a screwdriver at an angle is NOT the solution as it will strip the screws. There is just enough place to slide a screwdriver bit in between the screen and the camera body, I was able to get enough torque simply by holding the bit with my fingers. Using pliers to hold and rotate the bit also makes it easier if you are having a hard time getting enough grip.
Pierre Masselot -