Introduction
It happens relatively often that the slider of the toaster no longer stays down, but the heaters still work. On most toasters the slider is held by an electromagnet at the bottom, here you will often find the malfunction: either the coil is defective or the magnet is contaminated with bread crumbs and can therefore no longer hold. This issue can be easily eliminated and the repair is about the same for many toasters.
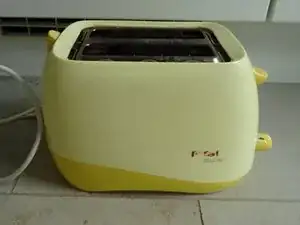
The repair is shown on an old Tefal model 539627.
Tools
-
-
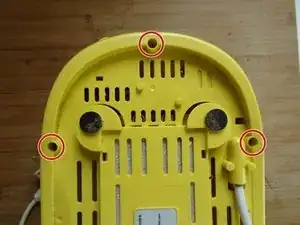
Three of the screws are in the front half.
-
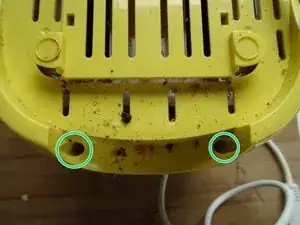
Two of the screws are in the other half under the crumb drawer.
-
Unscrew and remove all screws.
-
-
-
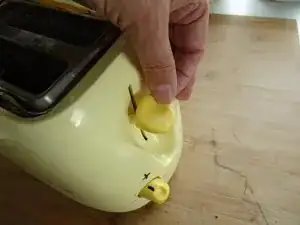
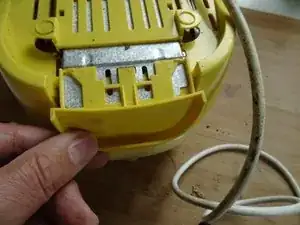
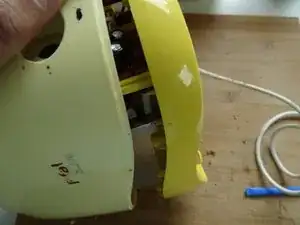
Insert a plastic tool into the seam between the upper and lower part and enlarge the gap all around.
-
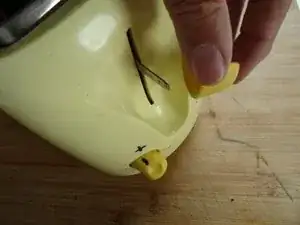
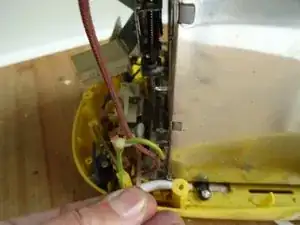
Pull the top off the bottom, paying attention to the axes of the controller and the slider.
-
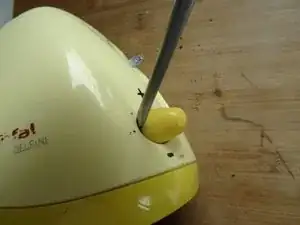
Lift the top off and put it aside.
-
-
-
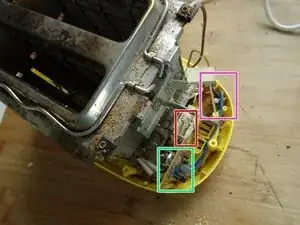
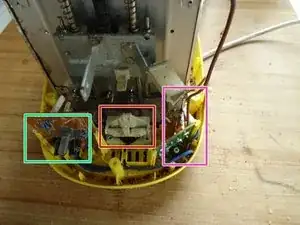
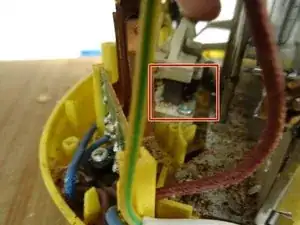
Here are the main internal parts:
-
The contacts for the heating wires. They are switched when the slider moves down
-
The timer. The longer the time, the darker the toast.
-
The holding magnet, it's here where you have to look for the solution.
-
-
-
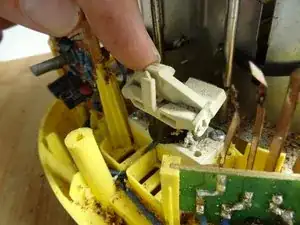
Thoroughly clean the space between the magnet and the iron holder. Use a cotton swab with alcohol.
-
-
-
Insert the power plug and test whether your repair was successful.
-
Pull the power plug again and clean the toaster thoroughly before assembling
-

To reassemble your toaster, follow these instructions in reverse order.
7 comments
Hey super, das klappte!!
Mein Toaster sieht leider anders innen.. schade, das hat nicht geklappt.
Hallo Elke,
es gibt neben den Toastern mit dem Magneten noch eine andere, weit verbreitete Toaster-Bauart, bei dem ein kleiner Haken aus Kunststoff oder Metall den Auswurf solange unten hält, bis ein Bimetall sich entspechend erwärmt oder eine Zeitschaltuhr auslöst. Häufig greifen diese kleinen Haken nicht mehr, und der Auswurf rutscht immer nach oben. Hier hilft in der Regel eine kleine Dreikantfeile oder die Rekonstruktion des Hakens.
Bei einigen Fällen ist aber auch der “Zeitgeber” defekt.
Michael -
The repair is done on an old Tefal model 539627, but is the same for many toasters. Unplug the power cord before repairs
Matthew Newton -