Introduction

This guide will help you to remove and replace the flash lens

  1. nWWunZCYDCOM4Tun
    nWWunZCYDCOM4Tun
    cWFjUCjaMKVyKjTR
    INNm3vJGe4yW3cNa
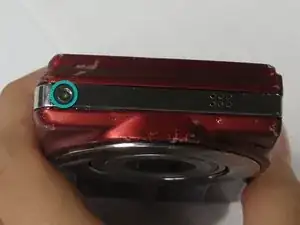
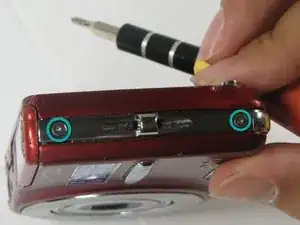
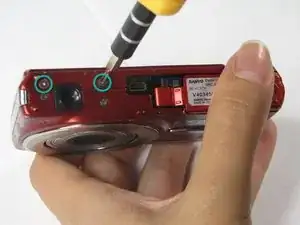
    • Remove the five case screws with a Phillips #00 Screwdriver.

    • Five 3.5mm Phillips Screws

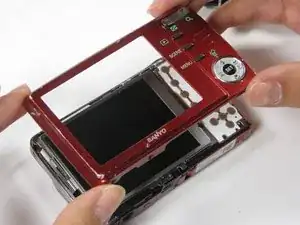
  2. 3fs5LCDPf5yjEOMx
    • Gently lift up the back cover and set aside.

  3. p5lLjhMKSaZdGPox
    p5lLjhMKSaZdGPox
    VDCrvVUs5E23HoKs
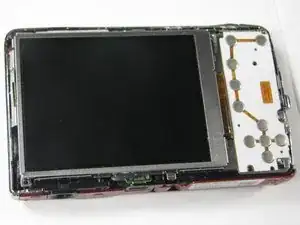
    • Gently lift up on the left side of the LCD and slowly pull it to the left side of the camera but do not remove entirely, there is a ribbon connector.

    • Be careful not to rip out the ribbon connector.

  4. sdVUMOmB61yBPxTK
    sdVUMOmB61yBPxTK
    FdPa4qBglGLuXZnK
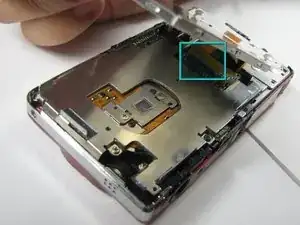
    • To clear the ribbon connection underneath the screen, lift up the black ribbon gate with the spudger.

    • Gently lift ribbon out of the gate and set screen aside.

  5. bJsncoRtfmQ1EPoI
    bJsncoRtfmQ1EPoI
    JmZQbPdmmu2LJOBB
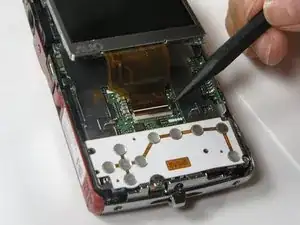
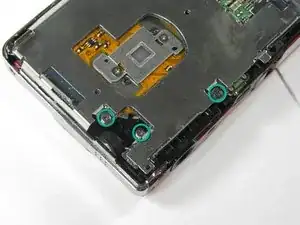
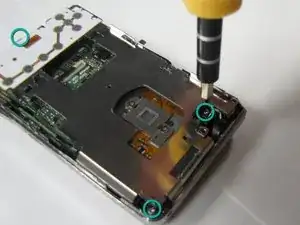
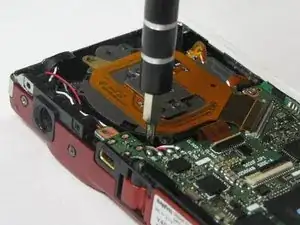
    • There are five screws of three different sizes which need removal.

    • One 4.5mm screw

    • Four 3.5mm screws, one on the button side

    • One 5.5mm screws

  6. lBgdQZI3qCNsPT2V
    lBgdQZI3qCNsPT2V
    VmcBb5IvlTjBufiO
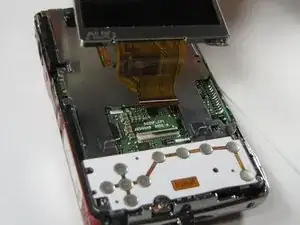
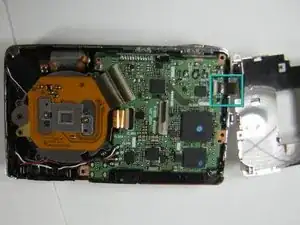
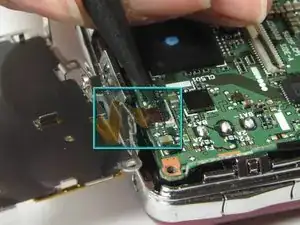
    • Slowly lift metal tray to the right.

    • Be careful not to bend the screw tabs or rip out the ribbon cable.

    • Remove ribbon cable by using the spudger to lift up the black ribbon gate to release the ribbon

  7. GLBeg4y3yc1RuANE
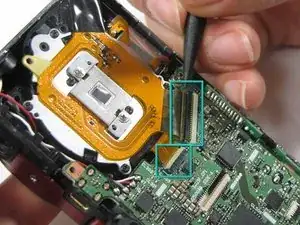
    • Disconnect the two ribbon cables from the lens unit by using the spudger to lift the ribbon gates.

    • One gate is black and another is white.

  8. GfyMf2ZMoM16gjqc
    GfyMf2ZMoM16gjqc
    BpQYKR5D6n1TnN3k
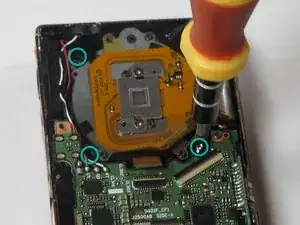
    • Remove the three silver screws.

    • Three 5.5mm screws

  9. ZqwNogjxrDr1ukns
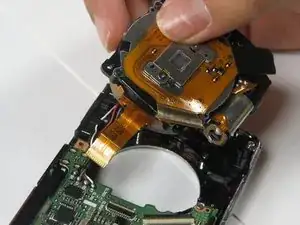
    • Lift the lens unit free of the camera. A spudger can be used to separate the lens unit if necessary.

  10. cxLiiRxHN3L5qEoS
    cxLiiRxHN3L5qEoS
    J4SedgtisjcqMqxK
    4GeD2nkWZ2aikKUw
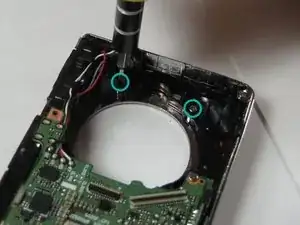
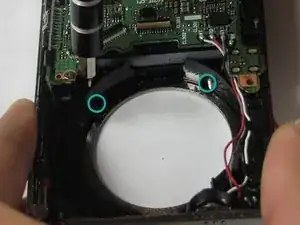
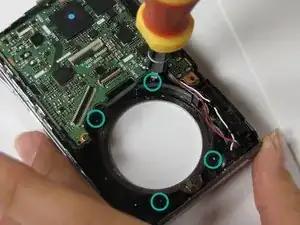
    • Remove 4 screws attached to the exterior silver bezel.

    • Four 3.5mm screws

  11. JPgLBswAJ1hCLRCa
    • Remove round silver bezel from the front of the camera.

  12. LhRBMoA4QIu1HyjH
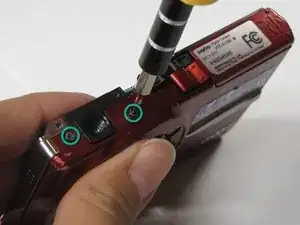
    • Remove the two screws on the bottom of the front cover.

  13. ToFYXxiqmUA62bOI
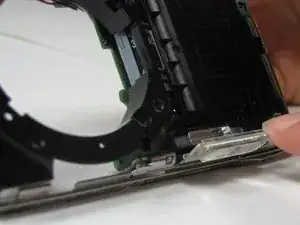
    • Remove tripod mount.

  14. NKkZUKiJ33AVlMY6
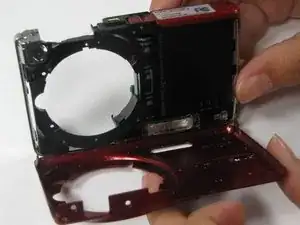
    • Carefully lift off the front cover plate of the camera.

  15. UxOWwISpDB6LuGPM
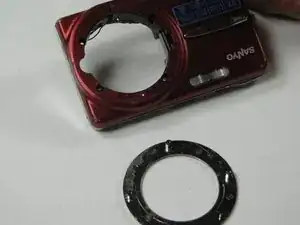
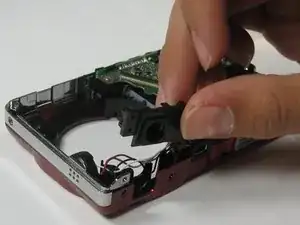
    • Remove the flash lens using the spudger or a finger.

    • It will be attached by a piece of tape, peel the lens off of that piece of tape without removing the tape.

Conclusion

To reassemble your device, follow these instructions in reverse order.
Anthony Giardina

Member since: 19/04/10

20 Reputation

0 comments