Introduction

  1. LS2H3FsJ6ayBAEXO
    • Slide the lock towards the middle of the camera, in the same direction of the arrow.

  2. WEaOAJwtXdSSsbvT
    • Push the blue battery holder up in the direction of the arrow.

  3. XNhXSnVBZAOPmilP
    • Pull the battery out of the battery slot.

  4. WdlmgNXkP2mgIOOR
    WdlmgNXkP2mgIOOR
    OxgKByoxdlA34Vwn
    • Use tweezers to remove the four rubber screw covers.

  5. AHPdiTNqFISFu3b1
    AHPdiTNqFISFu3b1
    ssY4Tyj2FiJZcEEs
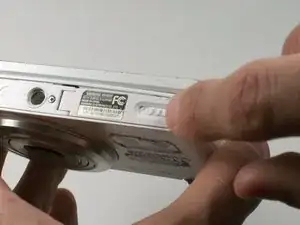
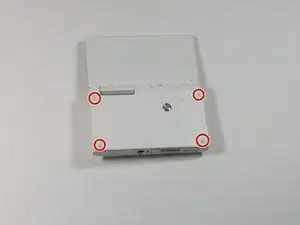
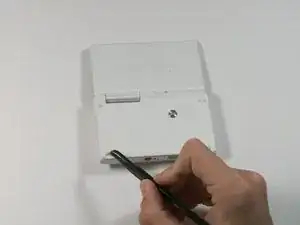
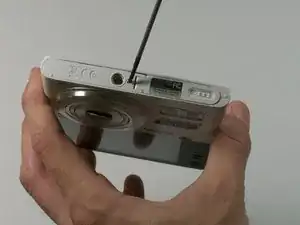
    • Remove the four Phillips 2.381 mm screws on back side of camera and one Phillips 2.381 mm screw on the bottom of the camera, using a Phillips #00 screwdriver.

  6. 3EBmE3IYHO1baCYC
    • Remove the back casing by just carefully pulling the casing off of the camera.

  7. OKWr5Ed2j2KZGw1E
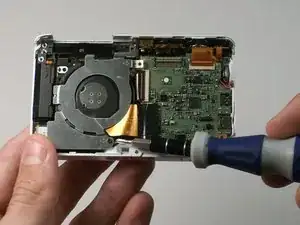
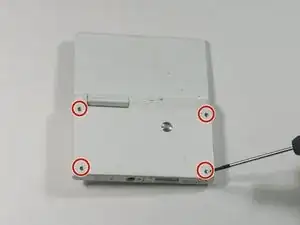
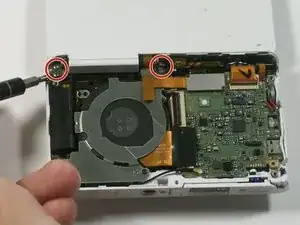
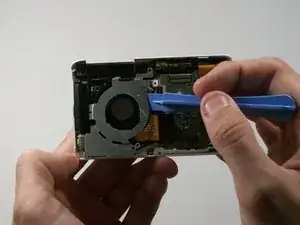
    • Use the Phillips #00 screw driver to remove the four 2.381 mm screws next to the screen hinge.

  8. LK1gJRaDoxsIbonA
    • Use plastic opening tool to disconnect screen connector from the control board.

  9. U6FWFbXcZkVXhcYB
    • Remove the old screen.

    How to replace lcd in the old screen? How to open it?

    lynda_myself -

  10. e1UE6WIRUniTfarM
    • Remove the 2.381 mm screw with a Phillips #00 screwdriver.

  11. PwUhmNOy1EF6NRKx
    • Use the plastic opening tool to remove the silver metal lens cover.

  12. GKMfMBiMVByDugU4
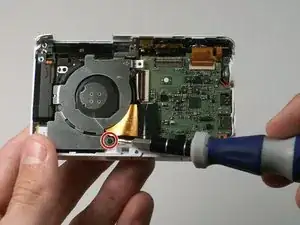
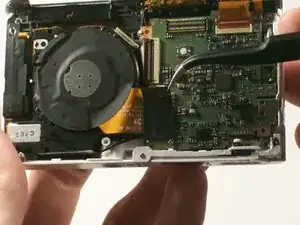
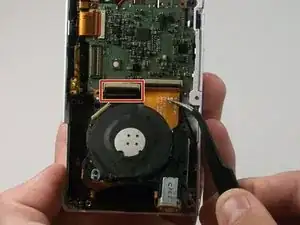
    • Use the tweezers to remove the black electrical tape covering the copper connector to the control board.

  13. vAIv6dIlaItxVRPH
    • From the front of the camera, push the lens through the back of the camer.a

  14. e4ibChKsxORjPpsB
    e4ibChKsxORjPpsB
    cSBT5xSJFaGZdgFP
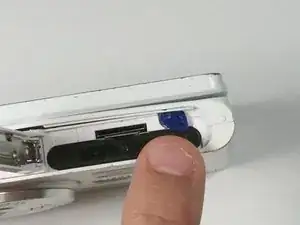
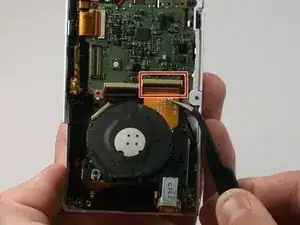
    • Use a pair of tweezers to flip up the black retaining bar on each of the two ZIF connectors.

  15. ihFZJkXQyWaZAFNx
    ihFZJkXQyWaZAFNx
    ysK1Kguc6p2vUZPB
    • Remove the lens assembly from the camera.

Conclusion

To reassemble your device, follow these instructions in reverse order.

Ethan Rowland

Member since: 03/03/15

216 Reputation

0 comments