Introduction

If camera lens jams or breaks, this guide will help you replace it.
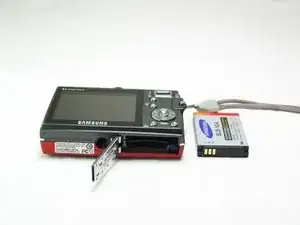
  1. q2soNFxUUC5lb1ky
    q2soNFxUUC5lb1ky
    Wy6lMmSi2wEHgBVZ
    GhwphVxvUTbnKXTm
    • Remove the six external screws from the camera using a Phillips #0 screwdriver.

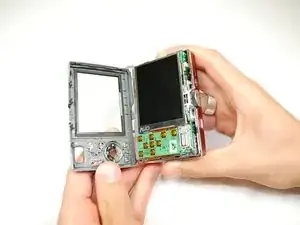
    • After the screws has been removed, the bottom of the back half of the external case should be loosened from the camera.

    • Be careful, make sure you don't lose the screws.

  2. ppiECWcCsQqRWXPL
    ppiECWcCsQqRWXPL
    rqmZdhu32oQEhsKx
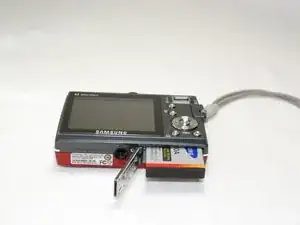
    • Open the battery cover that's located on the bottom right side of the camera and carefully remove the battery.

  3. 3TYGCgfHBJdhmRZ2
    3TYGCgfHBJdhmRZ2
    SQgNiTJKCv1PIOdD
    elgM4k3jmLnRlNBT
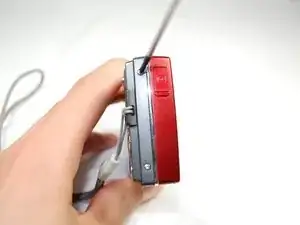
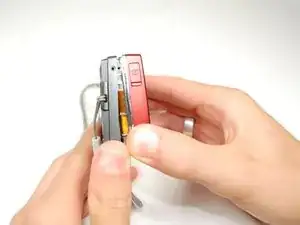
    • Slide your fingernail or a plastic spudger in the groove from the bottom to the top right side of the camera.

  4. es12lcCoBWSoRkXv
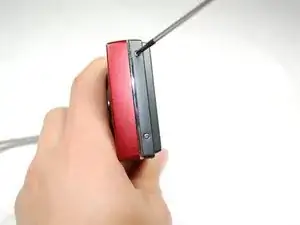
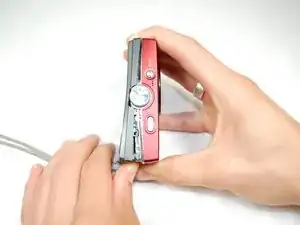
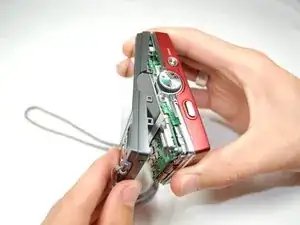
    • Carefully squeeze the top right corner of the camera and pry off the external cover.

    • If you hear a "cracking" sound. This is normal.

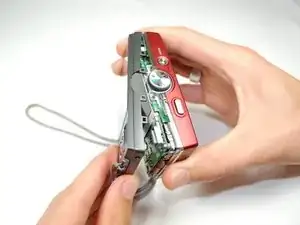
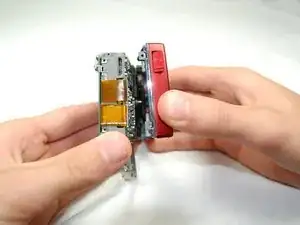
    • Continue to pull the external cover and it will come off cleanly.

    • Be cautious of the flash capacitor. It carries an electrical charge, that may give you an unpleasant shock.

  5. YFXwYPTkhADg5q5B
    • Carefully pull off the back cover, parts behind the back of the case might fall out.

  6. NDpFm4KElfDpqajQ
    • Remove the front cover, it comes off easily.

    • Buttons might fall out when you remove the front cover.

  7. qdnKXblxPQIwCDmY
    • Remove green tape from ribbon.

  8. yaUWQlMSYZGkHkai
    yaUWQlMSYZGkHkai
    TOHI4IsmN5DnIS11
    • Remove four screws around lens.

  9. btLBgNCERCv3FwBp
    • Use spudger to remove ribbon connecting the circuit board from lens.

  10. ghGM5tXGM1k3WTMY
    • Remove lens from camera.

Conclusion

To reassemble your device, follow these instructions in reverse order.

Adriel

Member since: 15/04/10

123 Reputation

0 comments