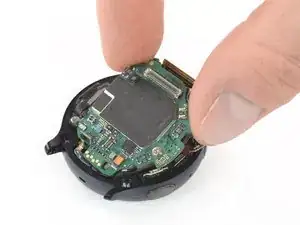
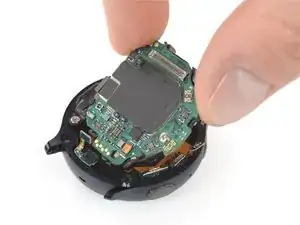
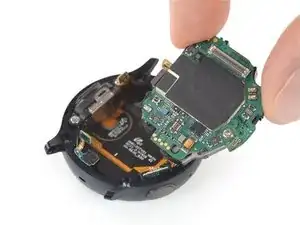
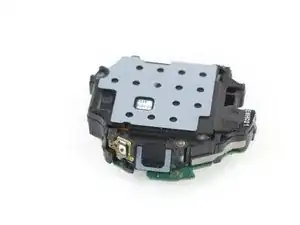
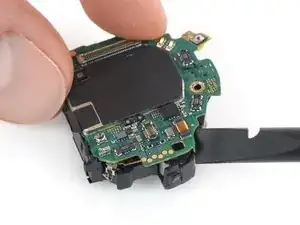
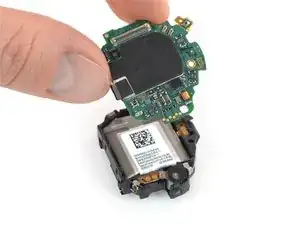
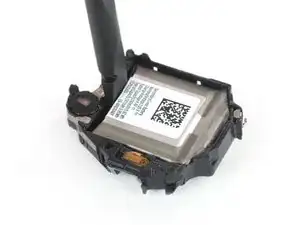
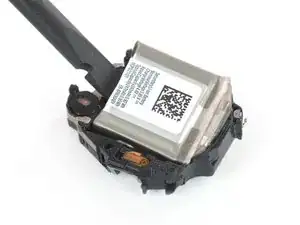
Introduction

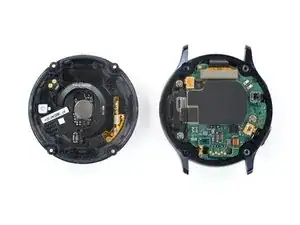
Use this guide to replace a worn-out or dead battery in your Samsung Galaxy Watch Active2.

If your battery is swollen, take appropriate precautions. For your safety, discharge your battery below 25% before disassembling your watch. This reduces the risk of a dangerous thermal event if the battery is accidentally damaged during the repair.

You might need replacement adhesive to reattach the battery when reassembling the device.

  1. PpZOv4HwIXocgyLa
    PpZOv4HwIXocgyLa
    URGisUyoLxnnOdxd
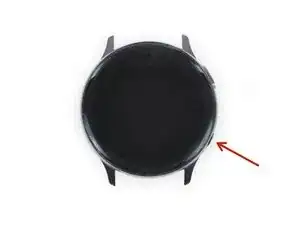
    • Turn off the Galaxy Watch Active2 by pushing and holding the bottom button for approximately 3 seconds. You should feel a short vibration.

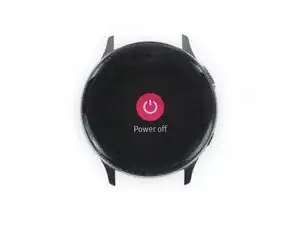
    • When the "Power off" symbol appears, tap the center of the screen to make it shut down. You should feel a longer vibration for confirmation.

  2. uu5BVXM3mPVqtxCV
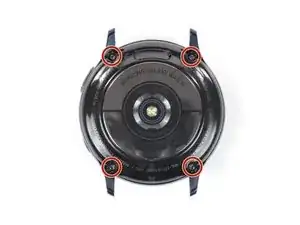
    • Use a Tri-point Y00 screwdriver to remove the four 4 mm-long screws on the back of the watch.

    Y1.5 works just as good

    BRIAN MIRANDA -

    Bekomme ich nicht auf … Schrauben zu fest

    Tino Wehner -

    The screws are attached to the cover. So you just need to loose them, not remove them.

    Yonic Surny -

    Any tips for a too tight screw ?

    Daisy Doune -

  3. gaLLXZL6PtTfeKTr
    gaLLXZL6PtTfeKTr
    R12EOStuFS1gSrnJ
    pEvRLZfPye6TlF5x
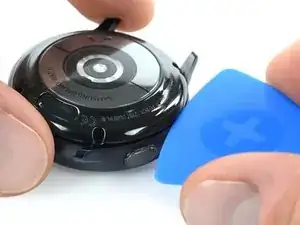
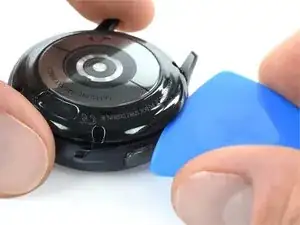
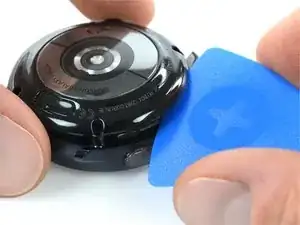
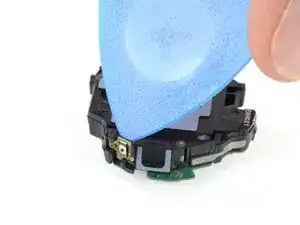
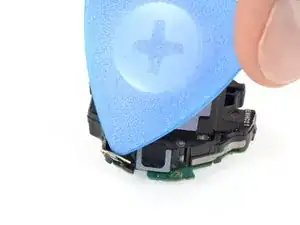
    • Use an opening pick and place it between the plastic back cover and the metal housing near the buttons.

    • Push the opening pick into the gap to separate the back cover from the housing.

    • Don’t remove the back cover all the way yet. There is a cable connecting it to the motherboard.

    There is a glue-ish gasket keeping it closed. I used an exacto knife to start it opening.

    BRIAN MIRANDA -

    This was super helpful thank you! Perfect timing

    this is trash -

    Waarmee kan ik de achterste oplaadplaat weer vast lijmen op de achterste behuizing

    Ilona Smit -

  4. bpWZC4dQSQhyoeRG
    bpWZC4dQSQhyoeRG
    HBeHnBVjm3DQi5vK
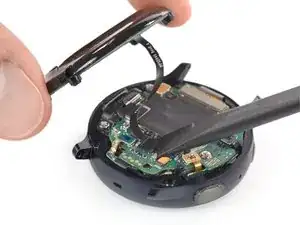
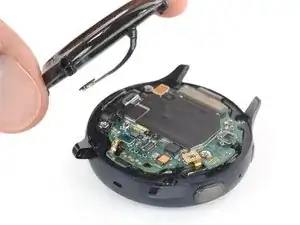
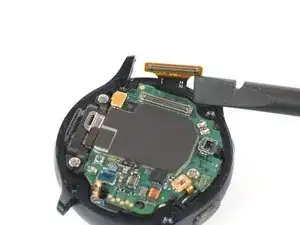
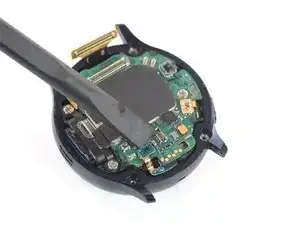
    • Carefully lift the back cover to access the sensor array connector.

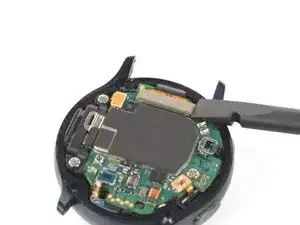
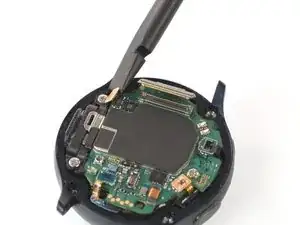
    • Use a spudger to disconnect the sensor array from the motherboard.

    Ou je peu me procurer le tourne vis tri point 000

    grenierlulu -

  5. IgBIqAvjWTgdSyaX
    • Remove the back cover.

    Where would you recommend buying a new back panel/charger?

    Nathan Williams -

  6. hLMRrQcln2F44EQC
    hLMRrQcln2F44EQC
    nO2YThO42whDToCV
    J1U56kAhiy32Q3hP
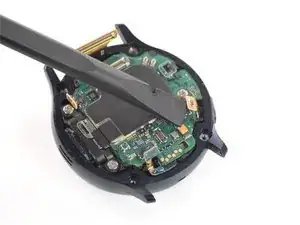
    • Use a spudger to disconnect the display assembly and the speaker.

  7. ZyS3IXZroO6LiUpm
    ZyS3IXZroO6LiUpm
    vZEaGvB25hI1MnBW
    edFTAGtRlQHABfbw
    • Use a spudger to disconnect the barometric sensor, the buttons, and the microphone.

  8. 4qX2lhcADWyrkPW6
    4qX2lhcADWyrkPW6
    Ti3ToIYjPAZSBcck
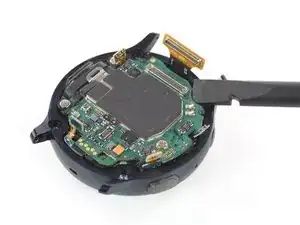
    • Place a spudger underneath the motherboard at the top right next to the display connector.

    • Slightly twist and lever the spudger to loosen the core assembly.

    • It might help to also check the comments below this and the next step if you’re having difficulties.

    I would not suggest to do so. There are components underneath the motherboard as well. There are none in this specific corner, but the core assembly does not come out that easily and people might try other corners and positions. Rather unscrew the motherboard and remove the battery from the core assembly directly.

    Nicola Tambascia -

    Yes! I was unable to remove the motherboard as pictured unless the screw was removed (Step 12). I suggest a re-ordering of steps in this guide.

    Jerry Rattanong -

  9. yUc2Y4nQihhPqWvT
    yUc2Y4nQihhPqWvT
    QNKTxIJwKFhonAco
    sdqNalvtlsoNgOk3
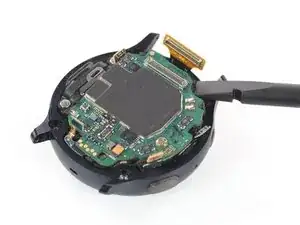
    • Grab the core assembly and carefully slide it out from under the cables.

    • Remove the core assembly.

    I had to remove that screw on the core assembly using a Phillips 000. When I initially tried lifting, the core assembly started to bend. Mine also has a connector under the core assembly near the thumb in the picture. The connector goes from the underside of the core assembly to the screen/body. It prevents me from removing the core assembly as I'm not sure how it should be removed examining it

    Louis Finney -

    This step is really difficult, and I'm still not sure it was necessary. The core assembly is really packed in there, and it took me several attempts, lifting from various corners. Don't pull by the circuit board. It will bend if you're not careful. You've got to get under the core assembly. I had the most luck starting next to the display connector at the top, then moving to the sensor on the other end of the board (barometric sensor), then moving to the speakers on the left, and finally lifting from multiple points once it was out far enough. In really hoping I didn't damage anything.

    Karl Arp -

    I think the comments here should be added to the step before.

    Nicola Tambascia -

    I would be very careful following Louis Finney's advice above. They are describing detaching the motherboard from the core assembly which also includes the battery and internal frame. Removing the motherboard from the rest of the core assembly exposes a very delicate looking ribbon cable that I nearly tore by trying to remove the screw holding the motherboard in place.

    As Karl Arp notes, trying to pry the core assembly up by the motherboard feels like it puts a lot of strain on the circuit board, so it might be necessary to go at it from multiple angles.


    Removing the whole core assembly was very difficult, and required a lot more force than I was expecting, and I had the luxury of being able to approach it from both sides, as the screen had already detached from the device (hence the need to repair), and still found it very challenging.

    I would advise, at a minimum applying mild heat to the metal outer frame to hopefully cause it to expand and give some additional clearance.

    Philip Hickey -

  10. LwmyOaWQLbfdTQI3
    • Flip the core assembly over so the motherboard faces down.

  11. kobjSYMmX51KYBtq
    kobjSYMmX51KYBtq
    fi5dgtKbbiHUu2MN
    • Use the tip of an opening pick to peel the top button off the plastic frame.

  12. Tv2oY3aGauOdqCKy
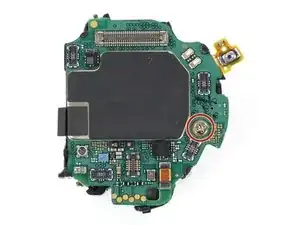
    • Use a Phillips screwdriver to remove the 4.4 mm-long screw holding the motherboard in place.

  13. 6HH51WJZ2dQjylPo
    6HH51WJZ2dQjylPo
    XXuCJFSYr2dUn5rL
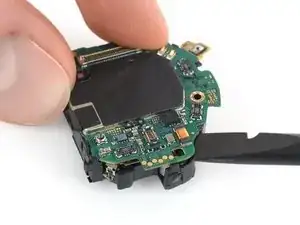
    • Place the flat end of a spudger between the motherboard and the plastic frame near the copper coil at the bottom right.

    • Twist the spudger to free the motherboard from the plastic tabs.

  14. NYyBCKNojcKthnxi
    • Slide the motherboard out from under the remaining plastic tabs to remove it.

  15. VBVWhtHsH5A2eajm
    VBVWhtHsH5A2eajm
    BArdU2WulLuCcEHV
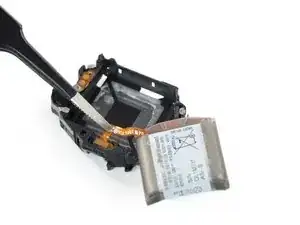
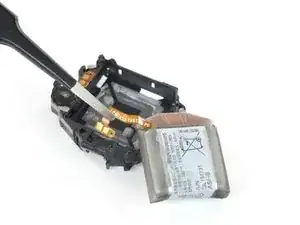
    • Insert the flat end of a spudger between the bottom of the battery and the core frame.

    • The battery is secured with some mild adhesive. If the adhesive is too strong you can use a hair dryer to soften it.

    • Use the spudger to lever up the battery.

    • Take care not to puncture or bend the battery. Only use plastic tools. A punctured or bent battery may leak dangerous chemicals or cause a thermal event.

  16. AKdTgJeAgsri4V1A
    AKdTgJeAgsri4V1A
    OZC3xaFp5PkCXtpO
    OEgZrs1sQmOyMRTK
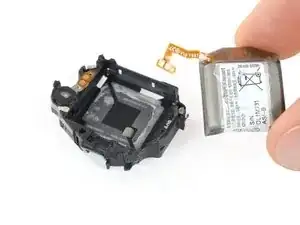
    • Use a pair of tweezers to grab the connector and slowly pull it off the core frame.

    • The battery connector is affixed with mild adhesive.

    • Remove the battery from the core assembly.

    • When installing a new battery make sure the tiny hole on the battery connector aligns with the pin on the core frame.

Conclusion

Secure the new battery with pre-cut adhesive or double-sided adhesive tape. Press the new battery firmly into place.

To reassemble your device, follow these instructions in reverse order.

For optimal performance, calibrate your newly installed battery: Charge it to 100% and keep charging it for at least 1 more hour. Then use your device until it shuts off due to low battery. Finally, charge it uninterrupted to 100%.

Take your e-waste to an R2 or e-Stewards certified recycler.

Repair didn’t go as planned? Try some basic troubleshooting, or ask our Answers community for help.

Tobias Isakeit

Member since: 31/03/14

116775 Reputation

17 comments

Hi. How can I distinguish between battery rather than motherboard disfunción? My watch doesn't charge anymore. It appears to start charging but doesn't.

Dan Frank -

It doesn't appear swollen either. Took to the beach and swam on salty water and pool… didn't work after.

Dan Frank -

This is the SAME thing that is happening to me. Went to the beach, on the drive home it died, hasn’t charged since. I set it on the charger and it will say 0%, but never charge enough to power on. I took to best buy and they said I need to buy a new watch :(. Would also like to know if you think it is the battery or if the beach water could have fried the whole thing. I wouldn’t think it would since it occasionally will flash the 0% when try to charge it.

Branddy Hopkins -

Exact same thing in two separate cases. That's it. 0% flashing sometimes and completely dead. And as it seems nobody but us is posting our sad stories. We need to look further and find something on YouTube or online… there must be something…

Dan Frank -

I have been looking online and it seems that the battery has lower charge than what is chargeable. And by going deeper it also seems that there is a way to recharge that same battery at least to the point we're it might start again.

Dan Frank -

Not sure if this might work but worth a try. If the battery is depleted beyond (below) charging status maybe using a weaker charger/wall plug (less Ampere?) will kickstart the battery after a few hours or throughout the night, and then switch to the regular charger. Can’t say for sure if the motherboard was damaged by some salt water getting into the watch. But opening those up is easy for checking on corrosion. Good luck on the diagnosis and hopefully you’ll succeed in restoring charging function.

Tobias Isakeit -

The same thing happened to me now. After all these years, has anybody at all managed to get the watch 2 back from the dead in this situation?

Martin Costabel -

Finally I found the courage to open it up. What I found was not pretty, traces of salt at several places. In particular, one connector, I guess from the picture of Step 7 the barometric sensor, was completely corroded, no teeth left. So it is time to say goodbye to Watch 2.

Martin Costabel -

So for losses of watches through salt water. Have had any luck finding something about it? In comparision to the problem i had with my gear s3 frontier it sounds similar, but without the salt water. In my watch the battery died, would not charge anymore. So i opend it, replaced the battery and left alone for later. So after putting it back together couple of weeks later, still same problem.

As it turned out, battery died and anlong with it the motherboard. I read something about a firm ware crash later. So anyways, properly the same. After replacing the motherboard and the battery the watch should work again.

a b -
Followed these instructions and they were spot on except for the seal that makes the watch waterproof. There were no instructions to remove the bottom without that sticking and it ended up getting streched and not re-useable. I watched a video and they recommended using a heat gun to slightly warm up the bottom to keep from sticking (will try that next time). That video recommended B-7000 to reseal it if needed so I purchased that.

David Hoag -

Did you get the battery from ifixit? Did the battery hold about the same charge duration, I believe the original last up to 2 days. It looks like you replaced it about a year ago, does the battery still hold a good charge?

Jack F -

The display on my watch went black. I could still feel the vibrations and was able to check the Galaxy Wearable app on my phone. It got really hot when charging with the watch powered on. I did troubleshooting and after failing all attempts it was recommended I replace the battery. The initial disassembly was difficult but do-able. After disassembling and reassembling 3 times, the watch finally powered on but the display was still black. I let it charge and once it reached full charge the display was working!! Thank you so much for this detailed instructions!! I'm so happy to have my smart watch back!!

Gisele Forsyth -

Glad we could help you get your watch back to a functioning condition. Congratulations on the repair, keep on fixing stuff :)

Tobias Isakeit -

This was one of the more easier repairs I've ever done. Luckily the adhesive holding the back cover on wasn't too much of a pain, and the adhesive holding the battery in wasn't bad either. Love this watch and can't see spending $$$ on a new one when the battery was only ~ $40.

Eric Feldbauer -

Glad you could give your Galaxy Watch a new life with this guide and a $40 battery. Keep on fixing stuff

Tobias Isakeit -

Hello,

I have changed the old battery on Samsung Galaxy Watch Active 2 since it started to drain very fast. Initially it started to charge in very low or stopped at some percentage while charging. I have replace to new battery, but after replacement it started to charge at 27% and then the percentage started to decrease. I use original charger. Don't know what to do, any ideas are welcome. Thanks.

eimou55 -

Hi there, after a couple of years, my Active2 40mm battery barely lasts 1 day. I'm thinking of changing it. Of course, I know that I should go for the 40mm battery. But before doing so, I just need to ask if anyone has tried to squeeze in the 44mm battery model in the 40mm? Is there any space for it? I know it's a dumb question, and probably there is no space, otherwise, the brand would have done it. Nevertheless, brands have made mistakes before...

Thanks

Dupont Jean -