Introduction

  1. 6pfnZ5yZYJnqoJW4
    6pfnZ5yZYJnqoJW4
    A3lNnVVNadLBRKLc
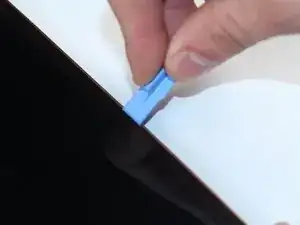
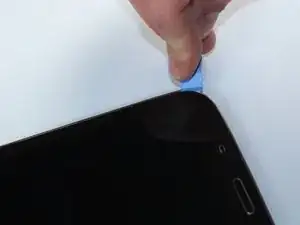
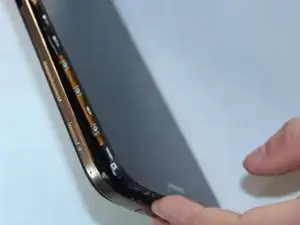
    • Start out by separating the screen from the back cover using the larger plastic opening tool to pry them apart.

    • Be careful when removing the screen as negligence can cause damage.

    Separating the back cover was the hardest part of the procedure for me (a retired electrical/software engineer). I used a large flat screwdriver blade instead of the hard plastic tool shown. Go slow all the way around the tablet and expect pops as the pieces separate. I was not able to re-connect the back cover completely, accepting a paper-thin gap about 30% around the cover, but it is secure.

    Rick Nungester -

  2. 4GTTAmiaoLGPH6AP
    4GTTAmiaoLGPH6AP
    nlAebAOFmaEB5Fhq
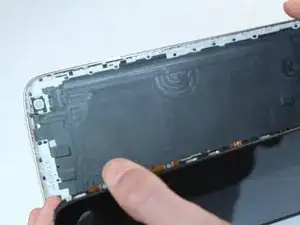
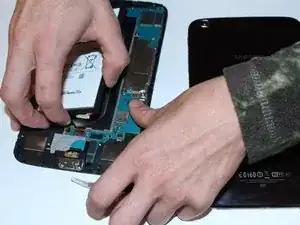
    • Once every part of the screen is separated from the back cover, you should be able to fully remove it with your hands.

    Peter how do I know which charging port I need thank you I don't know how else to reach you Tom Patrick mlc@earthlink.net all small case and no spaces thank you

    Tom Patrick -

    Yikes. I began carefully prizing off the screen - but when it finally came away the connector (near the top of the screen, about 1” from the right side) got ripped, so the unit is damaged beyond repair. I think it would have been helpful if your guide had warned us about this possibility and given some advice about how to make sure it doesn’t happen. I now have a broken tablet and a brand new battery, likewise of no use to me. Pretty heartbroken - the unit had been working fine, mainstay of daily use.

    goodone -

    For any future people repairing their tablets. DO NOT REMOVE THE SCREEN. I thought my tablet was a Tab 2, but no it was a Tab 3. No heat guns needed. I ended up cracking my screen a bit. I don’t know the extent of the damage yet, but Im probably going to get a replacement screen. You need to pop out the whole thing. Not just the front screen. The reason being that there’s a sort of metal scaffolding holding the screen and the back together. This needs to be separated to put in the new charging port.

    Matt -

  3. aWAPHjPpCDUvUUn5
    aWAPHjPpCDUvUUn5
    4Z3d4iAsKJq1kWmT
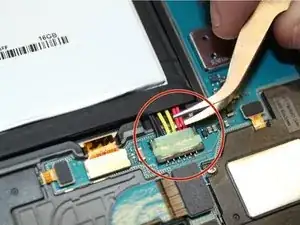
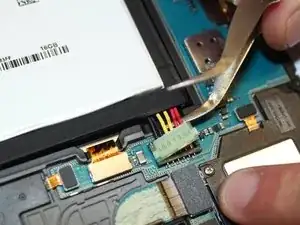
    • To remove the battery you must use something small, such as tweezers, to disconnect the battery from its port.

    • Note: the connection lifts up to remove.

  4. sASYLgSFhjhOdffw
    • After the battery is disconnected, use the pulling tab to safely remove the battery.

    You don't have to, just be careful with battery connector.

    Kyoko Hori -

    You have to be very careful with the battery connector. On mine, the plug was difficult to remove from the base and I ended up breaking the connections between the base and the circuit board. Maybe use the pry tool to hold the base down while easing out the plug.

    Hugh Morrison -

    I just did the same thing Hugh...does that mean my tablet is trashed? Can it be repaired?

    tlibert -

    There’s also a pull tab on with label printed on the batery to make the pulling easier.

    IMI Comp -

  5. WjvC5J41KY2aZpVV
    WjvC5J41KY2aZpVV
    ENBRWT1hyaufbI3D
    yBIdBNUuAwDRKROh
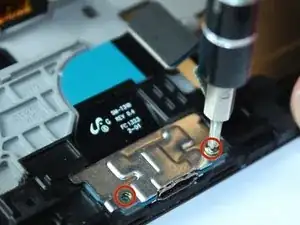
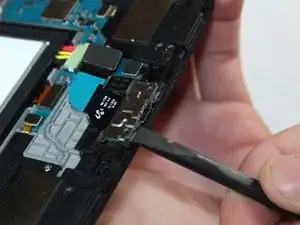
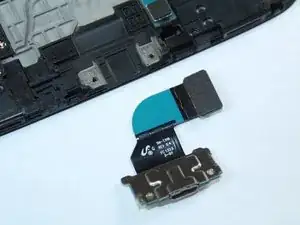
    • Unscrew the 2.9mm screws from the charging port with Phillips Head #000 and use the spudger to pry it up from under the port to remove component from the device.

    Hey Mr. fix it how can I get in contact with you to get a charging port I can't seem to find mine anywhere my name is Tom and my phone number is 7175332039I hope you see this if anybody else does that knows where I can get one give me a call thank you

    Tom Patrick -

Conclusion

To reassemble your device, follow these instructions in reverse order.

Peter Paoletta

Member since: 22/09/14

2085 Reputation

11 comments

No need to remove the battery. You don't even need to unplug it, but be sure if you don't unplug it that the battery doesn't have a charge left.

Danyf -

My tablet had a plastic frame around the sides and bottom under the back which was impossible to get around. I had to cut off the section covering the battery charging port in order to get the old one out and put the new one in. but it seems fine and charges well and I'm really pleased I could fix my son's tablet without spending a lot of money.

Sasha Boucher -

Very easy repair. Thanks very much!
soccer123 -

Hey Danyf, Lithium Ion Batteries should never go fully dead. Your tablet is going to shut down before the battery goes fully dead. I would at-least unplug it to make sure you don't short out the battery, or fry the motherboard.

Randall Vonderbrink -

Hi All, just wanted ask a few questions regarding charging of Samsung galaxy 10.1 note.

I have recently changed a battery. In the start it was charging but now it's not? Do we have to reinstall drivers in android OS?

Seth Amaratunga -

Hallo,

danke für die Anleitung! Damit (und mit eine anderen Video, wie man das Tablet überhaupt AUFBEKOMMT), konnte ich die Ladebuchse rasch tauschen. Letzt lädt mein > 3 Jahre altes, viel genutztes Tablet wieder!

Rolf

Rolf Felix -

Problem nur: nach dem Tausch der Ladebuchse sehe ich, dass ich per Kabel keine Daten mehr zwischen PC und Tablet austauschen kann.

Habe den Verdacht, dass die (bei Ebay gekaufte) Buchse auch nicht mehr ganz taufrisch ist… :-(

Rolf Felix -

Korrektur: Habs nochmals neu verbunden, klappt alles!! :-)

Rolf Felix -

Hallo Rolf,

hast Du die die Ladebuchse verwendet, die bei ebay für 5,49 € angeboten wird (s. https://www.ebay.de/i/401500594940?chn=p...)? Ich will sie mir auch kaufen, allerdings sieht sie mechanisch etwas anders aus als in meinem Tablet und auch in obiger Reparaturbeschreibung: das Abschirmblech der Buchse ist anders geformt.

Harald Weiß

Harald Weiß -

why is this tab 3 8.0 guide for charging port in the Tab s2 9.7 section??

tobiasagren -

Agreed, the Tab S2 9.7 procedure for removing the screen is nothing like the Tab 3.

D McCartney -