Introduction
Follow this guide to replace the screen or display adhesives for the Galaxy S8. This procedure is meant to be followed in conjunction with the Galaxy S8 screen replacement guide.
Tools
Parts
-
-
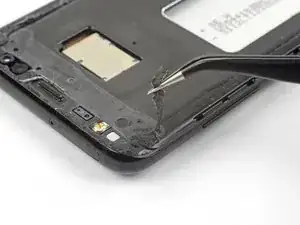
Remove all traces of adhesive and debris from the phone's frame. Clean the adhesion surface with high concentration isopropyl alcohol (over 90%) and wipe it clean with a lint-free cloth.
-
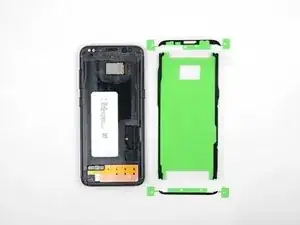
Lay the adhesive strips out to get an idea of where they go.
-
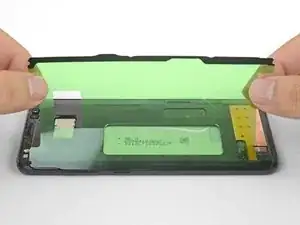
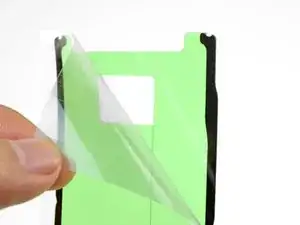
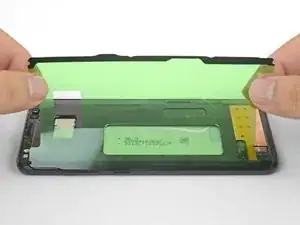
Peel off the clear plastic backing from the large pre-cut adhesive strip, exposing one side of adhesive.
-
-
-
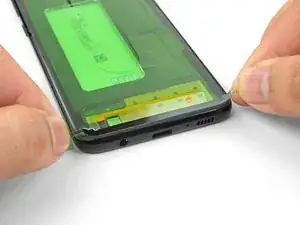
Carefully line up an edge of the adhesive with the corresponding edge of the phone frame.
-
Set the adhesive down lightly on the frame.
-
If it is not properly aligned, carefully peel the adhesive back up.
-
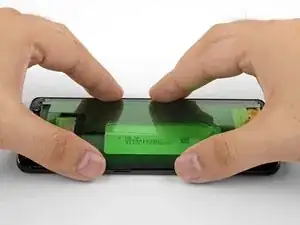
Once the adhesive is aligned, use your fingers to press the adhesive onto the frame.
-
-
-
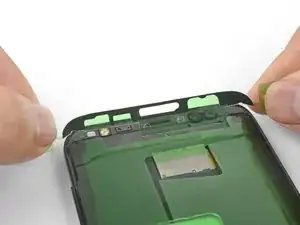
Peel one of the end adhesive strips from the clear plastic backing.
-
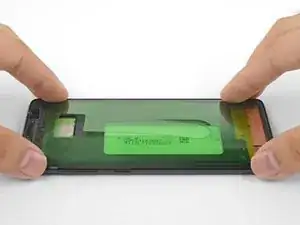
Hold the strip by the two green end tabs and line the adhesive strip with the phone frame.
-
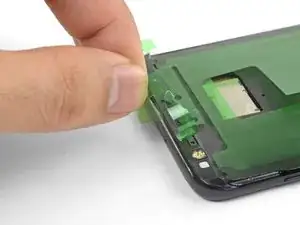
Lay the adhesive down lightly on the phone. Make sure that all cutouts are properly aligned.
-
Once aligned, use your fingers to press the adhesive into place.
-
Repeat the procedure for the remaining adhesive strip.
-
-
-
Continue reassembling your device until you are ready to attach the screen.
-
Peel and remove the green plastic liner from all adhesive strips to expose the screen-facing adhesive.
-
Align and set the phone screen on top of the adhesive.
-
Use your fingers to squeeze around the perimeter of the phone to set the adhesive.
-
Apply a few books worth of weight on top of the screen for an hour to help the adhesive bond.
-
Follow this link to return to the Galaxy S8 screen replacement guide.
4 comments
My set of adhesive strips were a mirror image of these pictures, meaning the strips when solely attached to the green plastic liner were arranged to adhere to the back cover, not onto the phone! This is likely a production issue with the green plastic liner and clear plastic backing being swapped. Like in these pictures here, the seal strips stay aggressively with the green plastic liner upon pealing off the clear plastic liner; however, they were then an incorrect mirror image when trying to position then to the phone. This forced me to painstakingly use scotch tape the position and secure edges of the green plastic to the phone first (sticky side of strips facing up), and then lower the back cover down onto the phone, to adhere the strips to the back cover first. Then, lift off the back cover to removed the green liner, exposing adhesive to apply to the phone-side. Trust me, I didn’t install the strips upside down, or mirrored. This is just the way all my strips came, and there was no other workaround.
Hi Kevin,
First, I’m sorry to hear of your troubles! I’m glad you came up with a system to get the adhesive on. Very ingenious!
I looked into this issue and found that the adhesive you got is correct. Unlike the screen adhesive, which should be applied to the frame first, the back cover adhesive should be applied to the back cover first. Unfortunately, we don’t have any explicit guides for the back cover adhesive. However, I will edit the device guides to clarify that point.
Thanks for bringing this observation up!
Thank you for the rapid response, Arthur. You’re very welcome. I presume IFixIt sources these strips from a common supplier, also serving competitors. These multi-piece strips have very fine hole, notch, and angular details demanding a level of placement precision not easily achievable by adhering them on the back cover first — especially if intended to restore a level of water resistance. Ifitit stands out above it’s competitors, as the kit was excellent. It might further differentiate itself by provided a template to nest into the back cover first, creating a guide. Again, thank you for your product and support. Excellent.
I will keep your feedback in mind about the template. As for water resistance, replacing the back cover adhesive will unfortunately still compromise the water resistance, unless you use an adhesive press.
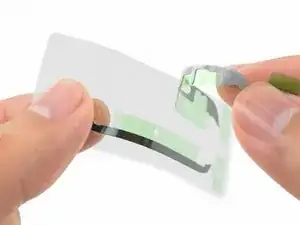

I found it far easier to cut the plastic sheet for the two edge strips into two pieces. Much easier to get one adhesive strip aligned when you don't have to watch the other side as well.
Peter Burt -