Introduction
Use this guide to replace the midframe assembly in your Samsung Galaxy S6. The midframe assembly contains the induction coil, power and volume buttons, camera lens, and speaker.
This guide involves removing the rear glass. Removing the rear glass destroys the adhesive holding it in place. Follow this guide to reinstall the rear glass.
Tools
Parts
-
-
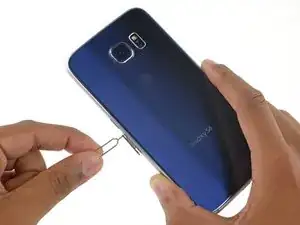
Insert a paper clip or SIM eject tool into the hole in the SIM card slot on the power button side of the phone.
-
Press to eject the SIM card tray.
-
-
-
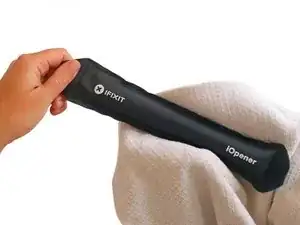
Heat the iOpener for thirty seconds.
-
Throughout the repair procedure, as the iOpener cools, reheat it in the microwave for an additional thirty seconds at a time.
-
-
-
Remove the iOpener from the microwave, holding it by one of the two flat ends to avoid the hot center.
-
-
-
Fill a pot or pan with enough water to fully submerge an iOpener.
-
Heat the water to a boil. Turn off the heat.
-
Place an iOpener into the hot water for 2-3 minutes. Make sure the iOpener is fully submerged in the water.
-
Use tongs to extract the heated iOpener from the hot water.
-
Thoroughly dry the iOpener with a towel.
-
Your iOpener is ready for use! If you need to reheat the iOpener, heat the water to a boil, turn off the heat, and place the iOpener in the water for 2-3 minutes.
-
-
-
Lay the heated iOpener over the rear panel for about two minutes to loosen the adhesive around the edge of the glass.
-
Shift the iOpener to heat the remaining section of the panel for another two minutes.
-
-
-
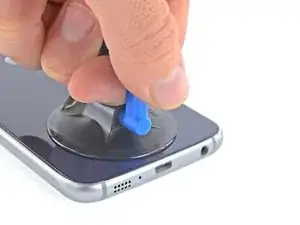
Once the rear glass is hot to the touch, apply a suction cup near the bottom edge of the glass.
-
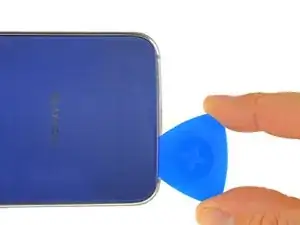
Lift on the suction cup to create a small gap underneath the rear glass, and insert an opening pick into the gap.
-
-
-
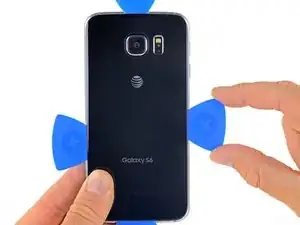
Slide the pick along the bottom edge of the phone to slice through the adhesive securing the rear glass.
-
-
-
Repeat the heating and cutting procedure for the remaining three sides of the phone.
-
Leave an opening pick under each edge to prevent the adhesive from resealing.
-
-
-
Use tweezers to peel away any remaining adhesive from the phone's chassis.
-
Clean the adhesion areas with high concentration isopropyl alcohol (at least 90%) and a lint-free cloth. Swipe in one direction only, not back and forth. This will help prep the surface for the new adhesive.
-
Peel the adhesive backing off of the new rear glass, carefully line up one edge of the glass against the phone chassis, and firmly press the glass onto the phone.
-
-
-
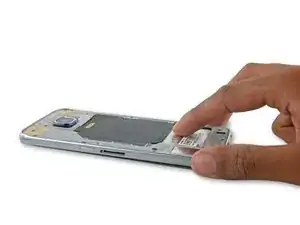
Firmly grasp the edge of the midframe assembly.
-
Lift up on the midframe assembly while pushing down on the battery to separate the midframe assembly from the rest of the phone.
-
While lifting the midframe, be careful to avoid snagging it on the audio jack or charging port.
-
Once the midframe is partially seperated, carefully run an opening pick around the edges of the rest of the phone to separate the top of the midframe.
-
To avoid damage to the headphone jack, remove the top of the midframe first, then push the midframe downwards to disengage it from the headphone jack.
-
You may need to heat and apply an iOpener to the edges of the display to soften the display adhesive if midframe separation is difficult.
-
To reassemble your device, follow these instructions in reverse order. When reinstalling the rear glass, refer to the rear glass adhesive replacement guide.
6 comments
Step 18
Is it really that "simple" to separate the midframe from the front of the phone? In most videos (even the one on ifixit) a suction cup is used (after warming the front) with some prying tools.
So, does Step 18 really work?
It appears that the front is hold together by only 4 adhesives in the corners. Are this damaged during the front removal process? (is there a replacement kit?)
Just another question, I damaged the heart sensor plastic cover, is it possible to buy just that part or do I need to buy a complete midframe?
paulo -
Can this step be exactly with a simple push as stated? Other sources required focusing heat on the 4 corners and run through with a pick....?
Secondly, how can one avoid damaging the lamination under the glass while removing it or trying to get the first foothold with the pick. Most guides I have seen appear to skip this step.
ahmad -
I have seen one phone parts site (EtradeSupply) list all different variants of the mid housing (G920F, G920V, G920R etc). But another site (WitRigs) has just one, as if they aren't specific.
Does anyone know? Because i'm in Australia and can't find G920i variant.
Also, has anyone simply swapped over the antennas, and crimped them onto the new housing?














It really needs to be stated at the outset that if doing this repair to replace the daughterboard, there is a high likelihood that the display will be destroyed (even if you don’t break the display, the foil backing on it will likely be destroyed rendering it unusable). The PDF version of this guide states this at the beginning, but this online version does not.
David White -
Done. Thanks for the tip!
Minor editor -