Introduction

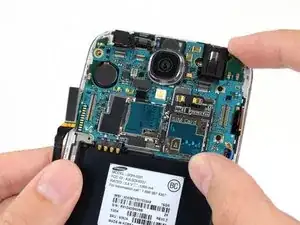
Prerequisite to replace the motherboard in a Samsung Galaxy S4.

  1. QOBJ3LFbWBFVVGcA
    QOBJ3LFbWBFVVGcA
    yVD1EFNFEaXchvOf
    63C2pIomgcyGqkCc
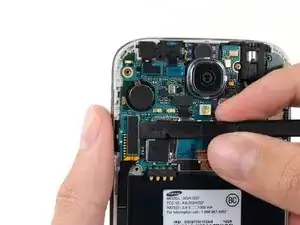
    • Use the flat end of a spudger to disconnect the USB board connector.

    • Disconnect the front-facing camera cable connector.

    • Disconnect the earpiece speaker assembly cable connector.

  2. rNPnmChVeydDDOkQ
    rNPnmChVeydDDOkQ
    XLIVIYF1GdMvaGRN
    epVsggkyQGhUiBBG
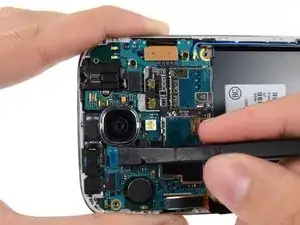
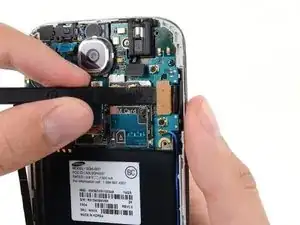
    • Disconnect the headphone jack assembly cable connector.

    • Disconnect the display/digitizer cable connector.

    • Disconnect the antenna cable connector.

    My model had an antenna connection next to the usb board connector in addition to the antenna connection near the display cable connector.

    Drew -

    That's point a, on the daughter board (where the USB is located is point b. You must connect it from a to b

    djweijers1997 -

    I could not get the screen connector to fit on with the motherboard assembly in place. I had to remove the motherboard assembly, attach the screen connector, and then carefully replace the motherboard assembly, with the screen connector still attached..

    Tom4G -

    Same as Tom4G above. When trying to connect the screen connector, it would not give me that nice clear snap indicating a positive connection. The phone powered up with no screen. So, I disconnected the other connectors again, lifted the motherboard out and connected the screen connector by pinching it with finger and thumb from both sides of the motherboard, this time getting a nice snap when it engaged.

    speedrzr -

  3. rj6NCBPKbIQYnvFu
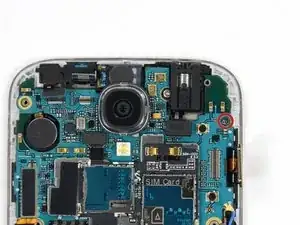
    • Remove the single 2.4 mm Phillips #00 screw from the motherboard assembly.

    As Sam Lionheart states at the end of this guide, some of these phones have an additional antenna on the opposite side of the phone. Be sure to detach it before removing the motherboard.

    mcr4u2 -

  4. aePe63fVSmTOtsPY
    aePe63fVSmTOtsPY
    etpnFuSt2fSS2A1Y
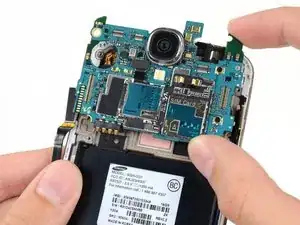
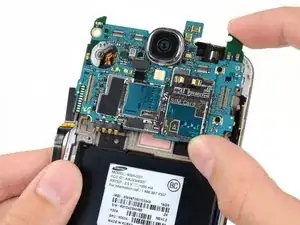
    • Gently remove the motherboard.

    • Hold the motherboard by its edges to prevent ESD damage. Be careful not to snag it on any cables as you extract it from the display assembly.

Conclusion

To reassemble your device, follow these instructions in reverse order.
Sam Goldheart

Member since: 19/10/12

465329 Reputation

0 comments