Introduction

Use this guide to replace the plastic midframe.

  1. DwHxEdBbWNKViZrf
    DwHxEdBbWNKViZrf
    oBKb6GRWHcAY4hkg
    • The following four steps can be accomplished without a plastic opening tool. However, it's recommended to use a tool to best avoid breaking any clips along the perimeter of the rear case.

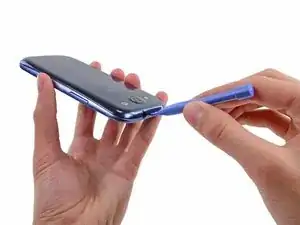
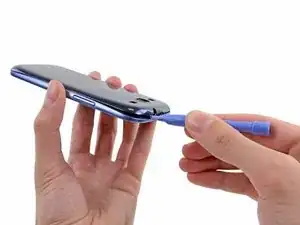
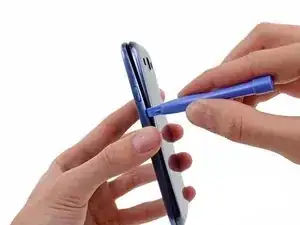
    • Insert a plastic opening tool or fingernail into the notch in the gap between the rear case and the rest of the phone, located at the top of the device.

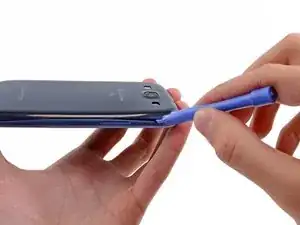
    • Gently twist the opening tool to disconnect the clips securing the top of the rear case.

  2. N2d46fEShI6YEWJu
    N2d46fEShI6YEWJu
    DOQTTgHWTeMZfEKL
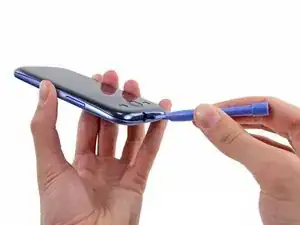
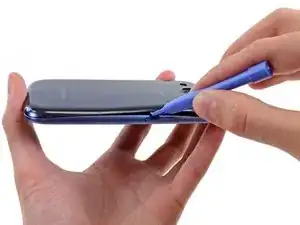
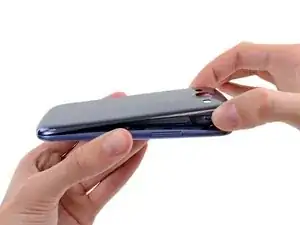
    • Slide the plastic opening tool left along the top edge and repeat the twisting motion to widen the gap between the rear case and the phone.

  3. 6DLNQL4LPjTVyFtj
    6DLNQL4LPjTVyFtj
    hWXD5cvEQV2RsKmi
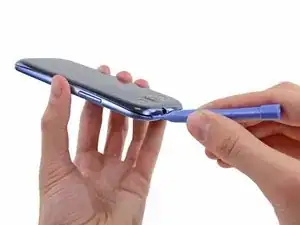
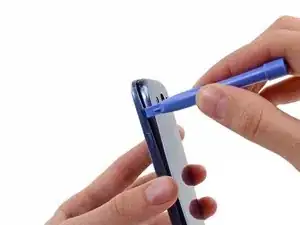
    • Continue to move the plastic opening tool around the perimeter of the top left corner, gently prying up along the rear case.

  4. 2AQMAZmcDjGNFNAR
    2AQMAZmcDjGNFNAR
    KFWOeW64cAlgiDLc
    • Pry along the top right side, and continue prying down the right side of the rear case.

  5. OK5HBh12pNPKIlWL
    OK5HBh12pNPKIlWL
    fxVFrPQOr2nEVMT5
    • Lift up and remove the rear case from the phone.

    • You may need to peel the case up to separate it from any clips still holding it to the bottom of the phone.

    very easy to follow instructions clear and concise

    Deric JONES -

  6. RGYnKIYhRMdNHy3M
    RGYnKIYhRMdNHy3M
    hC1SLlMLkvHQVxv6
    • This step can be accomplished without the need of a plastic opening tool. Just use your finger if you want to.

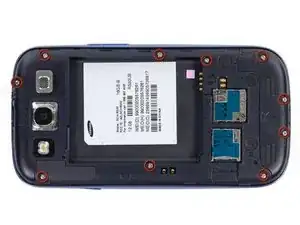
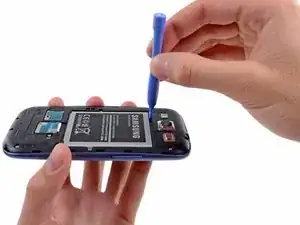
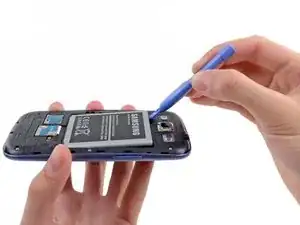
    • Wedge a plastic opening tool into the small notch above the battery.

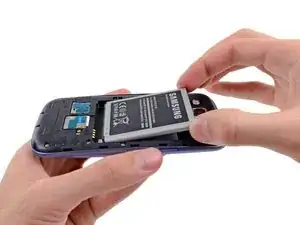
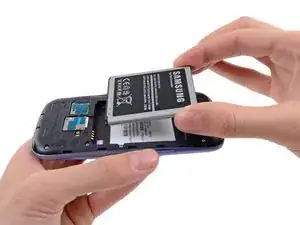
    • Pry the battery up out of its recess.

  7. 3NM1jGXSPubf4NRk
    3NM1jGXSPubf4NRk
    UtmKceXarIch4VDY
    • Remove the battery.

  8. IoWBOUcMFKA1YZMV
    IoWBOUcMFKA1YZMV
    pgcYfhBQPwVGuub4
    veu6t3FcrXRqr3N3
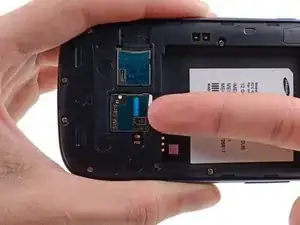
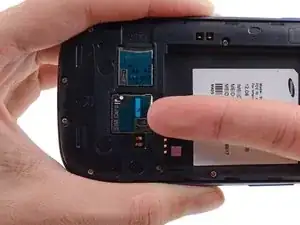
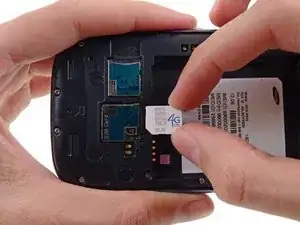
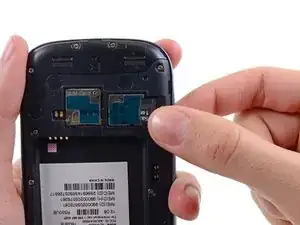
    • Using your fingernail, push the SIM card slightly deeper into its slot, until you hear a click.

    • After the click, release the card and it will pop out of its slot.

    • For reassembly, push the SIM card into the slot until it clicks in place.

  9. LPbyjHLjHIjHYVbx
    LPbyjHLjHIjHYVbx
    dmPXhg4mwYJKq1fD
    elSekARYxeCBFKdB
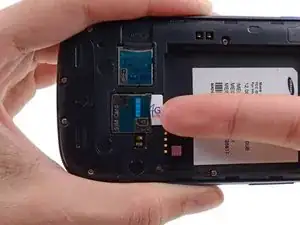
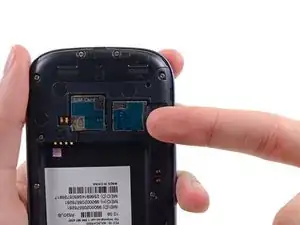
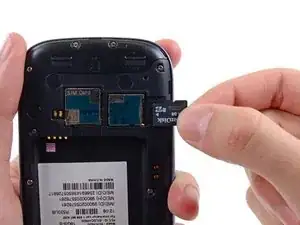
    • Use your thumb to slide enough of the SIM card out of its slot to grab ahold of it.

    • Grasp and remove the SIM card away from the phone.

  10. PlPYbEyAd1uaDhZB
    PlPYbEyAd1uaDhZB
    q33uGJoDny6WthFc
    ZLgCdY2KKbUEIOib
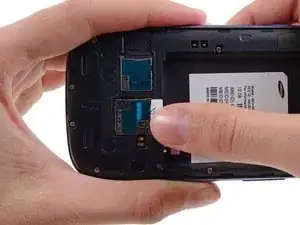
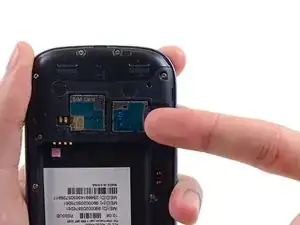
    • Using your fingernail, push the microSD card slightly deeper into its slot, until you hear a click.

    • After the click, release the card and it will pop out of its slot.

    • For reassembly, push the microSD card into the slot until it clicks in place.

  11. 4ELXh6FvDcpKuyst
    4ELXh6FvDcpKuyst
    nOPvQ6cLOPAwsZnx
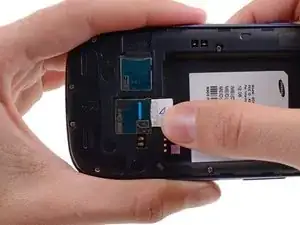
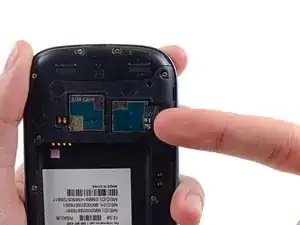
    • Use your thumb to slide the microSD card out of the slot.

    • Remove the microSD card from the phone.

    Forgot about the step to remove the back casing...pretty simple though, just several screws then pop it off.

    Courtney -

  12. 4fDtWNxMAclSi5ye
    • Remove the ten 4.0 mm Phillips screws securing the midframe to the front panel assembly.

    What would you use to remove the screws

    Curt the heneke -

    I used both P#000 and J#00 precision bits to good effect. I tend to prefer the Japanese Standard bits in place of Philips, as the JIS bits seem not to cam out and strip screws as easily.

    E West -

  13. hgiwMdY2T2lgSsZr
    hgiwMdY2T2lgSsZr
    kZkbhbUYXjKEVyWD
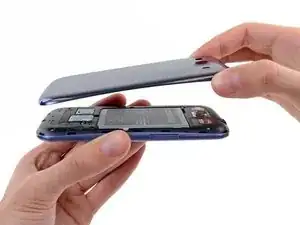
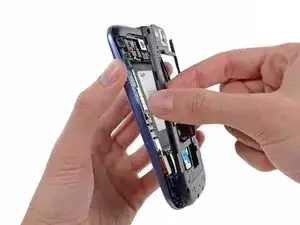
    • Grasp the left side of the plastic midframe with your thumb and forefinger and lift it away from the phone.

    • The midframe lightly snaps in place, and can be removed with very little force.

    There's another piece of the frame that needs to be taken out, but it doens't come out as nicely... unless I did something wrong. It's the part that covers the speaker. I couldn't find a nice way of taking it out.

    David -

    I had to use a guitar-pick to pry that section off of the frame. Start at the front-facing camera edge and run the pick underneath the plastic cover. The catches should release.

    Takashi Alekseev -

    I used a pointed prying too to get it started, then the flat one. It took some fiddling but finally came off nicely.

    Nick B -

    READ ME!

    For a guide that takes you step by step on how to remove the SIM and microSD, I'm surprised they didn't mention the top part of this midframe (still attached, in the pictures). This top part of the midframe also needs to be removed before you can take out the motherboard.

    You need to disconnect a ribbon not listed in these directions first, then pry that midframe up with the help of a guitar pick. This ribbon is located by the back-camera, next to the digitizer ribbon. This ribbon is connected to the midframe so it is essential you disconnect this before lifting the frame up.

    The frame is really snapped in there so don't be afraid to use a little force - for reference, you will use more force to pull this frame off than you did to pull off the back-cover of the phone. Once this piece is off, your phone should look like the picture in step 14.

    Jess -

Conclusion

To reassemble your device, follow these instructions in reverse order.

Walter Galan

694047 Reputation

0 comments