Introduction

Follow this guide to remove and replace the battery in your Samsung Galaxy Note5.

Before disassembling your phone, discharge the battery below 25%. A charged lithium-ion battery can catch fire and/or explode if accidentally punctured.

If your battery is swollen, take appropriate precautions. Do not heat your phone. If needed, you can use a dropper or syringe to inject isopropyl alcohol (90+%) around the edges of the back cover to weaken the adhesive. Swollen batteries can be very dangerous, so wear eye protection and exercise due caution, or take it to a professional if you're not sure how to proceed.

After completing this guide, calibrate your newly-installed battery.

  1. RiFZhNDBMelfMBTB
    RiFZhNDBMelfMBTB
    eiewCyIL1HxTkoEw
    vJjvmJtdAPFT1WOW
    • Insert a SIM eject tool, SIM eject bit, or a straightened paperclip into the small hole in the SIM card tray at the top of the phone.

    • Press to eject the tray. This may require some force.

    • Remove the SIM card tray.

  2. j5CRMGOcZLJD4NWA
    j5CRMGOcZLJD4NWA
    NREA1KAvHdhcIpDN
    UDcL1OuRcG5KS6vA
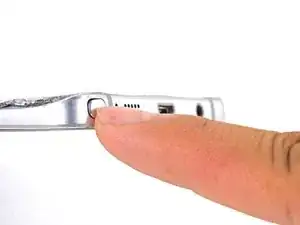
    • Using your fingernail, push the S-Pen button until it clicks and pops out of the phone.

    • Remove the S-Pen.

    Hola mi priblema es que meti al reves el spen en el orificio y al sacarlo pues ya no funciona …. Tiene reparacion es un galaxy note 5

    Lidia Lopez -

  3. sSRM2RKyEjFojdkT
    • If the glass back is cracked, carefully tape over the entire surface with packing tape.

    • Apply a heated iOpener to the bottom of the phone for about two minutes.

    • You may need to reheat and reapply the iOpener several times to get the phone warm enough. Follow the iOpener instructions to avoid overheating.

    • A hair dryer, heat gun, or hot plate may also be used, but be careful not to overheat the phone—the OLED display and internal battery are both susceptible to heat damage.

  4. kUoBHVSPhlhEPpn6
    kUoBHVSPhlhEPpn6
    tJUWShrlyZOPjPjd
    qEZhBnWKHOU65tF3
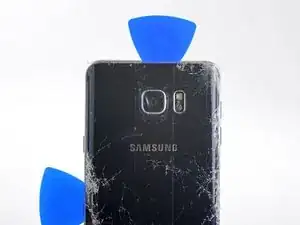
    • Apply a suction cup as close as possible to the bottom edge of the phone.

    • If the phone's back cover is cracked, the suction cup may not stick. Try lifting it with strong tape, or superglue the suction cup in place and allow it to cure so you can proceed.

    • Lift on the suction cup and insert an opening pick under the rear glass.

    • The rear glass very fragile and can break if you use too much force or attempt to pry with metal tools.

    Yes very fragile, i dont know how to remove without cracking the glass back.

    victor zlotnicki -

    It IS possible, because I just did it. You have to be extremely patient and use firm but gentle pressure. It took me nearly an hour just to get the back off.

    Michael Ridenour -

    One more thing: I discovered that the only way that I could get enough heat into it to soften the adhesive it is to fold the hot iOpener so that you heat from both sides.

    Michael Ridenour -

  5. mbwPJvJ2vr4R2dQj
    • Once the pick is in place, reheat the edge with an iOpener for another minute.

  6. 2j5HC2lnVrkcITIg
    2j5HC2lnVrkcITIg
    qfJtEcuDoOMrkm1v
    NABbvJp3xLyq15UO
    • Slide the pick down the bottom edge of the phone.

    • Go slowly so that the tip doesn't slip out of the seam. If sliding becomes difficult, reheat and reapply the iOpener.

    • Leave the pick in place to prevent the adhesive from resealing, and grab another pick as you proceed to the next step.

  7. nGvqmAbCWNTZZo1Y
    nGvqmAbCWNTZZo1Y
    gFXgr2kvmlo4piCH
    BRlNaYv1HiLJ1Qsv
    • Insert another pick and slowly cut around the corner of the phone.

    • Due to the curved shape of the back, the glass is extremely fragile and prone to cracking in the corners. Be patient and reapply an iOpener if the corner feels hard to slice through.

  8. Ee3VHR2uYouDKHwO
    • Before cutting further, apply a heated iOpener to the long edge.

  9. geqWV1TqxwDhvZ5T
    geqWV1TqxwDhvZ5T
    S6cCXyyOPTPHbXCT
    NQwBgqZ4cxNiF3cj
    • Repeat the previous heating and cutting procedure for the remaining three sides of the phone.

    • Leave an opening pick in each edge of the phone as you continue to the next to prevent the adhesive from resealing.

  10. XgErB2TRRO5hVZtS
    XgErB2TRRO5hVZtS
    xMBEJwfEWbh5C23n
    A4ZksKnelpOCgau4
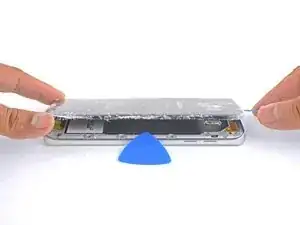
    • Use an opening pick to cut any remaining adhesive around the edges of the glass.

    • Lift the glass and remove it from the phone.

  11. EyIoaUI3dvivjmPr
    • To reinstall the back cover:

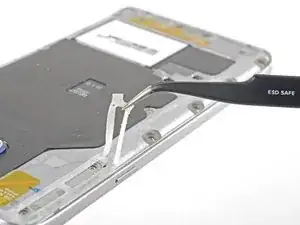
    • Use tweezers to peel away any remaining adhesive from both the back cover and the phone's chassis.

    • Clean the adhesion areas with high concentration isopropyl alcohol (at least 90%) and a lint-free cloth. Swipe in one direction only, not back and forth. This will help prep the surface for the new adhesive.

    • Be sure to turn on your phone and test your repair before installing new adhesive and resealing the phone.

    • Replacement adhesive comes in a pre-cut sheet to match the exact contours of the back cover. If that's not available, you can use a high-bond double-sided tape, such as Tesa 61395. Be aware that this leaves gaps that are vulnerable to liquid intrusion.

    • After installing the rear cover, apply strong, steady pressure to your phone for several minutes to help the adhesive form a good bond, such as by placing it under a stack of heavy books.

    • If desired, you may reinstall the back cover without replacing the adhesive. Remove any large chunks of adhesive that might prevent the back cover from sitting down flush. After installation, heat the back cover and apply pressure to secure it. It won't be waterproof, but the glue is usually more than strong enough to hold.

  12. BtGRtBBEMmKypvfV
    • Remove the twenty 3.3 mm Phillips screws.

    the phone was gave to me and I bought a replacement battery but two of the screw around the camera won't come out it's like their stripped what do I do

    wadefultz2 -

    Hi wadefultz2,

    You can try some of these methods:

    How to Remove a Stripped Screw

    Arthur Shi -

  13. 34JFLSUTUNuEC4aX
    34JFLSUTUNuEC4aX
    ZGTclIdSDNpTHJeP
    cIjECLOZdrvD4KMT
    • Make sure you've ejected the SIM tray before performing this step.

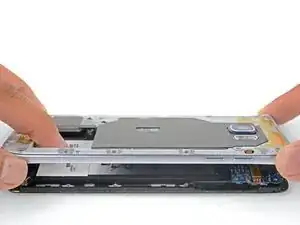
    • Hold the midframe by the edges and lift it upwards while pushing down against the battery with one finger.

    • There is a small amount of adhesive in each corner holding the midframe to the display assembly. Apply constant force until the midframe separates.

    • Remove the midframe.

    During this step, I destroyed my phone. Some of the circuit board at the bottom of the battery is attached to the mid-frame. When I pushed on the battery as instructed, it broke apart. The phone is useless.

    Edward Hamilton -

    Hi Edward,

    I’m sorry to hear that! My guess would be that a stray screw held the board to the midframe. If your phone had an extra screw that I missed, please notify me and I’ll correct it!

    Arthur Shi -

  14. hLAj1hQSFxmvPvxs
    hLAj1hQSFxmvPvxs
    NfihSUeHQgd2v3kt
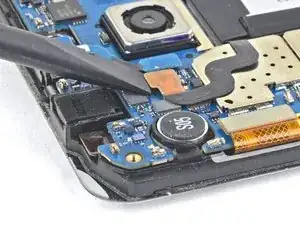
    • Using the flat end of a spudger, lift the battery connector straight up from its socket on the motherboard.

  15. lZLp2fFc31tLi6KW
    lZLp2fFc31tLi6KW
    QvlT5DqCxSYUAjCd
    5Wxn2wTCvRw6BFkU
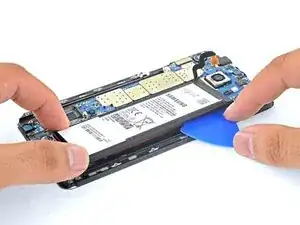
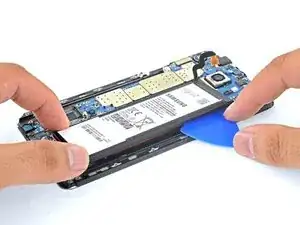
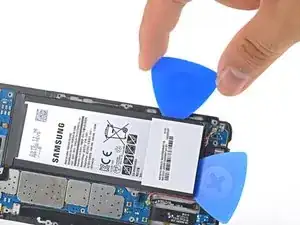
    • Slide an opening pick under the bottom edge of the battery to slowly pry it up from the case.

    • The battery is held in place by strong adhesive. To help with removal, you can apply a heated iOpener on the battery for a minute. Alternatively, apply some isopropyl alcohol under each corner of the battery and allow it to penetrate for several minutes to help weaken the adhesive.

    • Try your best not to deform the battery during this process. Soft-shell lithium-ion batteries can leak dangerous chemicals, catch fire, or even explode if damaged. Do not use excessive force or pry at the battery with metal tools.

  16. kfyLWFfH6ecRvFao
    kfyLWFfH6ecRvFao
    GFxV1LXTF3KNZAXu
    fIFQDHUlEH6S4NYl
    • Slide an opening pick up the side of the battery to break apart any remaining adhesive.

    or add a few drops of isopropyl alcohol (IPA) to the gap at the edge of the battery & wait 30s, then the battery just lifts out

    rob65536 -

  17. kdT6bNMWvBxlLkxJ
    kdT6bNMWvBxlLkxJ
    GDTdAfPemPELyJIJ
    QWgIAJAQpLe6Mbxu
    • Lift the battery out of the case.

    • Do not reuse the battery after it has been removed, as doing so is a potential safety hazard. Replace it with a new battery.

    • To install a new battery:

    • Remove any remaining adhesive from the phone, and clean the glued areas with isopropyl alcohol and a lint-free cloth.

    • Secure the new battery with pre-cut adhesive or double-sided adhesive tape. In order to position it correctly, apply the new adhesive into the phone, not directly onto the battery. The adhesive should go around the perimeter of the battery compartment, but not in the rectangular cutout in the center (which is actually the back side of the display).

    • Press the battery firmly into place for 5-10 seconds.

Conclusion

Compare your new replacement part to the original part. You may need to transfer remaining components or remove adhesive backings from the new part before installing.

To reassemble your device, follow the above steps in reverse order. Take your e-waste to an R2 or e-Stewards certified recycler.

Repair didn’t go as planned? Check out our Answers community for troubleshooting help.

Arthur Shi

Member since: 03/01/18

248651 Reputation

43 comments

Hi , Sophia

The Back Case after heating, will it be fixable without any adhesive solution

LOGESAM -

Yes if you over heat the back for a long time. If you just heating it up to remove adhesive you should be fine.

Constantino -

Would doing this void my warranty?

Willie contreras -

Ofcourse it will void your warranty..You seriously think opening up fixed battery wont void your warranty lol..

Asad Malik -

By the time you need a new battery, your warranty will be out anyway most likely.

Kathy -
is the battery linked in this post the same one that comes in Note 5 stock? i'm hesitant to buy a battery that might be worse than i currently have.

paul -

Yes the battery is OEM

Jade Davis -

check the connections when it plugged in to the main board, see if any prongs are bent or broken. Make sure there are no tears in the ribbon from the batteries.

Dustin Gonzales -

I also am having to charge my phone every 3 to 4 hours. Terrible!

dgpaul -

I swapped the battery and saw 24hr use with normal usage. Old oem battery had blown up and was all lumpy. Amazing how much better it is. I don't know how not to break the glass whIle removing the back cover though, would recommend buying a spare back cover just in case since it breaks easily.

joinhalo -

dbpaul, best way to avoid damages is to heat the back cover area and use 2 suction holders. 1 attached to the LCD and one to the back cover. gently pull them appart and the glues will begin to seperate. you can get them on this site for ~$3 a piece.

Suction Handle

Product code: IF145-361

Dustin Gonzales -

What tool are you using to heat/melt the adhesive? I tried using a hair dryer but it did not work :(

Newton Berwig -

Thank you so much (: i had to buy a heat gun from my local hardware store the blow dryer just didnt get hot enough . The most difficult part of this process was removing the actual battery it didnt just pop out like the video . it was glued in place i couldn't just rip it out either becaue the screen was on the other side i didnt want to yank it around to much and crack the screen underneath. but i slide a thin card and seperated the glue from battery (: yay all fixed !

mooberries25 -

I've tried using blow dryer and it doesn't loosen the glue at all. I have a heat gun, but won't it damage stuff inside?

littl-bit -

This is ridiculous...I have heated my phone til it burns my fingers and the glue does NOT release at all. And the hotter the phone gets, the worse the suction cup works!!!! Waste of $ for a battery I can't use!

littl-bit -

Will you have to replace the back if it is cracked when you take it off?

Derrick hardin -

Will you have to replace the back if it is cracked whenever you take it off to replace the battery?

Derrick hardin -

I just did a battery replacement on my dad's refurbished note 5. Getting the back to 450F was enough to seperate it. Do not use a small suction cup. Find something that takes up alot more surface area so you don't have to pull as hard. If your back does crack buy a replacement one its like ~10$ and mine came with pre-applied adhesive.

Matthew Dela Cruz -

I have a Note 4 and want a 5. Can I permanently remove the adhesive from the cover to help aiding the removal process? The phone won't get in the water anyway. Adhesive seems like an overkill.

Tony -
I wouldn´t do that in advance, because it may damage some part and the phone is not waterproof and dustproof anymore.

Claus Gärtner -

I changed the battery and but forgot to take out the sim initially. I checked the sim on other phone and thats working ok. But on this phone, no sim is getting signals or registered... any idea.. did i spoil something?

Ali -

Did you check the contacts in the phone for the sim? Are they in a good condition und clean? Try to clean them with a clean piece of cloth and a litte amount of alcohol on it.

Claus Gärtner -

Thanks, Sophia, I think your post has convinced me to stick with my Note 4 and not upgrade to the 8. I understand why manufacturers are moving away from replaceable batteries, but I sure don't like or agree with it.

Rick S -

Is samsung galaxy note 5 a strong phone to use, does the battery last?

Harry Gillis -

Is samsung galaxy note 5 a strong phone to use, does the battery last longer, pls wats the major problems with this brand?

Harry Gillis -

Grrrr lol, my first Note 4 and i cracked the digitizer and glass. I cracked them by gently pushing on the back of the battery so the sub-chassis could come out. Next time i’m putting the heat gun on Volcano to melt that %#*@ glue!! :-)

Aaron Tremblay -

Grrrr.!!! I broke the screen and digitizer while gently pressing on the back of the battery so the sub-chassis could come out, but no, it didn’t come out. So, next time i’m setting the heat gun to Volcano and melt that glue the heck out of there!!! :-)

Aaron Tremblay -

Thanks ,++Heat Gun++ setting temperature is?

zhangyang -

These are some of the stupidest comments I've ever read in my life Samsung enclosed the housing to keep water in moisture from getting inside of the device seconds the Note 5 is a huge upgrade compared to this shity ass Note 4. And the expandable memory saying that's why they make Dropbox yes Samsung did not put expandable memory in this phone because they wanted everybody to buy the next model and yes that is kind of shity of them but they send signals and updates to your phone to slow it down so that you get the next phone. The reason being new technologies are coming out and they can't continue to produce old technology when they are making new technologies it's the wave of the future get used to it or don't use a %#*@ cell phone

Spencer -

Why is the Note 4 so bad? I went from the 3 to the 5, and they really aren’t much different at all.

Chase Helms -

Sticking to my Note 4, after seeing these comments on remove/replacing the battery.

Tony -

I did it! Only casualty was the back case but I found an OEM on Amazon for that at 13 bucks. Since I use the Samsung S-view case, I am able to use my phone immediately. When the new back comes I will put that back on. Thanks Sophia!

Terry Kraft -

This will be my 3rd battery replacement. Once you do it its not so bad, the factory outside shell was a major pain but my replacements have come off very easy and I did NOT have to replace it. 2nd battery was bad. 3rd was oem VERIZON compatiable MAKE SURE you get the battery for your service provider (att/sprint/verizon/etc..) it does make a difference, there are dozens if not more batteries out there.

THANK YOU FOR THIS TUTORIAL IT WAS SPOT ON EASY TO FOLLOW!!!!! Much easier than youtube

joeykbarry -

I’m currious as to whether or not my saved data, etc will be affected by a battery swap? I’ll back it up anyway, but is losing it something I need to worry about?

antiknuckles -

You should not lose any data when doing a battery replacement. That said, you are very wise to back it up in case something goes awry with the repair.

Arthur Shi -

Do I need new glue to replace the old one ? I am going to buy a battery replacement on amazonkit but any glue seems to me included , is that ok ?

marco scocco -

Without the glue its no more protected against humidity. If thats no problem for you, you don´t need to use one.

But I would recommend you to use it. Its not really expensive.

For example on ebay, you could get a pre-cut tape for some bucks.

Claus Gärtner -

I was able to complete the replacement without needing a new back glass cover. But I’d like to add a few observations:

1. The bottom side of my back glass was much more stubborn than usual, maybe it’s because my phone is 5 years old. No amount of heating and pulling revealed any opening on the bottom. But I was able to start the process on the right side instead. If the bottom side is too tough for you, maybe you can look around for other locations.

2. The black adhesive on my front display (what makes up the bezel on the top and bottom edges) started to peel when I was removing the midframe. I don’t know if this was avoidable, since it looked like the adhesive was stuck quite strongly to the midframe. The peeling is just a cosmetic blemish on the screen, but I heard that you can fix this by filling the peeled section with LOCA UV glue.

Jerry Ding -

My battery was swollen and when I tried to remove it, I got a sweet smell from the battery.

Took it outside to let the gas fully escape. The battery was fully discharged for a few months and cold.

Should I attempt to remive the battery again, I assume the chance of ot catching fire would be less since the gas is gone.

Test -

If the battery is fully discharged and vented, you can proceed to remove the battery. Wear gloves and do not use heat to remove the battery.

Arthur Shi -

Helllo. Tell me please - where to buy an original or a good battery today?

picstudio -

We sell replacement Note5 batteries here!

Arthur Shi -

Step 13 my phone was destroyed.

The bottom of the circuit board was attached to the top somehow. It broke apart during this step.

Edward Hamilton -