Introduction

Use this guide to replace the headphone jack and earpiece speaker assembly in your Samsung Galaxy Note II.

  1. OjBO3NvwOg5hOTXC
    OjBO3NvwOg5hOTXC
    KkhfrTkwRqACFjGK
    • Grasp the end of the stylus and remove it from its slot in the midframe.

  2. 5SDSaSbxsacpPR3L
    5SDSaSbxsacpPR3L
    KNfwpdwjBD2vFEgC
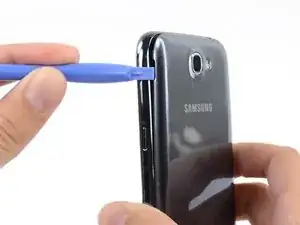
    • Pry with a plastic opening tool, or your fingernail, in the divot to the left of the rear-facing camera, near the power button.

  3. NAbGVsaEdYDkGulN
    NAbGVsaEdYDkGulN
    c6KPaPQCBVYZKheR
    oxlXdp1qUJ6fRJL6
    • Lift the rear case by the corner nearest the divot and remove it from the phone.

  4. xYyAnwMmb3FC43DY
    xYyAnwMmb3FC43DY
    jypFJ1ATIVReCVee
    kp4MWHahWyvBvSkH
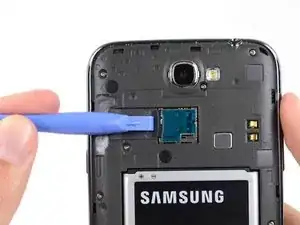
    • If you have an SD card inserted, use the flat end of a spudger, or your fingernail, to press the microSD card slightly deeper into its slot until you hear a click.

    • After the click, release the card and it will pop out of its slot.

    • Remove the microSD card.

    • For reassembly, push the microSD card into the slot until it clicks in place.

  5. yp5wEoAOllFeF1yK
    yp5wEoAOllFeF1yK
    nfOUHacGys3g4Fbo
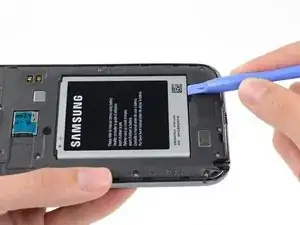
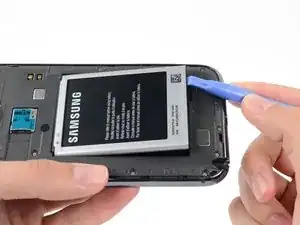
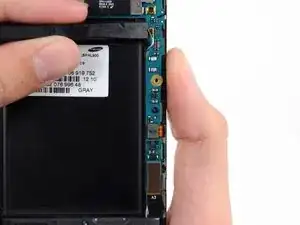
    • Insert a plastic opening tool, or your finger, into the notch of the battery compartment and lift the battery upward.

  6. tEZNORw4I4OUOoAs
    • Remove the battery from the midframe.

  7. cprKkriBWMA1SLP3
    • Remove the eleven 4.0 mm Phillips #00 screws securing the midframe to the display assembly.

    In my phone some of the screws are litterally not ot turn - I screwed up one of the heads - be careful!

    erich zalcmann -

    I have 2 note 2 phones model #: SGH-I317M. I have a broken screen that does not display in my note 2 but my brother's note 2 is working perfectly. Can I either transfer the motherboard in MY note 2 to my brothers note 2 or swap the broken screen with the new screen in my brother's note 2 ? Thanks. Reach me at anmac1789@gmail.com

    An Mac -

  8. UNyqMtMvOSEcyavU
    UNyqMtMvOSEcyavU
    WqTL4WGiRdSPYoWJ
    AZOE4GwRRDO4vRjG
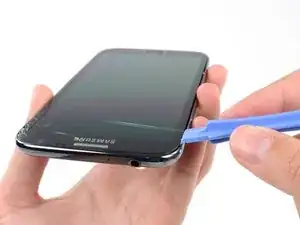
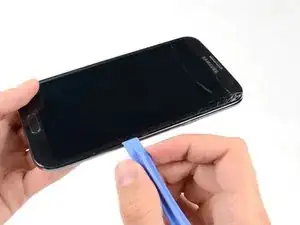
    • Insert your plastic opening tool between the midframe and front panel assembly on the side of the phone.

    • Slide the plastic opening tool down the seam.

    I didn't have an opening tool, so I used a stiff guitar pick. Worked like a charm.

    evanjpederson -

    for best result without any scratches or breaking frame, open the frame on table (solid), don't open on hand.

    Chovav Sutachy -

  9. MuEmYpbhA1NxSdlI
    MuEmYpbhA1NxSdlI
    sLPAPX11bSM1YNKE
    5Ubit2yNb2Wpea22
    • Continue to run the plastic opening tool down the seam.

  10. 1UBn2YEWu61fCYAv
    1UBn2YEWu61fCYAv
    PyVMVafgkANDduDE
    • Carefully pry around the corner with a plastic opening tool.

    The screen cracked using that plastic tool.

    hell0allis0n -

  11. sbRHcLgAIM4Xjm1n
    sbRHcLgAIM4Xjm1n
    DVVCvr6vjEeUG6Ia
    • Pry along the top of the phone with a plastic opening tool.

  12. RBhycTXVketEaYBp
    RBhycTXVketEaYBp
    HgRVIC2VIg6wUs6S
    • Push the plastic opening tool down to free the corner of the midframe from the display assembly.

  13. U4KY4asvrq6D3wAQ
    U4KY4asvrq6D3wAQ
    I2T2sHbJilTnE2L6
    • Free the clips along the power button side of the phone.

    • Lastly, free the two clips along the top and bottom edge of battery compartment.

    Start with the top clip. You can see it located next to the three battery connectors. Insert the spludge from the side gently to push, the clip should go off.

    Once this clip is off, the bottom battery clip can be unclipped simply by gently moving the two pieces apart.

    anonymous 4780 -

    Gan kalok bluetooth hp saya sama wifi nya nggak bisa nelusurin jaringan apa nya yg rusak apa gara gara udah di root

    aryadana55 -

    If you're primarily following the pictures, as I was, you might be frustrated that your display assembly isn't popping off. Unfortunately, a vital step was listed in the instructions but not photographed:

    "Lastly, there are two clips along the top and bottom edge of battery compartment that also hold the display assembly in place."

    alimac70117 -

  14. PdVAyLAnvItAqEgF
    PdVAyLAnvItAqEgF
    MUXgAbj2KxYeWcCT
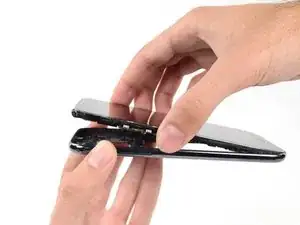
    • Lift the display assembly out of the midframe.

    unblock the edge at the middle-up of the battery compart!

    Giorgio -

  15. fBJ3dEuj61gKxLHk
    fBJ3dEuj61gKxLHk
    QRFXjJqTDrRv1PCA
    pNlJgC12SqPjqp1W
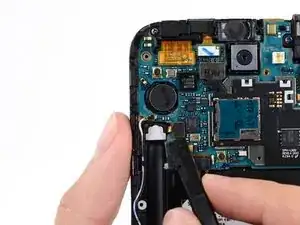
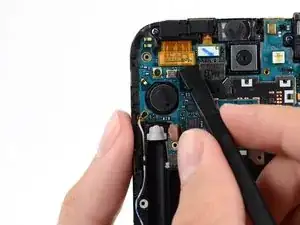
    • Use a spudger to disconnect the vibrator/power button assembly cable connector.

    • Disconnect the antenna cable connector.

    • Disconnect the display cable connector.

    Dear Sirs,

    My Galaxy Note II is completely dead due to lightning in the house. I guess there is a fuse or a protection somewhere but I can not find it. Can you help ? Thanks in advance, Jose

    Jose -

    One idea would be to track backwards, i.e. check to see if current is reaching from the charge port to the mainboard. Looking at the following picture http://d3nevzfk7ii3be.cloudfront.net/igi... it seems like the fuse is - as expected - located right by the USB port. If you're lucky it could be as easy as replacing the charging board, a $10 component.

    hakro807 -

    My Note II LTE does not have the antenna cable like here

    Bubbele -

  16. UaXWqjR1meti6aRw
    UaXWqjR1meti6aRw
    RI5qsou5bdgpIkfx
    6WSRDFX1TKC5nmJo
    • Disconnect the front-facing camera cable connector.

    • Disconnect the headphone jack cable connector.

    • Disconnect the digitizer cable connector.

  17. QpRGJwcYky1TPAc6
    QpRGJwcYky1TPAc6
    XnD5aYfNOKe4jPmy
    D5cQnBUEhxTbOt1l
    • Use the spudger to disconnect the antenna cable connector from the motherboard.

    • Disconnect the soft button cable connector.

    • Disconnect the USB board cable connector.

  18. lBufmmfOqQfBX54N
    • Remove the 3 mm Phillips #00 screw securing the motherboard to the display assembly.

    Is it possible to replace my Note II N7105 motherboard to N7100? Is there some negative effects happen, if i did it?

    Eduardo Lucas III -

  19. CHkRS3DNpGWckaPP
    CHkRS3DNpGWckaPP
    NGOHS3yU5tKn6aRO
    • Gently remove the motherboard.

    • Hold the motherboard by its edges to prevent ESD damage. Be careful not to snag it on any cables as you extract it from the display assembly.

  20. stHfHo3qOfVtnmRN
    • Remove the 3 mm Phillips #00 screw securing the headphone jack assembly to the display assembly.

  21. oymGuTHROCh2XZFn
    oymGuTHROCh2XZFn
    JLLAStuZIMWYWDyL
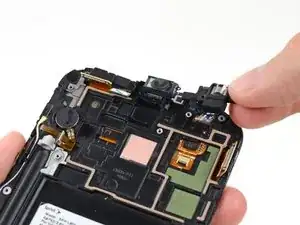
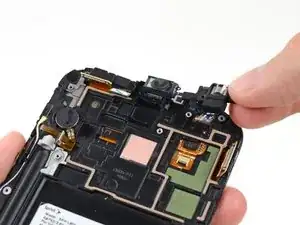
    • Grasp the headphone jack portion of the assembly and lift it out of its groove in the display assembly.

  22. e5Ar3uFTBf1cdGxP
    e5Ar3uFTBf1cdGxP
    Ax5KYLtAswPTuDUv
    • Gently pull the headphone jack straight up without twisting the cable to remove the earpiece speaker portion from its recess.

    • Twisting or pulling unevenly could damage the cable. Be very careful as you extract the assembly.

Conclusion

To reassemble your device, follow these instructions in reverse order.

Sam Goldheart

Member since: 19/10/12

465329 Reputation

5 comments

Thanks for the help. I have fixit the my Headphone Jack/Earpiece Speaker easily with these tutorial. The only difficult was the reassemble the antenna cable connector.

Giorgio

Giorgio -

Sooo, to replace the earpiece assembly, you have to bust your screen?

David -

Did you use the miniature hammer for that step David?

Jasen Putney -

Where can I purchase a headphone jack to replace my defective one?
jimhyunglee -

Installed everything correctly. Ear piece works fine, however my headphone jack (which was the faulty component in the first place) does not work at all. The phone does not even detect when I have a pair of earbuds plugged in. I replaced this piece due to heavy static out of the headphone jack.

Chris Del Sesto -