Introduction

  1. gBtaDMAdKNfNprUe
    • Begin removing the 3/16" screws for the device.

  2. NScoBeEQyMvEislq
    • Turn the device and remove the additional 3/16" screws.

  3. ctibQVQkAnj4rrSt
    • Turn the device and remove the additional 3/16" screw.

  4. 4qyDnYFPWejTZ5fq
    4qyDnYFPWejTZ5fq
    wMZGWqDEfWYD2lDH
    XYa6GEc6HUmHmjXp
    • Take the white cover plate off.

  5. rF4RpdBUKWSjTMhR
    • Using the plastic opening tools, pry open the camera from the bottom.

    • This may require a moderate use of force because of the sealing glue.

  6. aTxTT3Oh6uBGBDIt
    • Gently pull the connector away from the motherboard.

    Help! I can't get this connector back in place! How did you do it?

    Thanks!

    rotraut geringer -

    Got it finally - and it's working again, I can't believe it! Thank you so much for the instructions!!!!

    rotraut geringer -

  7. 56K6kGsQyK3kFMvv
    • Unscrew the motherboard's screws. There are 4 3/32" screws and 3 5/32" screws.

  8. T2eVmtrXIFZ2UiJY
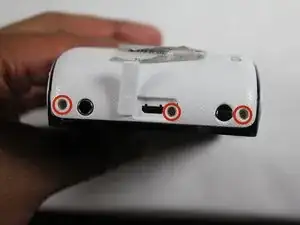
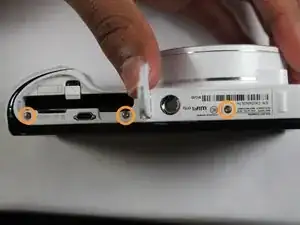
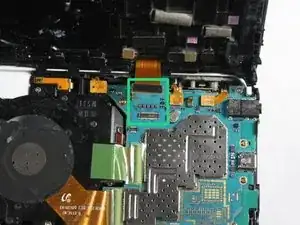
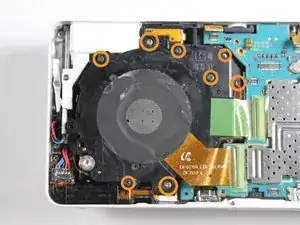
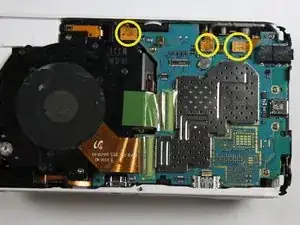
    • Unscrew the lens' screws. There are 1 black 4/32" screw, 3 3/16" black screws, and 2 white 5/32" screws.

    This seems to be wrong. Only 2 screws connect the lens to the camera body - if you unscrew the others, you open up the lens and there is no need to do so.

    NOVOMOTION J. H. -

  9. nBvOtCEPc1xwARoa
    • Pull these connectors away from motherboard.

  10. UaOjTFvIUQwMAgKh
    • Lift the motherboard and lens out of the case.

Conclusion

To reassemble your device, follow these instructions in reverse order.

Richard Hicks

Member since: 14/01/15

1262 Reputation

One comment

Hey mate, what do you do after the motherboard replacement? Just turn the camera on? Do you need to do a master reset?

Sam -