Introduction

This is a prerequisite-only guide! This guide is part of another procedure and is not meant to be used alone.

  1. 3nHRWK6EGQW4OX1h
    3nHRWK6EGQW4OX1h
    X1lDTZdfCrFONGBb
    CYBpWKyHeiymuMSJ
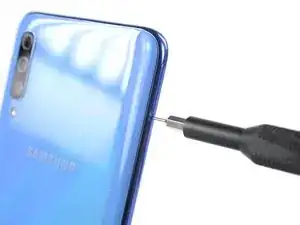
    • Insert a SIM card eject tool, a SIM eject bit, or a straightened paper clip into the hole on the SIM tray located at the left edge of the phone.

    • Press firmly to eject the tray and remove it.

  2. IGrGbksinpPw5nkH
    • Switch off your Galaxy A70.

    • Heat an iOpener and use it to soften the adhesive beneath the back cover. Apply the iOpener for at least two minutes. You might want to repeat this step several times during the back cover removal.

    • A hair dryer, heat gun, or hot plate may also be used, but be careful not to overheat the phone—the AMOLED display and internal battery are both susceptible to heat damage.

    Kann man im Falle dass man kein spezielles Gerät hat auch ein Fön benutzen?

    Derzocker39 -

    Hallo Derzocker39,

    auch einen Föhn kannst du zur Not benutzen. Die Zeit kann dabei variieren. Taste dich am besten langsam heran und überprüfen immer wieder ob sich das Backcover schon anheben lässt. Wenn es schwer werden sollte den Klebstoff zu durchtrennen, kannst du auch zwischenzeitlich immer wieder föhnen. Achte darauf, dass dein Gerät nicht zu heiß wird.

    Dominik Schnabelrauch -

  3. x1PwIaINLLWUsMHZ
    x1PwIaINLLWUsMHZ
    X4KAWUoQknXCLXJC
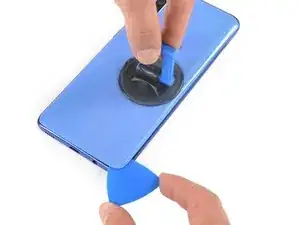
    • Apply a suction cup to the back of the phone, as close as possible to the center of the right edge.

    • Pull on the suction cup to create a gap between the back cover and the frame.

    • Insert an opening pick into the gap.

  4. PR1uwPIXSjeHQ1jG
    PR1uwPIXSjeHQ1jG
    iwmZtGs3jeypDCpm
    SRSFIRFGQPbXLxPK
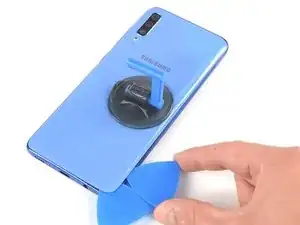
    • Slide the opening pick along the edge to the bottom right corner.

    • Leave the opening pick in its place to prevent the adhesive from resealing.

    • Once you have inserted an opening pick, feel free to remove the suction cup or continue to use it for a better grip during the removal procedure.

  5. Iw2lOIijImQGmEBY
    Iw2lOIijImQGmEBY
    F12kdWYcVPnLPGk2
    d6s1lZ5Tv5fHqqTQ
    • Insert a second opening pick underneath the bottom right corner of the back cover.

    • Slide the opening pick along the edge to the top right corner.

    • If you have trouble with cutting, you can use the iOpener again to soften the adhesive.

    • Leave the opening picks in place to prevent the adhesive from resealing.

  6. rutNVHPZS4WxsJcM
    rutNVHPZS4WxsJcM
    adJWiuFm3kjnkZyx
    • Insert a third opening pick underneath the top right corner of the back cover.

    • Slide the tip of the opening pick along the top edge of the phone to cut the adhesive.

    • Leave the opening pick in the top left corner to prevent the adhesive from resealing.

  7. WfPKcQjQqZcoroEK
    WfPKcQjQqZcoroEK
    PFhisuJG1Ng4DwZ2
    ho3lmXK1WKRNOQXw
    • Insert a fourth opening pick underneath the top left corner.

    • Slide the opening pick along the left edge of your phone to cut the adhesive.

    • Leave the opening pick in its place to prevent the adhesive from resealing.

  8. oGIRUhfnvKAXpCx4
    oGIRUhfnvKAXpCx4
    JMqnpRmYJOXYB31H
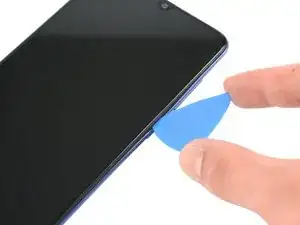
    • Insert a fifth opening pick underneath the bottom left corner.

    • Slide it along the the bottom edge to cut the remaining adhesive.

    Someone must have already worked on the A70 that I got. It had a clear very sticky stringy glue all over the place. They even applied it to that little copper strip (seen near the top of the phone in the pic below, opposite the camera). So when I pulled off the back, that strip came with it. Is that an antenna or something? Guess I will find out...

    Frank Zimmerman -

  9. di4gJhySbboRNARQ
    • Remove the back cover.

    • After installing the back cover, apply strong, steady pressure to your phone for several minutes to help the adhesive form a good bond — a stack of heavy books works well.

    What if the sub part of the black thing at the back has remove

    Adelaide Biney -

  10. Ci2kxClgaMlR6hfk
    • Use a Phillips screwdriver to remove the fourteen 4.0 mm-long screws that secure the midframe.

  11. rBGoWSAUTQGMXiTb
    rBGoWSAUTQGMXiTb
    TpMBJVqS1xApB5Td
    • The midframe is held in place by plastic clips.

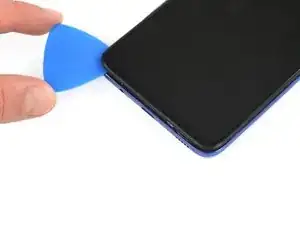
    • Insert an opening pick between the midframe and front panel assembly on the right edge of the phone near the volume button.

  12. Vpl6oDEbBl4JhVF5
    Vpl6oDEbBl4JhVF5
    SI3OmdMtAGD3VrGK
    • Slide the opening pick to the bottom right corner to detach the plastic clips.

  13. DfO3aRQS3FfuBMMB
    DfO3aRQS3FfuBMMB
    2WG2IHq4QHfbXKFm
    sJwCUGVIWbrYfR3F
    • Continue sliding the opening around the bottom right corner to the bottom left corner to detach the plastic clips.

  14. R2XvMACZTNNFONmP
    R2XvMACZTNNFONmP
    xJUUuKXXKmFJdioc
    cL1xVrEDFALyygxI
    • Slide the opening pick along the left edge to detach the plastic clips.

  15. 5y1la2FEwCxOPB3Q
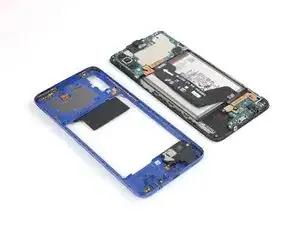
    • Remove the midframe.

Conclusion

To reassemble your device, follow these instructions in reverse order.
Adriana Zwink

Member since: 18/12/19

47683 Reputation

0 comments