Introduction

Prerequisite only! Use this guide to replace the midframe in your Samsung Galaxy A51.

  1. cH3CEx3nkaIr4gH5
    cH3CEx3nkaIr4gH5
    ncXw5DFjFqxOgbgm
    1VijufEZdiIvhYku
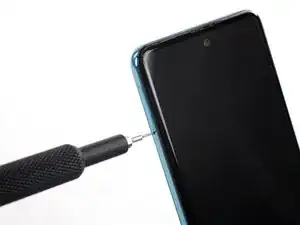
    • Insert a SIM card eject tool, a SIM eject bit or a straightened paper clip into the hole on the SIM tray located at the left side of the phone.

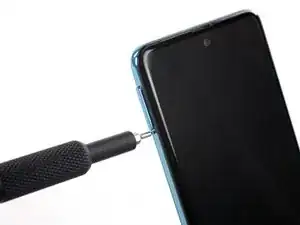
    • Press firmly to eject the tray.

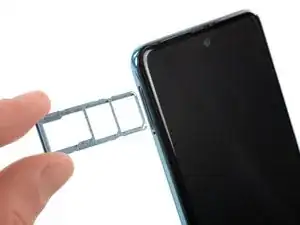
    • Remove the SIM card tray.

    • When reinserting the cards, make sure to properly orient them in the tray.

    Kijk uit voor de vingerafdruk scanner. Er zit een kleine flat cable aan die kapot gaat als je de behuizing er in 1 keer vanaf haalt

    Arno van Duijn -

    Falls der vorherigen Kommentar nicht verstanden wird, hier nun die Übersetzung 😉 Achte dabei auf den Fingerprint Scanner, da ist ein kleines flaches Kabel dran welches kaputt geht wenn Du die Hülle auf einmal entfernst.... also Vorsicht ist hier wohl geboten, wenn man sich an dieses scheinbar Einfache heran macht.

    Sylvia L. -

    Ik kan helaas niet de simkaart houder met sim. Eruit halen. In de S9 plus de sim kaart blijft achterwege.

    Deden -

    ????????????

    Deden -

  2. 1DN1UFIC2bsIuxuN
    • Before beginning this procedure, completely power off your phone.

    • Prepare an iOpener and apply it to the back cover to soften the adhesive.

    • The adhesive of the Samsung Galaxy A51 is very strong. You can use a hair dryer or a heat gun if you aren't able to open the device with the iOpener.

    • Be careful not to overheat the phone—the AMOLED display and internal battery are both susceptible to heat damage.

  3. jAxMQXMWeenYpOos
    jAxMQXMWeenYpOos
    x6dHBufZKtCXhZEC
    ALN1siEi3xDevUSR
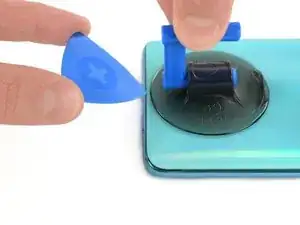
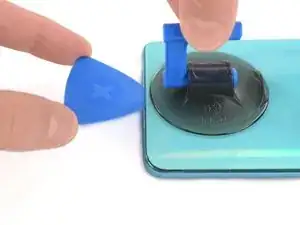
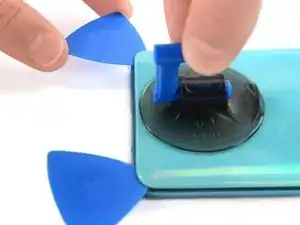
    • Insert the tip of an opening pick between the frame and the back cover at the bottom of the phone near the USB-C port.

    • If you can't get between the back cover and midframe with your opening pick, you can use a suction handle or strong tape to pull up the back cover to create a gap.

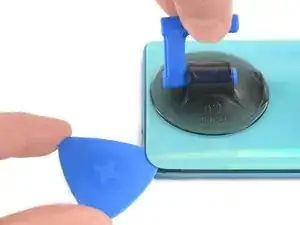
    • Slide the opening pick to the bottom right corner and leave it there.

  4. MEEI5OFCNvdixI1I
    MEEI5OFCNvdixI1I
    Em624pVLknyOG1Qf
    OqdANM3Y3nEvCFRa
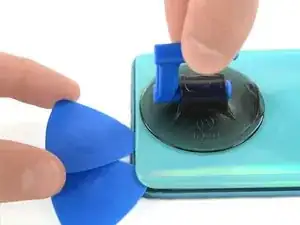
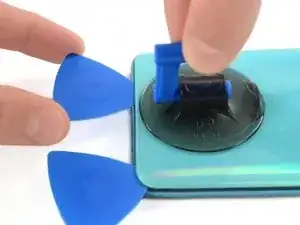
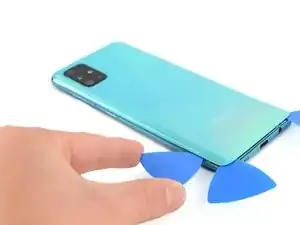
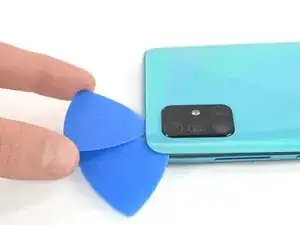
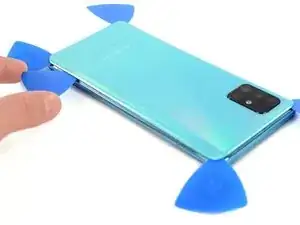
    • Insert a second opening pick and slide it from the bottom right corner to the bottom left corner to cut the adhesive.

    • Leave the opening picks in place to prevent the adhesive from resealing.

  5. xXoJDrSxZr4BSTM6
    xXoJDrSxZr4BSTM6
    exao1wgtIE3sNHet
    C6HxgArytoOXnFBk
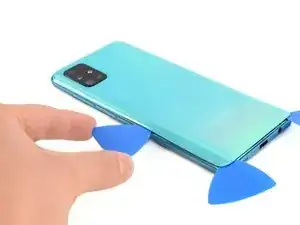
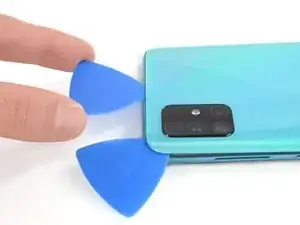
    • Insert a third opening pick under the bottom left corner of the back cover.

    • If you have any trouble, apply more heat to further soften the adhesive. Follow the iOpener instructions to avoid overheating.

    • Slide the opening pick along the left edge of the phone.

    • Leave the opening pick in the top left corner to prevent the adhesive from resealing.

  6. l1CZ3QDAJHriNcLf
    l1CZ3QDAJHriNcLf
    2bGyRZ1OGFCodIZj
    TTNPnjXBFTDKWScl
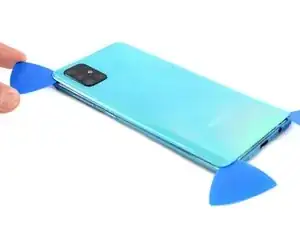
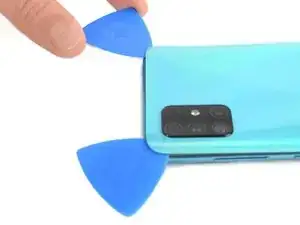
    • Insert a fourth opening pick under the top left corner of the back cover near the camera.

    • Slide the tip of the opening pick along the top edge of the phone to the right corner to cut the adhesive.

    • Leave the opening pick in the top right corner to prevent the adhesive from resealing.

  7. 1JfXLPJvqKDXTrIf
    1JfXLPJvqKDXTrIf
    oxGJbQTnoW5BbJPe
    FuGnHWXJGrmbDvog
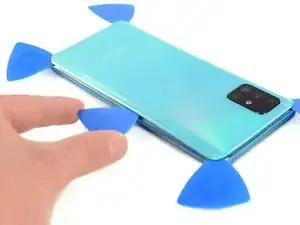
    • With opening picks in all four corners, insert a fifth and final opening pick under the top right corner of the back cover.

    • Slide the tip of the opening pick along the right edge of the phone to the bottom right corner to cut the remaining adhesive.

  8. OcAjqZOurs3bOXAB
    • Remove the back cover.

    • After installing the back cover, apply strong, steady pressure to your phone for several minutes to help the adhesive form a good bond—a stack of heavy books works well.

  9. HBIvEXZVPmuLZxAR
    • Remove the thirteen 3 mm Phillips #00 screws securing the midframe.

  10. yJH2K2CAesDuwZZH
    yJH2K2CAesDuwZZH
    vQfxVkYhj1MQL6Lm
    PBRfDiLAbXAPLrok
    • The midframe is held in place by plastic clips.

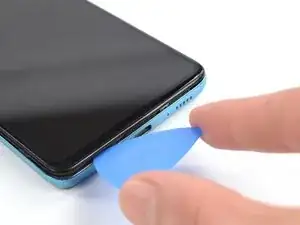
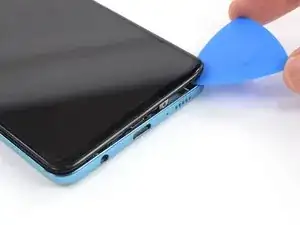
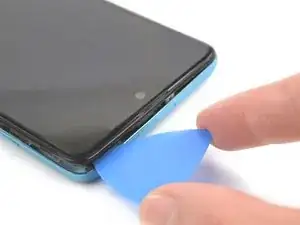
    • Insert an opening pick between the midframe and front panel assembly on the bottom of the phone near the charge port.

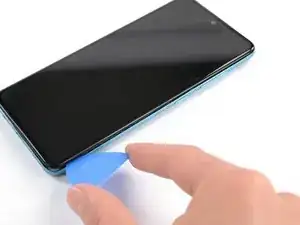
    • Slide the opening pick to the left bottom corner to release the plastic clips.

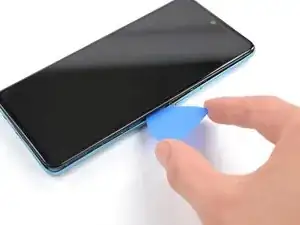
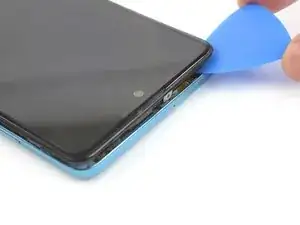
    • Slide the opening pick to the bottom right corner to release the rest of the bottom plastic clips.

  11. BItAVjEinTTcYMbD
    BItAVjEinTTcYMbD
    b1qEusdONtmQuaJ4
    VOAoVLwIZM44l24C
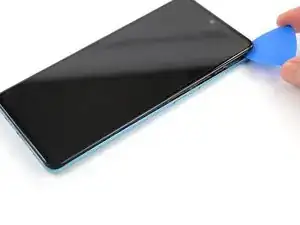
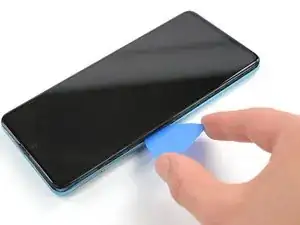
    • Continue sliding the opening pick on the right side of your phone until all plastic clips on the right side are released.

  12. CIRGHkPYrQh2NRGs
    CIRGHkPYrQh2NRGs
    Cgi6dFDHNBGIAGrR
    3LhYtIjEYCnljcOL
    • Slide the opening pick along the top edge to release the top plastic clips.

  13. F4iIBrdlHdeZLcjH
    F4iIBrdlHdeZLcjH
    5TFSl6KXb2NkrNi6
    WwwTORW1CtiGCYS1
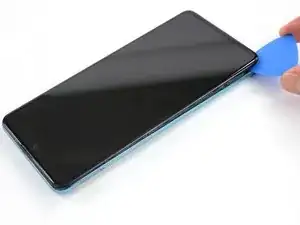
    • Slide the opening pick from the top left corner to the bottom left corner to release the left side's plastic clips.

  14. viWHRSBloVdY5FVU
    • Remove the midframe.

Conclusion

To reassemble your device, follow these instructions in reverse order.
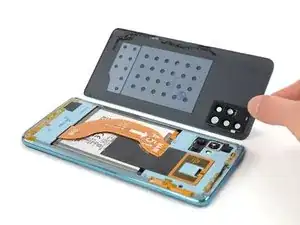
Adriana Zwink

Member since: 18/12/19

47683 Reputation

0 comments