Introduction

If your Galaxy A3 won't hold a charge you can use this guide to replace the worn-out battery.

This guide involves removing the display and the midframe. You will need replacement adhesive to reattach the display. The LCD is also glued to the frame and is likely to break when opening the phone.

Before disassembling your phone, discharge the battery below 25%. The battery can catch fire and/or explode if accidentally punctured, but the chances of that happening are much lower if discharged.

If your battery is swollen, take appropriate precautions.

  1. F2eqWLusC1HDXCVP
    F2eqWLusC1HDXCVP
    TApKZp16mEHowHpo
    v3NuLuKE6fIkLqiE
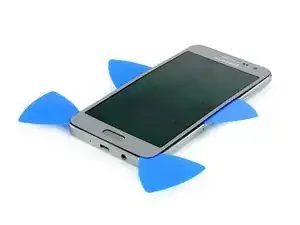
    • Switch off your phone.

    • If your screen is cracked you want to cover the front panel with tape to protect yourself from glass shards and get a better grip to lift it.

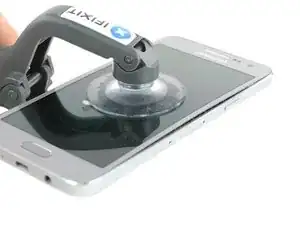
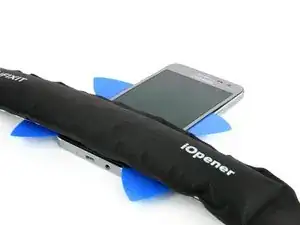
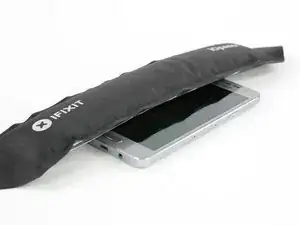
    • Use an iOpener to soften the glue on the edge of the display. Concentrate on the sides first and then on the bottom part.

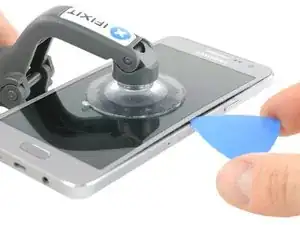
    • With an iSclack or a suction handle you can lift the display a little bit to get in the gap with an opening pick.

    • In the beginning just insert the very tip of the opening pick and slide along the side to loosen the glue. Leave the top and bottom alone for now.

  2. bgEyqJIgWHDims3I
    bgEyqJIgWHDims3I
    Y23QWfPNacVTuJGm
    E5LQO2r1nbSggeng
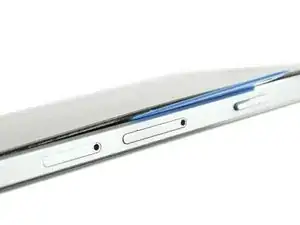
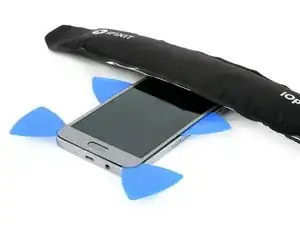
    • When the glue ist loosened enough on the side you can lift the display a little bit more to get underneath the display with an opening pick.

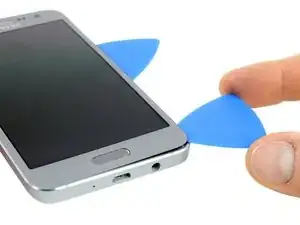
    • Take a second opening pick and work your way just around the bottom edge.

    • Be careful where the two touch buttons at the bottom are (see next step for orientation). Take your time and be patient.

    • Repeat the last step and this one on the other side.

    The connectors for the 2 touch buttons are very close to the bottom edge and easily ripped or cut. I suggest omitting that area or keep your pick very flat (parallel to your table) at the bottom edge.

    Tosnic -

  3. pgVmoHUEedNCShtH
    pgVmoHUEedNCShtH
    NYPyqNA5qfaqODtV
    tyRQmWBwN1DkILIZ
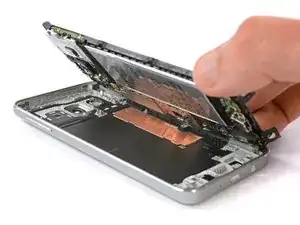
    • Grab the iOpener once again to heat up the bottom and top part to further soften the glue.

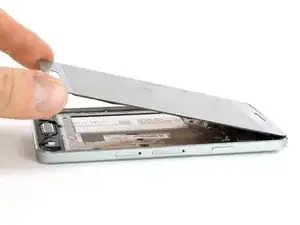
    • Now you will be able to move the picks at the bottom closer to the home button and eventually open the display towards the top.

    • Don't open the display all the way. It is still connected to the motherboard. Also the gold foil behind the display might come off and remain glued to the midframe. You can re-attach it later.

    • If your display is still working take care to not rip the front panel off of the display. You also want to leave the top part alone to not risk cutting any flex cables.

  4. d4FZ5RdtAYVHAWlM
    d4FZ5RdtAYVHAWlM
    frDNOSsTdOgKEAOo
    r4ZIkPkRqcYiP4xI
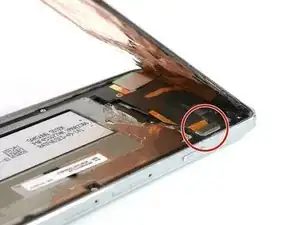
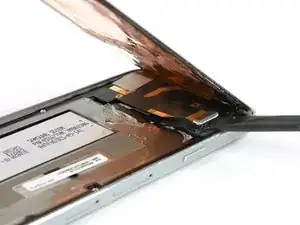
    • In the top right corner you can find the connector of the display. Use a spudger to disconnect it.

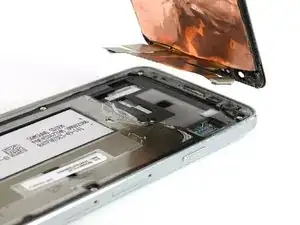
    • Now you can remove the display.

  5. MWn3YBs3OV5bbVji
    MWn3YBs3OV5bbVji
    tMSEGFQoNrDyfaeq
    shyIQyULsDDPDdUr
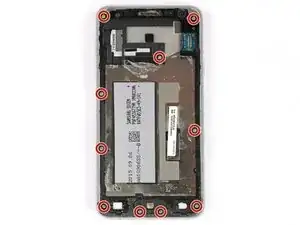
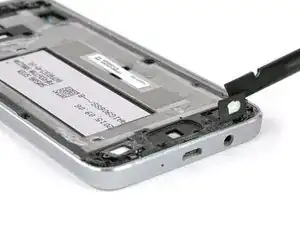
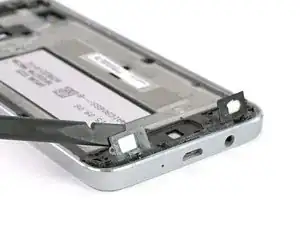
    • Remove the ten Phillips #00 screws.

    • Lift up the two touch sensors in the lower area of the frame with a spudger. You can skip this step if you are careful while removing the mid frame from the back cover later.

  6. uSRDxNAtIRCcE6Ir
    uSRDxNAtIRCcE6Ir
    64H2hSGVrygOxVEH
    FZIZp5Sf2ThKFqGt
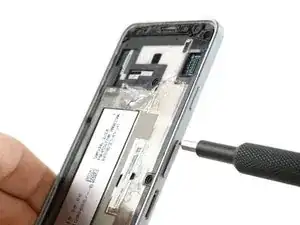
    • Remove the SD card tray and the SIM card tray.

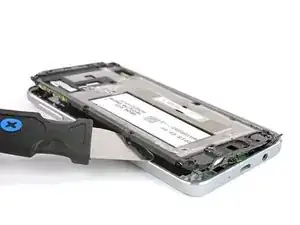
    • Use a Jimmy to lift up the mid frame on the left side of the phone where the battery is placed.

    • Be careful not to puncture the battery underneath.

    • Remove the mid frame with all its components from the back cover.

  7. TGdsqeYbc6Ufh3Cc
    TGdsqeYbc6Ufh3Cc
    iKHU5lSoC4VLDwUX
    YKYuMQerkqFUOXAG
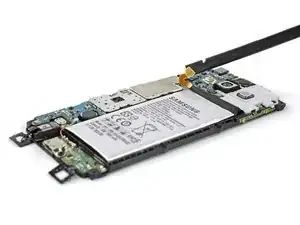
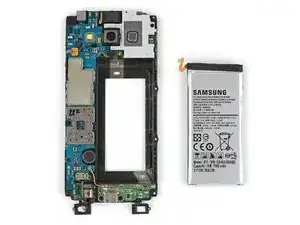
    • Unplug the battery connector with a spudger.

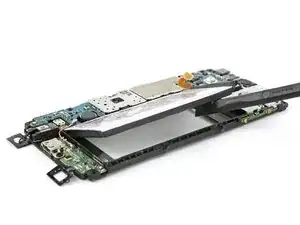
    • Use a spudger or an opening pick to get between the midframe and the battery to separate it from the glue.

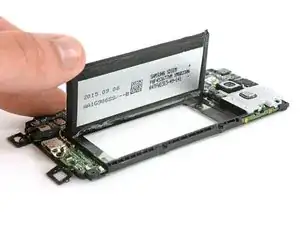
    • The frame around the battery is very fragile and easy to break. If the adhesive behind the battery is too strong, you need to use an iOpener to soften it.

    • Remove the battery from the frame.

Conclusion

To reassemble your device, follow these instructions in reverse order. Reapply adhesive where necessary.

Dominik Schnabelrauch

Member since: 23/11/16

201132 Reputation

11 comments

Ich habe die Metallfolie abgemacht und jetzt geht das Handy gar nicht mehr an! Ist das normal oder müsste es zumindest einmal vibrieren, selbst wenn kein LCD angeschlossen ist? Habe noch sehr wichtige Daten auf dem Handy ….

Tim GUndert -

Why does it not mention that the screen is glued to the frame (not just around the edges)? I have now found the ifixit guide for replacing the screen that says “NOTE: The LCD is also glued to the frame and will most likely break when removing the display“. Seems a pretty important bit of information to leave out of this article when the screen needs to be removed in one piece, and one that’s just cost me a screen. Not happy.

Alex -

Actually, he does say it. Esta guía incluye cómo quitar la pantalla y el marco intermedio. Necesitarás adhesivo de reemplazo para volver a pegar la pantalla. —>>>> La pantalla LCD también está pegada al marco y podría romperse al abrir el teléfono. <<<<—

Laura Virginia Gómez Ramos -

Do you really have to take the screen off just to replace the back cover

m.brown350 -

There is no real back cover, rather a complete casing. Unfortunately the display is the only way in.
Tobias Isakeit -

Yes, I agree with Alex, I have just cut through the glue that is around the frame and then tried to pry the screen up but was never aware that the screen is glued to the entire phone underneath. Caused the screen to crack and doesn’t work anymore. It should be clear that the screen is completely glued down.

Tom -

Excelente!!!! Gracias

graciela esposito -

Même remarque que Tom et Alex, l’écran est TOTALEMENT collé au chassis ce qui rend l’opération de dépose vraiment délicate car il faut chauffer fortement l’écran pour le retirer, chose que je n’ai pu faire sans le briser.

Donc à vouloir changer la batterie, je dois maintenant changer l’écran.

Il faut bien dire que la dépose de l’écran est une opération très risquée pour l’écran lui-même et délicate car le risque de casse est élevé.

Je ne vous remercie pas car je suis bon pour acheter un nouvel écran…

John Locke -

Nous sommes désolés d’apprendre cela et avons adapté le texte en espérant qu’il reflète mieux le risque maintenant.

Sandra Hiller -

La réparation a bien fonctionné pour moi . Malheureusement la batterie achetée en même temps que le kit n'a tenu que 6 MOIS !!!!!

Je suis contente davoir réussit la manip mais extrêmement déçue de la qualité de la batterie.

le drezen -

Bonjour @kldre !

Désolée d’apprendre que vous rencontrez un problème. Je vous conseille de prendre contact directement avec le fournisseur de la batterie. Si vous l’avez achetée chez iFixit, veuillez écrire au support@ifixit.com (pour la boutique américaine) ou au eustore@ifixit.com (pour la boutique européenne et française).

Ce sera un plaisir de vous aider !

Claire Miesch -