Introduction

Use this guide to replace the battery in your Samsung Galaxy A3 (2017).

Opening the Samsung Galaxy A3 (2017) will damage the waterproof sealing on the device. If you do not replace the adhesive seals, your phone will function normally, but will loose its water-protection.

If your battery is swollen, take appropriate precautions. Do not heat your phone. Swollen batteries can be very dangerous, so wear eye protection and exercise due caution, or take it to a professional if you're not sure how to proceed.

You’ll need replacement adhesive to reattach the battery and back cover when reassembling the device.

  1. ZSTAsKOF4ypxHQaj
    • Power off your phone before beginning disassembly.

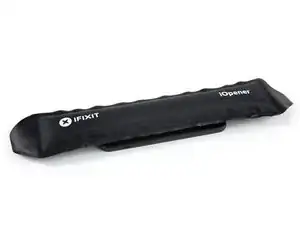
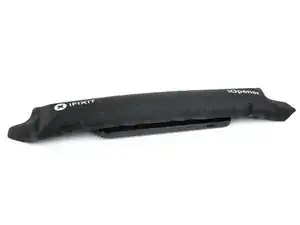
    • Use an iOpener to loosen the adhesive beneath the back cover. Apply the iOpener for at least two minutes. You might want to repeat this step several times during the back cover removal.

    • The adhesive of the Samsung Galaxy A3 (2017) is very strong. A hair dryer, heat gun, or hot plate may also be used if you aren't able to open the device with the iOpener. Be careful not to overheat the phone—the AMOLED display and internal battery are both susceptible to heat damage.

  2. xOuuDOlNIuVx2TTF
    xOuuDOlNIuVx2TTF
    EwBYgRMdTapFNIWK
    ckOSmrymdB2hUkN5
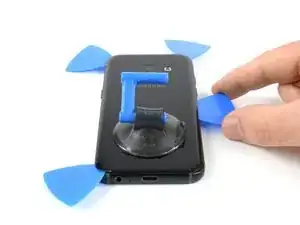
    • Use a small suction handle to create a gap at the bottom end of the Galaxy A3.

    • Insert an opening pick and slide the tip to the bottom left corner to cut the adhesive.

    • Leave the opening pick in the bottom left corner to prevent the adhesive from resealing.

    • Insert a new opening pick and start to cut the adhesive towards the bottom left side of the phone.

  3. 1WIscCF2rkV6I2Bv
    1WIscCF2rkV6I2Bv
    HD4ddXHdGgYPtgBw
    PikpQmYnZWWMgtC6
    • Use an opening pick to cut the adhesive on all sides of the phone. Leave one opening pick in every corner to prevent the adhesive from resealing.

    • Reuse an iOpener if the adhesive becomes hard to cut. During the removal process the back cover is under tension all the time and is likely to break if the adhesive isn't loose enough.

    • Insert an opening pick on the right side of the phone after you cut the adhesive on all sides. Flip it sideways until you can get a good grip on the back cover.

  4. LS1mg45L3dJajb2W
    • Remove the back cover from the phone.

    • Before applying new adhesive remove any remaining adhesive from the back cover and the frame and clean the areas with isopropyl alcohol and a lint-free cloth.

  5. kUSCkUKVtFnCMDFn
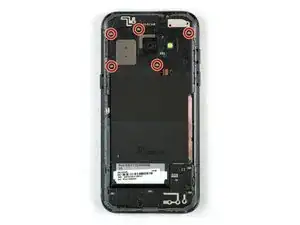
    • Remove the five Phillips #00 screws that hold the motherboard covers in their place.

  6. ZjoGFyplAoIJurbK
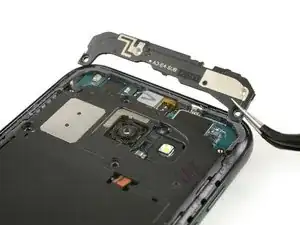
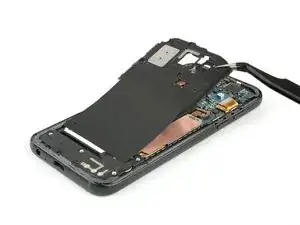
    • Use a pair of tweezers to remove the upper part of the motherboard cover.

    • The cover is secured by small plastic clamps. Don't break them during the removal procedure.

  7. fxVBFdFPMNZNXLCA
    • Use a pair of tweezers to lift up the motherboard cover including the loudspeaker and the NFC antenna and remove it.

  8. UDse2loIqNdkOQVo
    • Use the flat end of a spudger to disconnect the battery flex connector.

  9. yZOn3jyRtVeieBnL
  10. 2Y5eWKHDFl3Ek5IX
    2Y5eWKHDFl3Ek5IX
    lpj2CZbICeQ2Ffbg
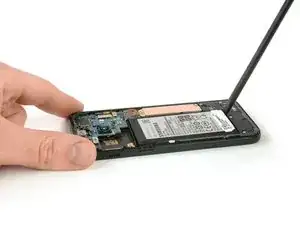
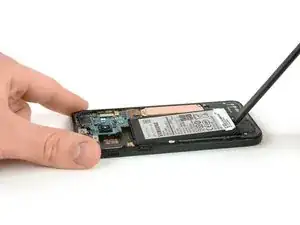
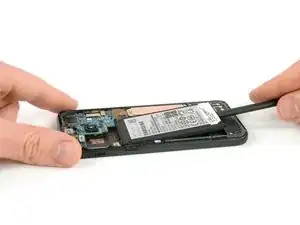
    • Insert the flat end of a spudger in the bottom right gap of the battery and start to pry it up just a bit.

    • Move the spudger to the bottom left corner of the battery and also pry it up a bit.

    • Only insert the spudger as far as the notch on its flat end. See next step for further procedure.

    The Samsung glue is really super strong and you need a lot of leverage to extract the battery. This is a bit frightening and at the end my battery was partially bent. But in the end it worked !

    david pitz -

  11. d2bhtvSkgcsZXTvn
    d2bhtvSkgcsZXTvn
    LeZ4AKfDJQnrKgsX
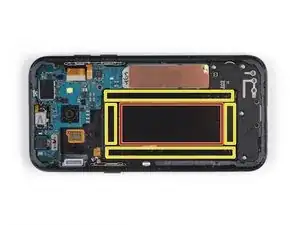
    • Caution when continuing:

    • Only pry in the areas marked in yellow (rim).

    • Avoid prying in the area marked in red (center). This is the back side of the display.

    • Insert the spudger beneath the battery on the sides of the recess to cut the remaining adhesive until the battery is loose.

  12. CZLWGNAaCY5toxQn
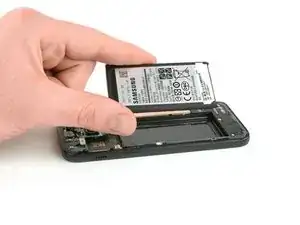
    • Remove the battery.

    Comment acheter une batterie

    Fabien -

Conclusion

To reassemble your device, follow these instructions in reverse order.

If possible, turn on your phone and test your repair before installing new adhesive and resealing the phone.

Secure the new battery with pre-cut adhesive or double-sided adhesive tape and press it firmly into place for 5-10 seconds.

For optimal performance and to avoid software sided errors, calibrate your newly installed battery: Drain battery below 10%, then charge uninterrupted to 100%.

Dominik Schnabelrauch

Member since: 23/11/16

201132 Reputation

5 comments

La batteria nuova,presenta la protezione, ovviamente tolta ma rimane ancora la colla

Immagino vada tolta per consentire di fare contatto con il display tack??!

gloriagiannecchini4 -

Ho sostituito la batteria al mio Samsung a3, sul retro vi è resto di colla dovuta alla protezione. Immagino vada tolta per far contatto. Giusto?

gloriagiannecchini4 -

Very instructive and easy to follow battery replacement guide!

CSD

Carsten S Due -

Unfortunately I had no iOpener or proper spudgers at my disposal, so I found that a pretty thin and flat plastic (!) spatula and a hairdryer also worked. The spatula was about as wide as the battery and fit perfectly in the pocket near the bottom of the phone and the battery. A bit of gentle heat from the hairdryer and by using the spatula as a lever the battery popped out in no time.

Thomas -

Hi, My Samsung Galaxy A3 2017 gets hanged while running and shuts down while two buttons stay lit for a few seconds then totally shut down and I have to start it with volume down and power button, or else it doesn't start. It happens many times in a day. can this be a battery issue? Also sometimes the first system doesn't work too then I disconnect the battery and connect it to the charger then I disconnect the charger and connect the battery and if I press the power button it starts again. Can this be a battery issue? Any idea? Thanks in advance.

Harry Potter -