Introduction

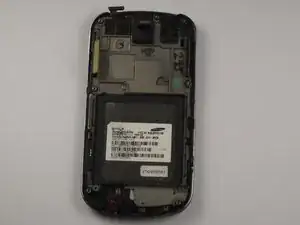
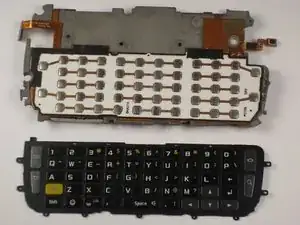
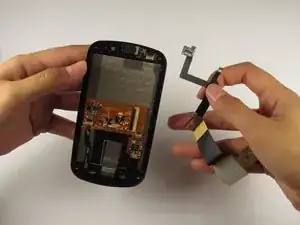
This guide shows how to remove the touch screen of the Samsung Epic 4G. Once the screen is removed, you may replace it and follow these directions in reverse order to reassemble your phone.

  1. 3KUStSvMCMQbVigA
    • Slide your fingernail along the edge of the device and pull at the plastic backing.

    • While pulling the plastic backing apart from the device, you will hear a snap sound which signals that the backing has detached.

  2. Kh1Oa1Me3jvLOlFj
    • Pull at the plastic backing gently to remove it after hearing the snap sound.

  3. ROteOEH6ivNWfKWA
    • Remove the battery from the device by pulling the battery edge upwards.

  4. vVUdO1ToiZkqZueB
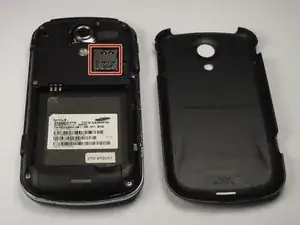
    • Locate the memory card on the upper right-hand corner of the device.

    • Remove the memory card from the device by gently sliding it out of its holder with your fingers.

  5. vRsvWGOuWXNJdh1D
    vRsvWGOuWXNJdh1D
    5gMsLJWDMy1wFldG
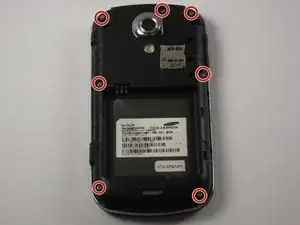
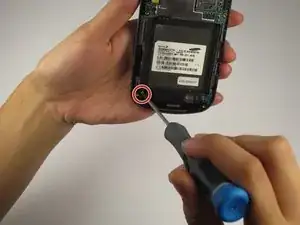
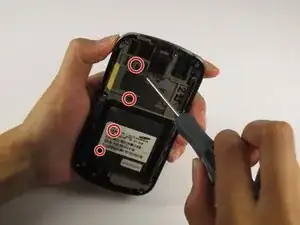
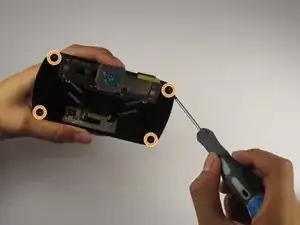
    • Remove the seven screws from the back of the phone using the Phillips #000 screwdriver.

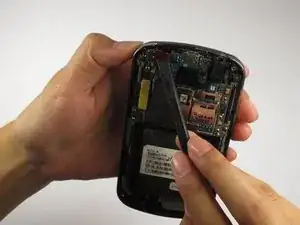
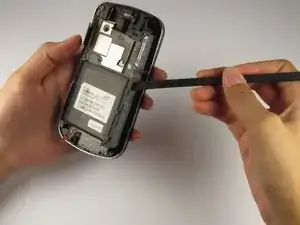
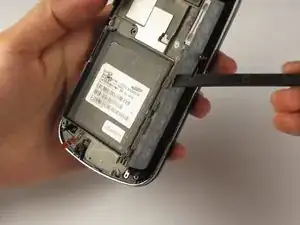
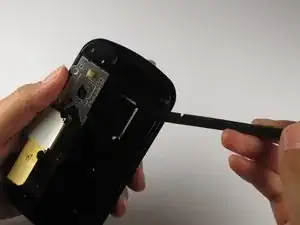
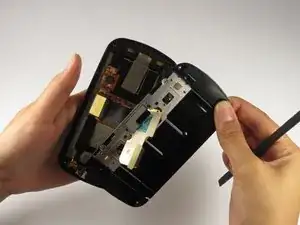
    • Separate the backing from the silver trim around the phone by using a nylon spudger to pry between the two components.

    • While separating the two components, most of the buttons (including the power button) will fall out.

  6. iIBiN1DK1ZtYuaku
    iIBiN1DK1ZtYuaku
    vfJpocRZYjRkUiYk
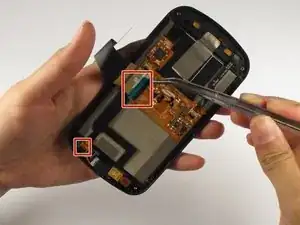
    • Remove the power button using tweezers if it did not fall out in the previous step.

    • At this point, you can replace the power button with a new one from a manufacturer.

  7. mNrTstA4PdTBAAor
    • Remove the white cable along the right side of the device (next to the battery housing) using the nylon spudger.

    • Pull out both ends of the white cable. They will easily snap out of place without excessive tension.

    • Do not rip the white cables out of the device.

  8. ltKN2AooAiT46UmQ
    ltKN2AooAiT46UmQ
    Ic64jX5fwllx4voV
    • Remove the screw holding the antenna assembly in place using a Tri-Point Y0 screwdriver.

    • Snap the antenna assembly out of the device gently using your fingers.

  9. NvZcOv2ljLCg1orQ
    NvZcOv2ljLCg1orQ
    6VwPXNKJfneNb6IL
    • Pry the flex cable from the top of the phone by carefully using a nylon spudger.

    • Repeat this step for the larger flex cable located on the left side of the device below the smaller one.

  10. dhXoDL1m35HpvxYh
    • Lift and remove the motherboard from the device.

    • The USB port is located at the top of the motherboard. At this point, replace the port with a new one from a manufacturer.

    how do you take it off from the motherboard

    brian cortez -

  11. qUJlcqKTJlxdhLTQ
    • Remove and replace the camera lens with a new one from a manufacturer.

  12. WMmRaH5Qt6LDs4rI
    WMmRaH5Qt6LDs4rI
    5SfRCD2F14ZOAfbd
    • Remove the white label sticker.

    • Remove the four screws on the left side of the device with a small Phillips screwdriver.

    • Two of the screws are found behind the white label, and two are found directly above the label.

  13. jq61cyRkBvY4baqb
    jq61cyRkBvY4baqb
    eucsFKXiwilrdyyl
    JxNg2mRxoskVHueZ
    • Lift up and loosen the metallic silver trim on the perimeter of the phone using a nylon spudger.

    • Carefully remove the gray mid-plate with the spudger.

    • Take extra caution to not destroy the QWERTY keyboard, which lies directly behind the mid-plate. Do not slide open the phone at this time.

    • The mid-plate should be completely removed from the keyboard and separated from the device.

    • At this point, you may remove the original QWERTY keyboard and install a replacement keyboard. Installation is the reverse of removal.

  14. iBp3CCjGtPmA6Gpv
    iBp3CCjGtPmA6Gpv
    2fS2JRpOFOVSmFXw
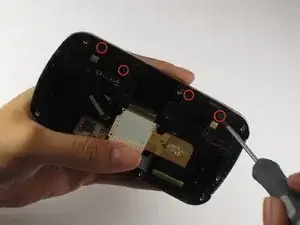
    • Remove the four Phillips #00 screws on the keypad housing.

    • Carefully pull off the keypad housing while avoiding the flex cable.

  15. IcTrTeiSn1inLEbB
    IcTrTeiSn1inLEbB
    x2nTBtLDUel2A6sN
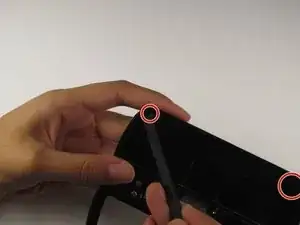
    • Remove the two black screw covers using the spudger.

    • Carefully unscrew the four corner screws using the Phillips screwdriver.

  16. iKqkfRmiAAMA4Ek6
    iKqkfRmiAAMA4Ek6
    15aevy6FgBvipHtU
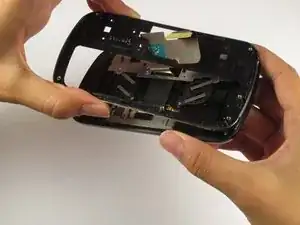
    • Pry off the slide mechanism using the flat edge of the spudger.

    • Be careful not to push the spudger too far in since it can damage the phone.

    • Carefully separate the slide mechanism while avoiding the flex cable.

  17. 5SrBfuJQUETRmStY
    5SrBfuJQUETRmStY
    fiWSQxhBsf1ZG1Zi
    VYHMuKKA3VCVJjEy
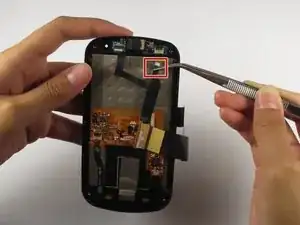
    • Carefully remove all the blue tape using the tweezers.

    • Unsnap and pull out the large portion of the flex cable.

    • Pull off the front face camera using the tweezers.

  18. 2VEN2CRfkrLU1f2F
    2VEN2CRfkrLU1f2F
    ljZ4WRMw2nDlvBTJ
    WbLcKOaQ4nAPib1g
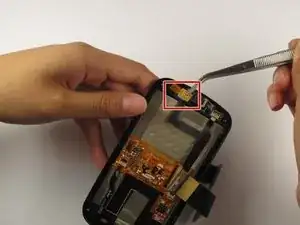
    • Carefully pull out the smaller portion of the flex cable using the tweezers.

    • Pop out the last part of the flex cable using the flat edge of the spudger.

    • Remove the flex cable completely.

  19. brFrb5DcwumCUVEs
    brFrb5DcwumCUVEs
    FHMLUUtejIuvfJBD
    XytYCNbWfVFLSUPH
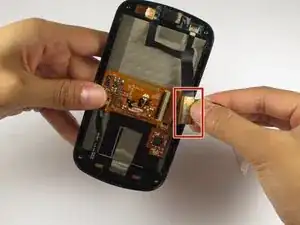
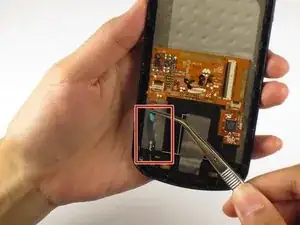
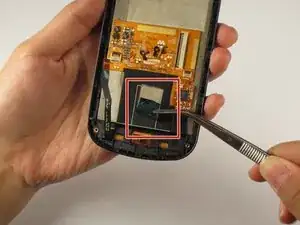
    • Pull out the touch sensor flex cable using the tweezers.

    • Fold back the strip of white tape using the tweezers.

    • Pop out the speaker assembly using the spudger.

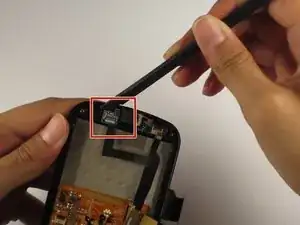
  20. xIKUMKRIcEQk54DT
    xIKUMKRIcEQk54DT
    NZvkgWJRxVRTJTI3
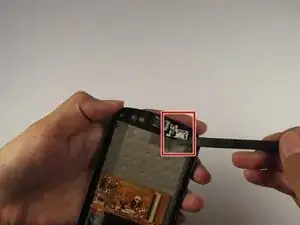
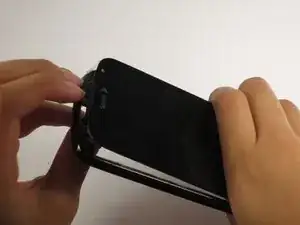
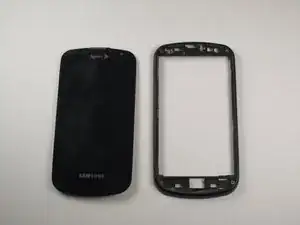
    • Carefully pull apart the frame and the screen.

    • You can now replace the LCD screen.

Conclusion

To reassemble your device, follow these instructions in reverse order.
Andrew Cunningham

Member since: 03/10/12

273 Reputation

0 comments