Introduction

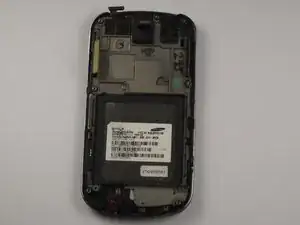
This guide details how to install a new keyboard into your Samsung Epic 4G. Directions are provided for both disassembly and reassembly.

  1. 3KUStSvMCMQbVigA
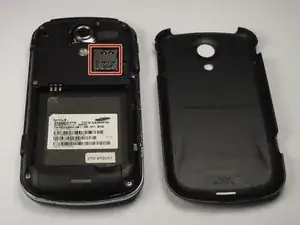
    • Slide your fingernail along the edge of the device and pull at the plastic backing.

    • While pulling the plastic backing apart from the device, you will hear a snap sound which signals that the backing has detached.

  2. Kh1Oa1Me3jvLOlFj
    • Pull at the plastic backing gently to remove it after hearing the snap sound.

  3. ROteOEH6ivNWfKWA
    • Remove the battery from the device by pulling the battery edge upwards.

  4. vVUdO1ToiZkqZueB
    • Locate the memory card on the upper right-hand corner of the device.

    • Remove the memory card from the device by gently sliding it out of its holder with your fingers.

  5. vRsvWGOuWXNJdh1D
    vRsvWGOuWXNJdh1D
    5gMsLJWDMy1wFldG
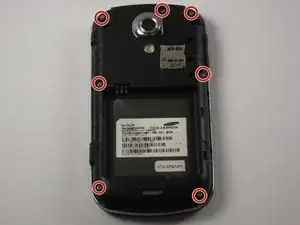
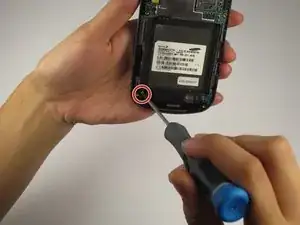
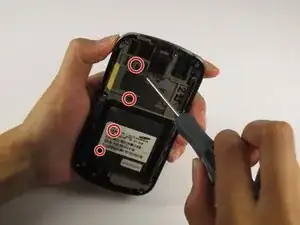
    • Remove the seven screws from the back of the phone using the Phillips #000 screwdriver.

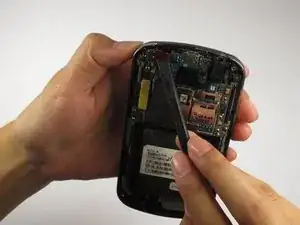
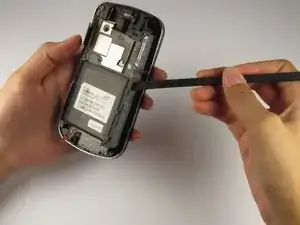
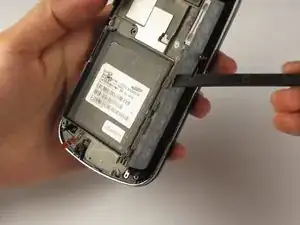
    • Separate the backing from the silver trim around the phone by using a nylon spudger to pry between the two components.

    • While separating the two components, most of the buttons (including the power button) will fall out.

  6. iIBiN1DK1ZtYuaku
    iIBiN1DK1ZtYuaku
    vfJpocRZYjRkUiYk
    • Remove the power button using tweezers if it did not fall out in the previous step.

    • At this point, you can replace the power button with a new one from a manufacturer.

  7. mNrTstA4PdTBAAor
    • Remove the white cable along the right side of the device (next to the battery housing) using the nylon spudger.

    • Pull out both ends of the white cable. They will easily snap out of place without excessive tension.

    • Do not rip the white cables out of the device.

  8. ltKN2AooAiT46UmQ
    ltKN2AooAiT46UmQ
    Ic64jX5fwllx4voV
    • Remove the screw holding the antenna assembly in place using a Tri-Point Y0 screwdriver.

    • Snap the antenna assembly out of the device gently using your fingers.

  9. NvZcOv2ljLCg1orQ
    NvZcOv2ljLCg1orQ
    6VwPXNKJfneNb6IL
    • Pry the flex cable from the top of the phone by carefully using a nylon spudger.

    • Repeat this step for the larger flex cable located on the left side of the device below the smaller one.

  10. dhXoDL1m35HpvxYh
    • Lift and remove the motherboard from the device.

    • The USB port is located at the top of the motherboard. At this point, replace the port with a new one from a manufacturer.

    how do you take it off from the motherboard

    brian cortez -

  11. qUJlcqKTJlxdhLTQ
    • Remove and replace the camera lens with a new one from a manufacturer.

  12. WMmRaH5Qt6LDs4rI
    WMmRaH5Qt6LDs4rI
    5SfRCD2F14ZOAfbd
    • Remove the white label sticker.

    • Remove the four screws on the left side of the device with a small Phillips screwdriver.

    • Two of the screws are found behind the white label, and two are found directly above the label.

  13. jq61cyRkBvY4baqb
    jq61cyRkBvY4baqb
    eucsFKXiwilrdyyl
    JxNg2mRxoskVHueZ
    • Lift up and loosen the metallic silver trim on the perimeter of the phone using a nylon spudger.

    • Carefully remove the gray mid-plate with the spudger.

    • Take extra caution to not destroy the QWERTY keyboard, which lies directly behind the mid-plate. Do not slide open the phone at this time.

    • The mid-plate should be completely removed from the keyboard and separated from the device.

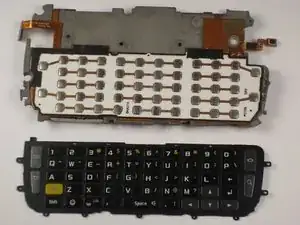
    • At this point, you may remove the original QWERTY keyboard and install a replacement keyboard. Installation is the reverse of removal.

Conclusion

To reassemble your device, follow these instructions in reverse order.

Katie Zombro

Member since: 03/10/12

250 Reputation

0 comments