Introduction

This guide can be use to replace a faulty wifi card or to upgrade the wifi connection bandwidth of a Samsung Chromebook XE550C22

  1. Pa3EJruuDBsqk1fB
    Pa3EJruuDBsqk1fB
    XmwcQZiiPpwdOKRe
    NZErD1M5OTTKvWq1
    • Turn the power off before beginning this step.

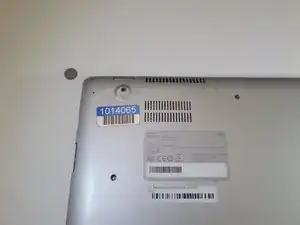
    • Using the spudger, remove the four 1/2 inch skid pads from the back of the laptop.

  2. GUcwWCLjc5LAHMlM
    GUcwWCLjc5LAHMlM
    6i3soEnGl3N3BeWY
    • Remove the eight 7mm screws using the J0 Screwdriver.

  3. hPpIlFv2Wkeg6jEv
    hPpIlFv2Wkeg6jEv
    luIAuId3gDSo4sSX
    YFy4pjXwDTOKnLFB
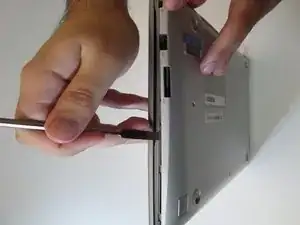
    • Starting at the center front of the laptop, insert the metal spudger between the keyboard panel and the bottom panel, separating the bottom panel from the laptop.

    • Continue prying around the sides to release more brackets.

  4. 5NvppG3PuAmIuVHi
    5NvppG3PuAmIuVHi
    vtDRPVgyFqPufGiD
    • After deconnecting all the brackets, pull the back panel away from the laptop.

    • Note: The back panel has some flex to it, don't be afraid to use some force.

  5. GpXm2kTIrxRJBvKi
    GpXm2kTIrxRJBvKi
    Xc5AjMP5QDc3QvHh
    • Remove the four 3mm screws holding the battery with the J0 screwdriver.

  6. OtBFF6pmwivgJRVm
    OtBFF6pmwivgJRVm
    nMBsnTxHfSM1S5Yi
    • Lift the battery up at an angle to disconnect the battery from the motherboard, then pull it away from the laptop.

    • Do not lift the battery straight up. This will damage the battery's connectors.

  7. sAUpGrGMAxxGFv1M
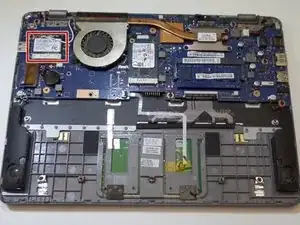
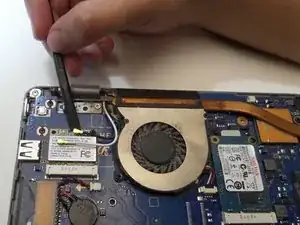
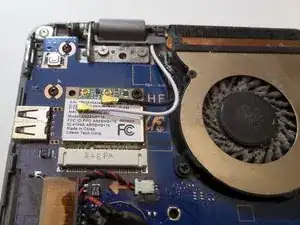
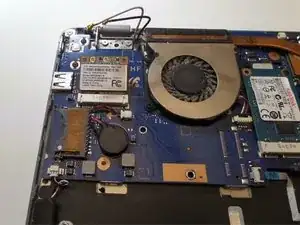
    • Locate the wifi card on the top left of the Chromebook.

  8. njUTCcIVRTVPBEAp
    njUTCcIVRTVPBEAp
    c3BUARNIxMD2GAhL
    GmDNErwN6OGOj2UD
    • Use only plastic tools for this step.

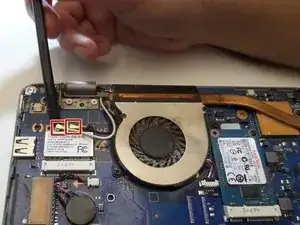
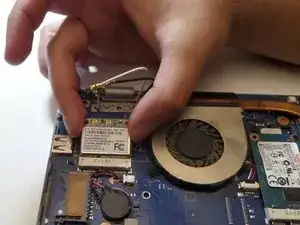
    • Use the spudger to detach the black and white cords from the wifi card.

  9. jyZcbrsJWTH3AKaQ
    jyZcbrsJWTH3AKaQ
    VXQW6twEXKTu5HL1
    2WJHNDZDWpiTxhOE
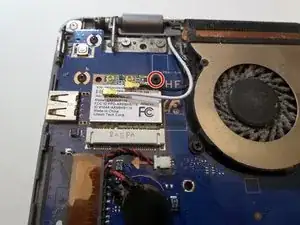
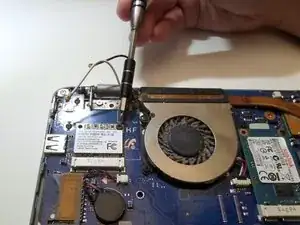
    • Remove the 6mm screw from the top right corner of the card using the J0 screwdriver.

    • The wifi card will "pop-up".

  10. chvXUxIHMehiBCRe
    chvXUxIHMehiBCRe
    oAWtlHMqmdfrJvva
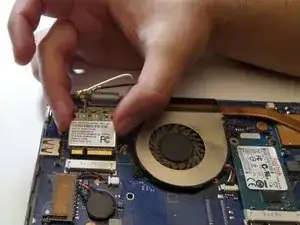
    • Using your hands, gently remove the card up and away from the Chromebook.

Conclusion

To reassemble your device, follow these instructions in reverse order.
Linh Luu

Member since: 11/09/17

312 Reputation

0 comments