Introduction

This guide will show you how to replace the motherboard on your Samsung Chromebook 3. The motherboard also contains the charging port, HDMI port, and left side USB port. All of these ports are soldered to the board, requiring a full motherboard replacement to fix.

  1. NtkCSxJVDsH5HvnH
    NtkCSxJVDsH5HvnH
    ASWccsBiNeZN5MaC
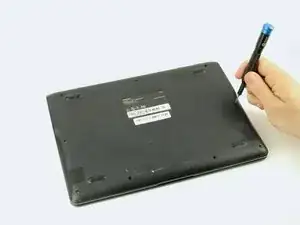
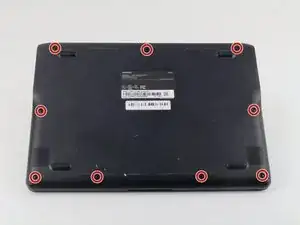
    • Place the Chromebook face down so that the bottom case is exposed.

    • Using a Phillips #00 screwdriver, remove nine 4.6mm screws from the back casing.

  2. 31b6CoLM4wBmpjgw
    31b6CoLM4wBmpjgw
    PuqDJmYEgwFcWSHq
    ssbekGsHZr1OEFm6
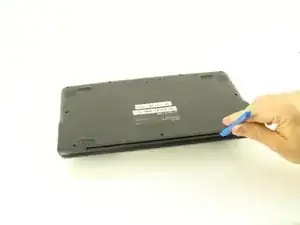
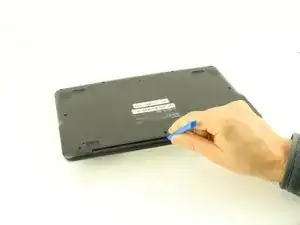
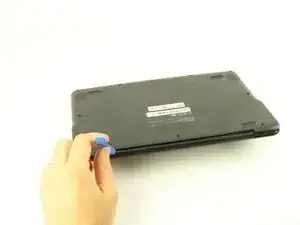
    • Use a iFixit opening tool to gently pry the case up from the vent on the hinge side of the Chromebook.

    • You should hear a popping sound as the connectors disengage inside the case.

  3. XjOMVLAYShdXT6Fq
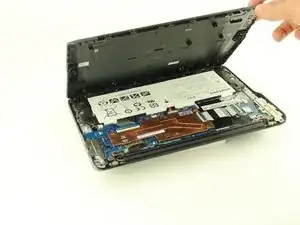
    • Lift the case up and off the device

  4. IxFabXxmsdJLsfYK
    IxFabXxmsdJLsfYK
    JVjtKgeeOosQHJfi
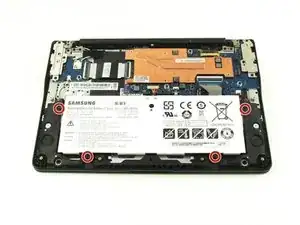
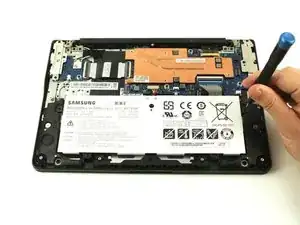
    • Locate the battery and remove the four 4.6mm screws at the corners which attach it to case using a Phillips #00 screwdriver.

  5. VChhWpQqUOZ5tDlT
    VChhWpQqUOZ5tDlT
    No6wBTu3SvUVN1rs
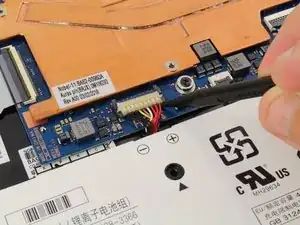
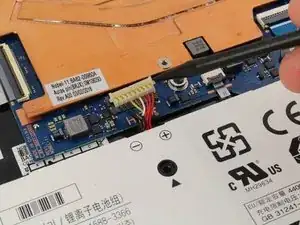
    • Use a spudger to gently pry the power cable cord upwards from the motherboard.

  6. RocF4tceA3ZEFXaF
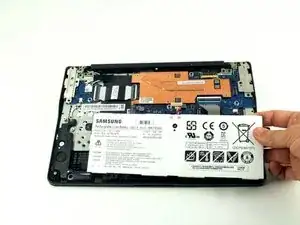
    • Lift the battery up and out from the case.

  7. kK1b4dUKnajTTDjR
    kK1b4dUKnajTTDjR
    bBhfQbF1W1yRmyGX
    xWOnwIrPPcKBOrNL
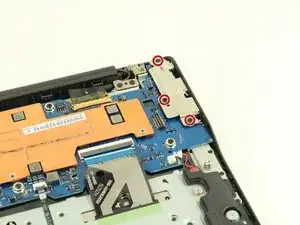
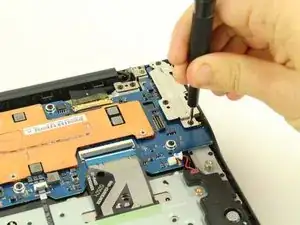
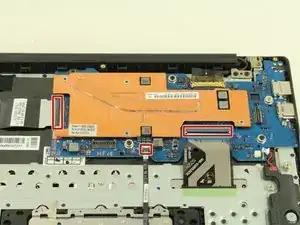
    • Before you can get to the motherboard, remove the three 4.6mm screws from the port cover using a Phillips #00 screwdriver.

  8. UBa3g44MxtcfCjYf
    UBa3g44MxtcfCjYf
    MHEbLb5gMYTrwXMo
    T3OYiP31LMX5ey4h
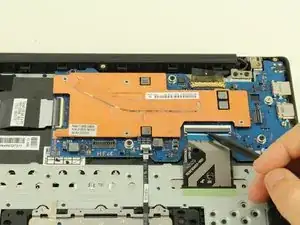
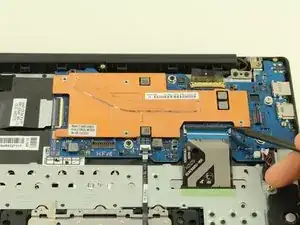
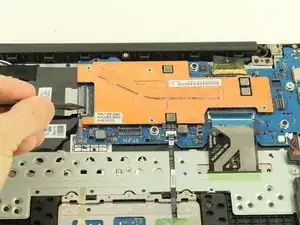
    • Then, use a spudger to begin flipping up the grey covers on the ZIF connectors.

  9. WNyyl6CV6rUFXYWb
    WNyyl6CV6rUFXYWb
    an6geNqmBoMUaQCy
    URkqHDWCHdZo1npd
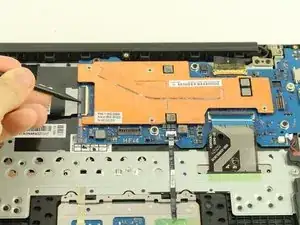
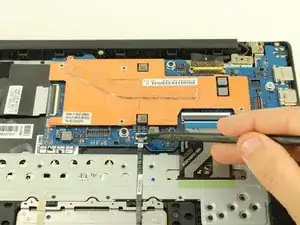
    • Two more ZIF connectors to go!

  10. MqR4ZrVAo6WdJNki
    MqR4ZrVAo6WdJNki
    LA6CBTdXSJYTyfUP
    • Use a spudger to disconnect the cables going to the speaker by prying outward to the right.

  11. 4FfPuvUDpfJwFqSn
    4FfPuvUDpfJwFqSn
    sZ4yJrJntR1I6Nmb
    2VY3mxoCptn2rFOq
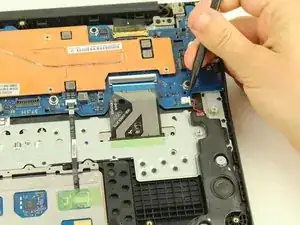
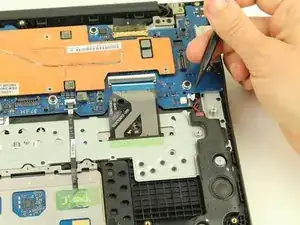
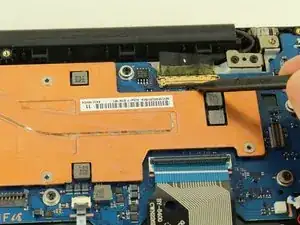
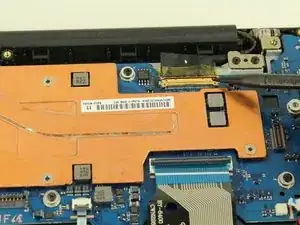
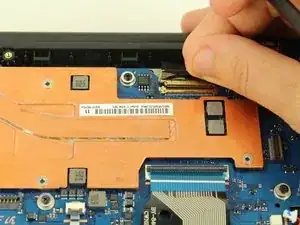
    • Use a spudger to lift the hinge locking the gold colored display cable in place.

    • Then gently coax the display cable from its connector using your fingers or a spudger.

  12. EqpDkvQA2VQJuO6J
    EqpDkvQA2VQJuO6J
    nboCShQIPP2A6osm
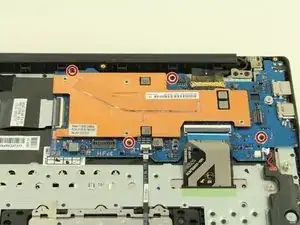
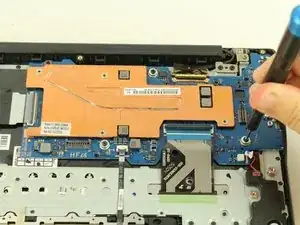
    • Use your Phillips #00 screwdriver to remove four 4.6mm screws from the motherboard.

  13. ANOb1DSmnsI1IjCp
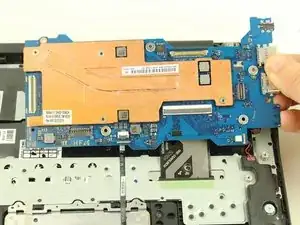
    • Ensure all cables are clear and remove the motherboard.

Conclusion

To reassemble your device, follow these instructions in reverse order.

Austin Blakely

Member since: 11/03/19

19392 Reputation

One comment

Thanks for the great guide! I used it to remove the write protection screw on the back of the motherboard.

My Chromebook is model number XE501C13. The only difference I noticed is that there is one less screw on the outer plastic cover. Everything else is exactly the same!
Edward Fernandez -